
Planting
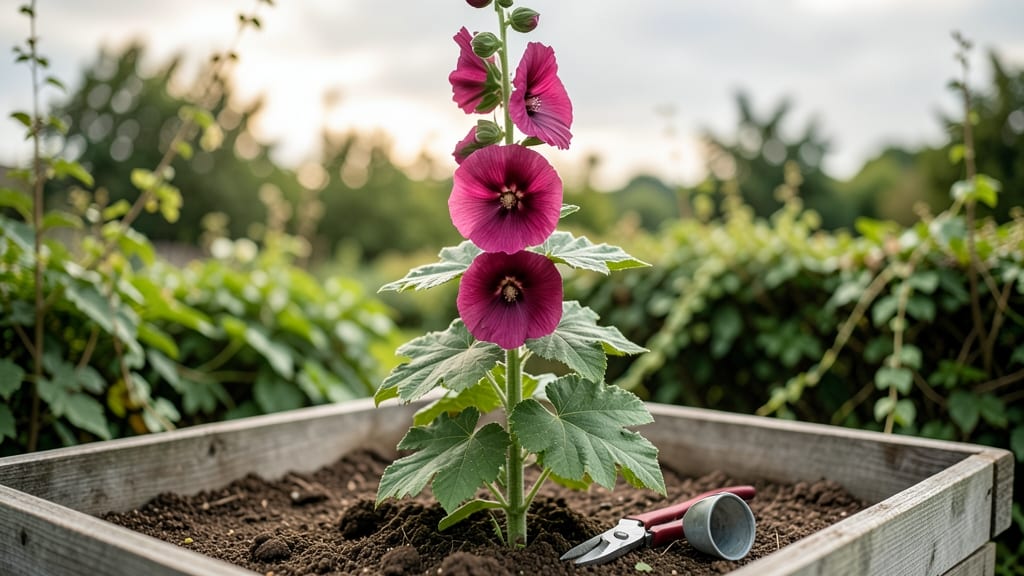
Alcea rosea plants—commonly called hollyhocks—stand tall like nature’s own skyscrapers, reaching 6-8 feet with blooms that last from early summer until frost. 🌸 I’ve grown them for years, and their dramatic height and bold colors make them the star of any cottage garden or sunny border.
The best part? They thrive with minimal fuss, making them perfect for busy gardeners who still want impact. These plants love full sun and well-draining soil, though they’ll tolerate average garden soil once established.
Plant seeds directly in the ground after the last frost, or start indoors 6-8 weeks earlier for a head start. Space them 18-24 inches apart to give their towering stems room to grow without flopping. Once planted, water deeply once a week, letting the soil dry slightly between waterings.
Deadhead spent blooms to encourage more flowers, and cut back faded stems in early fall to keep the plants tidy. Hollyhocks are hardy in zones 3-9, so they’ll bounce back year after year with proper care.
They’re surprisingly low-maintenance, but watch for rust or powdery mildew—common issues that can be prevented with good airflow and avoiding overhead watering. With their striking presence and long bloom time, hollyhocks are a gardener’s dream come true.
📚 In This Guide
- What you need
- Instructions
- Tips and common mistakes
- Wrapping up and next steps
What you need
- ● Seeds: Alcea rosea seeds (choose from heirloom varieties like ‘Chater’s Double’ or ‘Black Prince’). Quantity: 10-20 seeds per plant (or 1 packet for multiple plants).
- ● Potting Mix: Well-draining, organic potting soil (avoid heavy clay). Quantity: 1-2 bags (10-20 quarts each).
- ● Containers (if starting indoors): Biodegradable seedling pots (3-4 inches deep) or a seed tray with cell inserts. Quantity: 12-24 cells or pots.
- ● Fertilizer: Balanced, slow-release granular fertilizer (10-10-10 NPK ratio). Quantity: 1 lb for in-ground planting or ½ lb for containers.
- ● Hand Trowel: For transplanting seedlings or loosening soil.
- ● Garden Gloves: To protect hands while handling soil and plants.
- ● Watering Can or Hose: With a gentle spray nozzle for seedlings.
- ○ Pruning Shears: For deadheading spent blooms (optional but helpful).
- ● Stakes or Trellis: Tall stakes (5-6 feet) or a lightweight trellis to support mature plants (6+ feet tall).
- ● Sunlight: Full sun (6+ hours daily).
- ● Spacer: 18-36 inches between plants (depending on variety).
- ● Climate: Hardy to USDA Zones 3-9. Start indoors 6-8 weeks before last frost if in cooler zones.
- ● Mulch (straw or shredded leaves) to retain moisture.
- ● Organic compost for enriching soil.
- ● Plant markers to label varieties.
- ● Peat moss or perlite for improving drainage in containers.
Step-by-Step instructions for planting and caring for Alcea rosea
Alcea rosea—commonly known as hollyhock—delivers towering beauty with minimal fuss. Here's how to grow these stately flowers that thrive in full sun and bring drama to any garden.
🪴 Step 1: Choose the Right Location and Prepare the Soil
Hollyhocks adore full sun, so pick a spot that receives at least 6-8 hours of direct sunlight daily. These plants grow 5-7 feet tall, so place them where they won’t shade smaller plants or block foot traffic. I always check the mature height of my varieties before planting—some dwarf types only reach 3-4 feet, perfect for smaller gardens.
Amend the soil with 2-3 inches of compost to improve drainage and fertility. Hollyhocks tolerate poor soil but reward you with bigger blooms when the soil is rich. Work the compost into the top 12 inches of soil, breaking up any clumps. If your soil drains poorly, add a handful of perlite or coarse sand to prevent root rot—this is especially important for heavy clay soils.
🌱 Step 2: Plant Seeds or Transplants at the Right Time
For direct sowing, plant seeds 4-6 weeks before your last frost date in spring or 8-10 weeks before the first fall frost. Press seeds ½ inch deep into the soil, spacing them 12-18 inches apart—they’ll need room to grow. If you’re transplanting seedlings, wait until after the last frost when soil temperatures reach at least 50°F. I’ve found that transplanting too early in cool soil stunts growth.
Water the soil thoroughly before planting to help roots establish. If sowing seeds, keep the soil consistently moist until germination, which typically takes 10-20 days. Once seedlings emerge, thin them to 12-18 inches apart to avoid overcrowding. Hollyhocks grown too closely develop weak stems and fewer blooms—don’t skip this step, even if it means pulling some sturdy young plants.
☀️ Step 3: Provide Support and Water Consistently
Hollyhocks need strong support as they grow. Install 4-5 foot tall stakes or a trellis at planting time and tie stems to them as they grow. I use soft plant ties to avoid damaging the stems—tighten them gently but securely. Without support, tall varieties can flop over in wind or rain, ruining their dramatic effect.
Water deeply once a week, providing 1-2 inches of water per week. Hollyhocks are drought-tolerant once established, but consistent moisture produces larger, more vibrant blooms. Water at the base of the plant in the morning to reduce fungal risks. Mulch around the base with 2-3 inches of organic mulch to retain moisture and suppress weeds—just keep it 6 inches away from the stems to prevent rot.
✂️ Step 4: Prune and Deadhead for Long-Lasting Blooms
Remove spent blooms by cutting the stem just above a set of leaves to encourage continuous flowering. I deadhead hollyhocks every 2-3 weeks during the growing season—this keeps them looking tidy and prolongs the blooming period. Avoid cutting into old wood; always prune above a leaf node where new growth can emerge.
In late fall or early winter, cut back the stems to 2-3 inches above the ground. This prevents disease buildup in old stems and makes it easier to spot new growth in spring. Hollyhocks are perennial in most climates, so they’ll return year after year with proper care. If you live in a cold region, add a 2-3 inch layer of mulch around the base to protect the roots from freezing.
🌿 Step 5: Prevent Common Pests and Diseases
Hollyhocks are generally low-maintenance, but they can fall prey to rust fungus or aphids. To prevent rust, avoid overhead watering and space plants for good airflow. If you notice yellow spots on leaves, remove affected foliage immediately and apply a copper fungicide if needed. I’ve had success with neem oil spray as a preventive measure—apply it in early spring before blooms appear.
Watch for aphids on new growth, especially in warm, humid weather. Blast them off with a strong stream of water or use insecticidal soap for severe infestations. Healthy hollyhocks are less susceptible to pests, so prioritize proper spacing, watering, and support. With these steps, your plants will reward you with bold, show-stopping blooms from early summer until fall frost.**
Tips & tricks for growing stunning hollyhocks
These simple strategies will help your Alcea rosea reach its full dramatic potential with minimal effort.
Sunlight Strategy: While hollyhocks thrive in full sun, I've noticed that the 6-8 hours of direct sunlight mentioned in Step 1 works best when spread evenly throughout the day. If your garden has afternoon shade, position your plants to catch morning sun first—this prevents heat stress on the delicate blooms. For containers, rotate them every few days to ensure even exposure all around.
Soil Prep Secret: The 2-3 inches of compost and 12 inches of soil amendment in Step 1 make all the difference. I like to mix in a handful of perlite or coarse sand even in well-draining soils—this creates tiny air pockets that prevent waterlogging. For heavy clay soils, consider adding 10% sand by volume to dramatically improve drainage without altering the soil structure too much.
Timing Tip for Transplants: When transplanting seedlings after the last frost, I always check soil temperature with a thermometer rather than just watching the calendar. The 50°F minimum mentioned in Step 2 is crucial—cooler soils can stunt root growth. If your soil runs cool, wait a few extra days or use black plastic mulch to warm the soil faster. This small adjustment prevents transplant shock that can set your plants back for weeks.
Support System: The 4-5 foot tall stakes recommended in Step 3 should be installed at planting time, not after the plants get tall. I use bamboo stakes because they're sturdy yet flexible enough to accommodate growth. For windy areas, I add a second stake on the opposite side and tie the stems in a figure-eight pattern for extra stability. This prevents the classic "leaning tower" look that ruins the dramatic effect.
Pro Tips for Alcea Rosea Plant
- These simple strategies will help your Alcea rosea reach its full dramatic potential with minimal effort.
- Sunlight Strategy: While hollyhocks thrive in full sun, I've noticed that the 6-8 hours of direct sunlight mentioned in Step 1 works best when spread evenly throughout the day.
- Soil Prep Secret: The 2-3 inches of compost and 12 inches of soil amendment in Step 1 make all the difference.
Frequently asked questions
Got questions about growing Alcea rosea (hollyhock)?
You’re not alone! Here are some of the most common queries—plus quick answers to help you grow these towering beauties with confidence.
How tall can Alcea rosea really grow, and how do I support them?
Alcea rosea can reach 6 to 10 feet tall in ideal conditions! To prevent flopping, plant them 18–24 inches apart and stake them early (before they get too heavy). Use bamboo stakes or tomato cages tied loosely with soft twine. Pro tip: Avoid tight ties—they can damage stems as the plant grows!
When is the best time to plant Alcea rosea for blooms next year?
Plant seeds 4–6 weeks before your last frost for blooms the same year. For perennial growth (in zones 3–9), sow seeds in early spring or late summer. Alcea rosea is cold-hardy, so don’t worry about winter—just mulch lightly to protect roots. Bonus: Deadheading spent blooms encourages more flowers!
Why are my hollyhock leaves turning yellow or spotted?
Yellow leaves often signal overwatering or fungal issues (like rust or powdery mildew). Ensure soil drains well and space plants for airflow. Spotted leaves? Remove affected foliage immediately and spray with neem oil if needed. Prevention tip: Avoid wetting leaves when watering—aim for the base!
Can I grow Alcea rosea in containers, and what size pot do I need?
Yes! Choose a large container (at least 12–18 inches wide and deep) with drainage holes. Use a well-draining potting mix and fertilize lightly every 4–6 weeks. Dwarf varieties (like ‘Black Night’) are best for pots—they stay 3–5 feet tall and handle container life better.
How do I get my hollyhocks to rebloom after the first flush of flowers?
Deadhead spent blooms regularly (cut back to the nearest leaf or bud). For extra blooms, fertilize lightly with a balanced 10-10-10 formula mid-season. Water consistently—drought stress can stunt reblooming. Some varieties (like ‘Chater’s Double’) are more prolific than others!
Wrapping up and next steps
Growing Alcea rosea—or the stunning hollyhock—is a rewarding way to add dramatic height and vibrant color to your garden with minimal effort. Whether you’re drawn to its old-fashioned charm or its low-maintenance nature, this plant thrives in sunny spots and delivers season-long beauty with the right care.
With the tips and insights shared here, you’re ready to cultivate a thriving patch of hollyhocks that will wow neighbors and pollinators alike!
🌱 Next steps: Grab your seeds or seedlings, pick a sunny corner, and get planting! Pro tip: Snap a few photos of your progress—your future blooms will be worth the wait! 📸✨