
Propagation
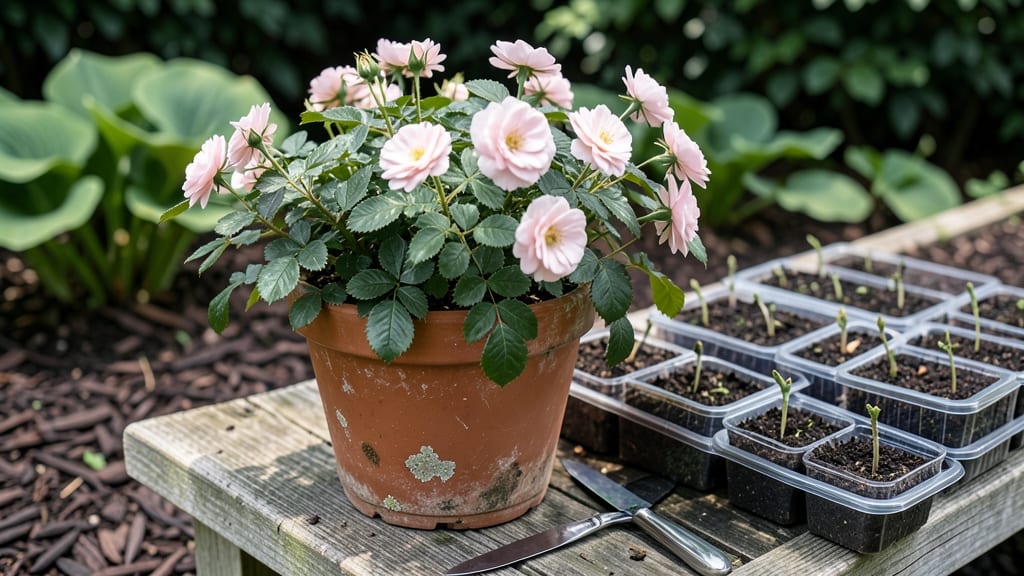
Learn how to propagate moss rose (Portulaca grandiflora) and watch a single plant bloom into a fragrant army in just weeks—timing is everything. 🌸 The key is spring or early fall, when mild temperatures let roots take hold before summer’s heat.
I’ve doubled my plants using this method, and the secret isn’t complicated: it’s all about patience, moisture, and knowing when to pinch. You’ll need sharp scissors, a well-draining potting mix, and a clear plastic bag to create a humid microclimate.
The trick is to bury just the lower half of a healthy stem (about 2-3 inches deep) while leaving the top exposed. Roots form where the stem touches soil, and within 3-4 weeks, you’ll have a baby plant ready to transplant.
Once rooted, these new plants bloom just like their parent—vibrant colors and that signature moss rose fragrance. The best part? You can propagate again from those babies next season. No more buying new plants; just more fragrant, sun-loving joy for your garden.
This method works for both ground covers and upright varieties, and it’s perfect for filling gaps in containers or borders. Just avoid overwatering—moss roses hate soggy roots. Ready to multiply your blooms?
📚 In This Guide
- What you need
- Instructions
- Tips and common mistakes
- Wrapping up and next steps
What you need
- ● Healthy moss rose plant: Choose a mature, well-established plant with thick, woody stems (at least pencil-sized) and multiple nodes (where leaves meet the stem).
- ● Sharp, sterilized pruning shears or knife: Clean with rubbing alcohol to prevent disease. Avoid dull tools—they crush stems!
- ○ Rooting hormone (optional but recommended): A powder or gel (e.g., Rootone or Clonex) to boost success rates. Look for 1-2% IBA concentration.
- ● Well-draining potting mix: A blend of 50% perlite/pumice and 50% peat moss or coco coir. Avoid heavy garden soil—it causes rot!
- ● Small pots or trays: 3-4 inch diameter for individual cuttings or a propagation tray with clear lid (to retain humidity).
- ● Plastic wrap or humidity dome: Keeps moisture high while roots establish (think mini greenhouse!).
- ● Spray bottle: For gentle misting—avoid soaking the cuttings.
- ● Watering can or cup: With a narrow spout for precision.
- ● Timing: Propagate in spring or early summer (active growth phase) or late summer (avoid winter dormancy).
- ● Light: Bright, indirect sunlight (e.g., east-facing window or grow lights for 6+ hours/day).
- ● Temperature: Keep between 65–75°F (18–24°C). Moss roses hate cold drafts!
- ● Humidity: Aim for 70–80% humidity (use a hygrometer if you’re fancy).
- ● Patience: Roots take 2–4 weeks to form—resist the urge to peek!
- ● Hydrogen peroxide (3% solution): Dilute 1:10 with water to sterilize cuttings and prevent bacterial infections.
- ● Fertilizer (low-dose): A balanced liquid fertilizer (5-5-5 or 10-10-10) at ¼ strength once roots appear.
- ● Heat mat: Speeds up rooting in cooler climates (70–75°F soil temp).
- ● Grafting tape or rubber bands: For securing air-layered stems (if trying the alternative method).
- ● Journal or labels: Track cutting dates, hormone types, and progress—science is fun!
Step-by-step instructions for propagating moss rose
Here's the simple, foolproof way to multiply your fragrant moss rose plants using air layering.
🌱 Step 1: Choose and Prepare a Healthy Stem
Select a 4-6 inch long stem that's at least ¼ inch thick and shows new growth. It should have several leaves but no flowers—those saplings will drain energy from your new plant. I always pick stems near the base where they're thicker and more established.
Look for a spot where the stem has a small bump or node—this is where roots will form. Clean the area with rubbing alcohol and a soft cloth to remove any dirt or debris. This ensures a clean surface for root development and prevents infection. You'll know you've picked the right spot when you see a slight swelling along the stem.
✂️ Step 2: Create the Layering Cut
Make a ¼ inch deep diagonal cut just above a leaf node, being careful not to cut through the entire stem. This shallow cut exposes the inner tissue where roots will grow. I use sharp pruning shears to make a clean cut—any jagged edges will slow down root formation.
Gently separate the cut area from the main stem to create a pocket. You'll want to slide a small piece of sphagnum moss (about 1-2 inches wide) into this pocket. Keep the moss damp but not soaking wet—it should feel like a wrung-out sponge. This creates the perfect environment for roots to develop while keeping the area moist.
💧 Step 3: Secure the Moss and Encourage Root Growth
Wrap the mossed section tightly with clear plastic wrap or a plastic bag, securing it with a twist tie or rubber band. This creates a mini greenhouse effect that retains moisture and warmth, both critical for root development. Leave the top of the stem exposed so it can still photosynthesize and stay connected to the parent plant.
Keep the moss consistently moist by misting it every 2-3 days or when it starts to dry out. You'll know it's working when you see tiny white roots emerging from the cut area after about 4-6 weeks. I check mine weekly by gently lifting the plastic—if roots are 1-2 inches long, it's ready for separation.
🌿 Step 4: Separate and Plant the New Rose
Once roots are 2-3 inches long, carefully cut the stem below the mossed area to separate it from the parent plant. Be gentle—you're handling delicate roots now. Remove the plastic and gently tease apart the moss to expose the roots before planting.
Plant your new moss rose in well-draining soil mixed with compost, and water thoroughly. The first few weeks are critical—keep the soil consistently moist but not soggy. You'll see new growth within 2-3 weeks as the plant establishes itself. This is your signal that the propagation was successful and the new plant is thriving.
Tips & tricks for perfect moss rose propagation
Air layering your moss rose is easier than you think—these little tricks will help you avoid common pitfalls and maximize success.
Stem Selection Matters: The 4-6 inch length and ¼ inch thickness requirements aren't arbitrary! Thicker stems near the base have more stored energy for root development. I've found that stems with a slight purple tint often produce stronger roots—this indicates maturity. Avoid stems with any signs of disease or damage, even small spots, as they can spread to your new plant.
The Cutting Technique: That ¼ inch deep diagonal cut is crucial—too shallow and roots won't form, too deep and you'll damage the stem. I like to make the cut just above a leaf node where the stem shows a slight bump. Use clean, sharp pruning shears to avoid crushing the stem. Pro tip: If you're nervous about cutting depth, make the cut and then gently press your fingernail into the cut area—it should give slightly but not go all the way through.
Moss Moisture Management: The sphagnum moss should feel like a wrung-out sponge—never soggy, never dry. I've learned this the hard way: overwatered moss leads to rot, while dry moss prevents root growth. Wrap the mossed section tightly with plastic to maintain humidity, but leave the top exposed so the leaves can still photosynthesize. Check moisture every 2-3 days by lifting the plastic—if it feels dry, mist again.
Root Development Timeline: Those 4-6 weeks until root emergence can feel like forever, but patience pays off. I check my moss roses weekly by gently lifting the plastic wrap. Look for tiny white root hairs—this is your sign that roots are forming. Once they reach 1-2 inches, you're ready for separation. Remember, thicker roots mean a healthier new plant that will establish faster.
Pro Tips for Propagate Moss Rose
- Air layering your moss rose is easier than you think—these little tricks will help you avoid common pitfalls and maxi...
- Stem Selection Matters: The 4-6 inch length and ¼ inch thickness requirements aren't arbitrary! Thicker stems near th...
- The Cutting Technique: That ¼ inch deep diagonal cut is crucial—too shallow and roots won't form, too deep and you'll...
Frequently asked questions
Got questions about propagating moss rose? You’re not alone! Here are some of the most common concerns—and their straightforward solutions—to help you succeed with your fragrant layers.
When is the best time to propagate moss rose?
The ideal time is late spring or early summer when the plant is actively growing. This gives roots enough time to establish before winter. Avoid propagating in extreme heat or cold, as stress can hinder success. If you’re in a mild climate, fall propagation can also work!
How do I know if my moss rose cutting is ready to root?
Look for healthy, flexible stems with at least 3–4 leaf nodes. If the cutting feels woody or brittle, it’s past its prime. A good test? Gently tug—if small roots form at the nodes when bent, it’s ready! Avoid overwatered or yellowing cuttings, as they won’t root well.
Should I use rooting hormone for moss rose propagation?
While not required, rooting hormone can boost success rates (especially for beginners). Dip the cut end in powder or gel before layering. For a natural alternative, try cinnamon powder or aloe vera gel, which also prevent rot. Just keep the cutting moist but not soggy!
Can I propagate moss rose from a store-bought plant?
Yes! Many nursery-bought moss roses are already layered. Look for stems touching the soil—these may already be rooting. Gently separate them and replant. If the plant is healthy but not layered, take 4–6 inch cuttings as described in the guide. Just avoid spray-painted or treated plants, as chemicals can inhibit rooting.
Why isn’t my moss rose cutting rooting?
Common culprits include overwatering (roots need air!), low humidity, or poor light. Try these fixes:
- Move to bright, indirect light (no harsh sun).
- Cover with a plastic bag to trap moisture.
- Check for pests (like spider mites) on the cutting.
- Wait longer—some varieties take 4–8 weeks to root!
Wrapping up and next steps
Propagating moss rose through layering is a rewarding way to expand your garden with minimal effort—and now you’ve got all the secrets! 🌿 Whether you’re a beginner or a seasoned gardener, this method ensures fragrant blooms year after year.
With the right tools, patience, and a little care, your moss rose will thrive and multiply beautifully.
Ready to put your new skills to work? Start by selecting the healthiest stems on your existing plants and follow the steps above. Soon, you’ll be sharing your lush, fragrant moss roses with friends—or simply enjoying their charm in your own garden. Happy propagating! 🌸