
Planting
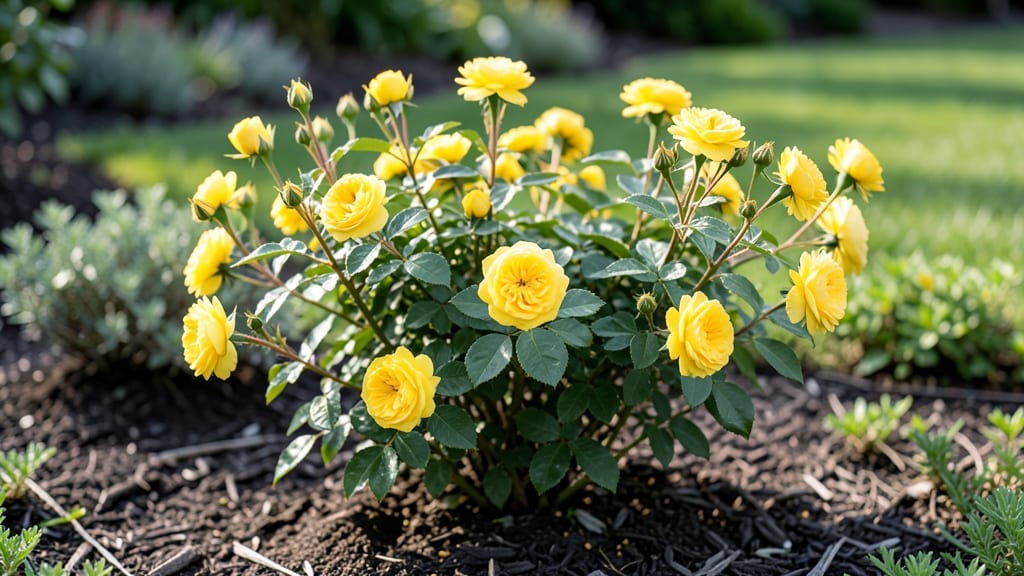
Growing a mini yellow rose plant is like having sunshine in a pot—bright, cheerful, and impossible to resist. 🌸 These tiny powerhouses pack all the romance of classic roses into containers that fit on patios, balconies, or even windowsills, yet they demand less fuss than you’d expect.
The secret lies in their love for morning sun and afternoon shade, well-draining soil, and a watering routine that keeps roots happy without drowning them. My first mini yellow rose bloomed nonstop for three months straight last summer, proving how resilient they are when given the right conditions.
You’ll end up with clusters of buttery-yellow blooms that smell like a spring meadow, all while keeping pests and diseases at bay with simple preventative care. Even my blackest thumb can’t kill these—once you master the basics, they reward you with effortless beauty.
Perfect for small spaces, urban gardens, or anyone who wants roses without the upkeep of a full-size bush. Let’s get those roots settled!
📚 In This Guide
- What you need
- Instructions
- Tips and common mistakes
- Wrapping up and next steps
What you need
- ● Mini yellow rose plant: Choose a healthy, disease-free starter plant (bare-root or potted, 1-2 feet tall). Look for varieties like 'Fairyland', 'Tea Rose', or 'Knock Out Compact'.
- ● Container: A well-draining pot (10–12 inches in diameter) with drainage holes. Terracotta or fabric pots work best.
- ● Potting mix: A high-quality, well-draining soil blend (e.g., 50% garden soil + 50% perlite or compost). Avoid heavy clay soil.
- ● Organic fertilizer: A balanced, slow-release rose fertilizer (e.g., 10-10-10 NPK) or compost tea for organic growth.
- ● Mulch: Wood chips or shredded bark (1–2 inches thick) to retain moisture and regulate temperature.
- ● Pruning shears: Sharp, clean shears (sterilized with rubbing alcohol) for trimming dead blooms or shaping.
- ● Gloves: Protective gardening gloves to avoid thorns and dirt.
- ● Watering can or hose: With a gentle spray nozzle for hydration.
- ○ Stakes or trellis (optional): Small supports (4–6 inches tall) to help young plants stand upright.
- ○ Plant food (optional): Liquid rose fertilizer (e.g., fish emulsion) for extra nutrients during blooming season.
- ○ Sunlight monitor (optional): A light meter or app to track sun exposure if growing indoors.
- ● A location with 6+ hours of direct sunlight daily (south-facing windows or outdoor spots).
- ● Access to soft, filtered water (avoid chlorinated tap water; use rainwater or let it sit for 24 hours).
- ● Patience! Mini roses thrive with consistent care—expect blooms in 6–12 weeks.
Step-by-step instructions for growing mini yellow roses in containers
Here's how I grow these cheerful yellow roses—compact, fragrant, and perfect for small spaces.
🪴 Step 1: Choose the Right Container and Soil
Select a pot at least 12 inches wide and deep with drainage holes—mini roses need room for roots but won’t tolerate soggy feet. I use terra cotta because it breathes and prevents root rot, especially in humid climates. Fill the bottom 2 inches with gravel or broken pottery for drainage.
Use a well-draining potting mix designed for roses—never garden soil. Mix in 20% perlite or pumice to improve aeration. The soil should hold moisture but not stay clumpy when squeezed. I like to pre-moisten the mix with warm water until it feels like a damp sponge, not a dripping sponge.
🌱 Step 2: Plant Your Mini Rose with Care
Gently remove the rose from its nursery pot and loosen the roots if they’re circling. Place it in the container so the graft union (the swollen bump near the base) sits 1 inch above the soil line. This prevents soil from smothering the graft and keeps the plant healthy.
Fill around the roots with your prepared mix, pressing lightly to eliminate air pockets. Water deeply until it drains from the bottom holes—you’ll know it’s right when the soil surface looks damp but not glistening. Avoid overwatering now; mini roses are tough but won’t forgive waterlogged roots.
☀️ Step 3: Position for Sun and Support
Mini roses need 6-8 hours of direct sun daily. A south- or west-facing spot is ideal, but they’ll tolerate partial shade if you supplement with a grow light during cloudy days. I place mine near a window where they get morning sun and afternoon shade in summer—this prevents leaf scorch.
Install a small stake or decorative trellis right away. Mini roses grow upright but need support for their delicate stems. Tie the main stem loosely with soft plant ties or strips of old fabric. Check ties every 2 weeks—they’ll tighten as the plant grows and can restrict circulation.
💧 Step 4: Water and Feed for Continuous Blooms
Water when the top 1-2 inches of soil feel dry. Stick your finger in the soil—if it’s dry past your first knuckle, it’s time. Water deeply until it runs out the drainage holes, then empty the saucer to prevent root rot. I water in the morning so the foliage dries by evening, reducing fungal risks.
Feed every 4-6 weeks with a balanced rose fertilizer (10-10-10) diluted to half strength. I switch to a bloom booster (like 5-10-5) when buds form to encourage vibrant yellow flowers. Stop fertilizing in late summer to let the plant harden off for winter—unless you’re growing in a frost-free zone.
✂️ Step 5: Prune and Maintain Year-Round
Prune in early spring to shape the plant and remove dead wood. Cut back by one-third to encourage bushier growth. Make cuts just above a leaf node at a 45-degree angle—this prevents water from pooling and rotting the stem. Deadhead spent blooms regularly to redirect energy into new flowers.
Watch for aphids or spider mites on the undersides of leaves. A strong spray of water usually knocks them off, but I treat persistent infestations with neem oil. In winter, move pots to a sheltered spot or wrap them in burlap if temperatures drop below 20°F. Mini roses are cold-hardy but appreciate protection from freezing winds.
Tips & tricks for growing thriving mini yellow roses in containers
These practical insights will help you cultivate vibrant, fragrant mini roses that defy expectations in limited spaces.
Container Selection: While the instructions specify a 12-inch pot, consider using slightly larger containers (up to 14 inches) for mature plants—this gives roots room to establish without sacrificing the compact growth habit. Terra cotta remains ideal for its breathability, but glazed ceramic pots work too if you monitor moisture more closely. The key is ensuring those drainage holes stay unobstructed, as mini roses despise soggy conditions.
Soil Preparation: The 20% perlite or pumice amendment is critical for preventing compaction, but I've found adding a handful of worm castings to the mix boosts microbial activity and gives plants a nutritional head start. Pre-moistening with warm water isn't just about convenience—it helps eliminate air pockets that could suffocate young roots during planting.
Light Management: Those 6-8 hours of direct sun are non-negotiable, but here's the secret: rotate your pots every 2-3 weeks to ensure even growth. Plants will naturally lean toward the light source, creating uneven canopies. Morning sun with afternoon shade is perfect for summer, but supplement with a grow light during winter months when daylight shortens.
Pruning Precision: When cutting back by one-third in spring, focus on removing crossing branches and inward-growing stems first—they compete for sunlight and nutrients. The 45-degree angle cut above a leaf node isn't just tradition; it creates a larger surface area for new growth to emerge while preventing water from pooling at the wound site.
Pro Tips for Mini Yellow Rose Plant
- These practical insights will help you cultivate vibrant, fragrant mini roses that defy expectations in limited spaces.
- Terra cotta remains ideal for its breathability, but glazed ceramic pots work too if you monitor moisture more closely.
- Pre-moistening with warm water isn't just about convenience—it helps eliminate air pockets that could suffocate young roots during planting.
Frequently asked questions
Got questions about your mini yellow rose plant? You’re not alone! Here are some of the most common queries—plus quick answers to keep your compact blooms happy and thriving.
How often should I water my mini yellow rose plant?
Water your mini yellow rose when the top 1–2 inches of soil feel dry to the touch. Overwatering is a common issue—these roses prefer slightly dry soil between waterings. In containers, this usually means every 3–5 days in warm weather, but adjust for humidity and sunlight. Pro tip: Always check moisture before watering to avoid root rot!
When will my mini yellow rose plant bloom?
With proper care, you can expect blooms within 6–12 weeks of planting, though some varieties may take longer. Prune spent blooms regularly to encourage more flowers. For year-round blooms, plant in early spring and deadhead flowers consistently. Bonus: A little fertilizer (like 10-10-10) every 4–6 weeks can speed up flowering!
Can I grow a mini yellow rose in a small pot or hanging basket?
Mini roses thrive in containers as small as 6–12 inches wide, making them perfect for balconies, patios, or hanging baskets. Just ensure the pot has drainage holes and use well-draining soil. For hanging baskets, choose trailing varieties like ‘Fairy Rose’ or ‘Baby Blush.’ Remember: Rotate the pot occasionally for even sunlight exposure!
What pests should I watch for, and how do I treat them?
Mini roses are tough but can attract aphids, spider mites, or whiteflies. Start with a strong spray of water to dislodge pests, then use neem oil or insecticidal soap for persistent infestations. Prune affected leaves immediately. Prevention tip: Encourage beneficial insects like ladybugs by planting companion herbs like basil nearby!
How do I overwinter my mini yellow rose plant?
In colder climates, move your mini rose to a sheltered spot or indoors (near a sunny window). Reduce watering and fertilizing in winter. If frost is expected, wrap the pot in burlap or frost cloth. Resume normal care in spring. Fun fact: Some mini roses bloom lightly in winter with bright light!
Wrapping up and next steps
Growing a mini yellow rose plant is a rewarding way to bring cheerful blooms to your space with minimal fuss! These compact beauties thrive in containers, making them perfect for balconies, patios, or even sunny windowsills.
With the right soil, sunlight, and occasional care, you’ll enjoy vibrant flowers all season long—and—they’re a great project for beginners.
Ready to dive in? Start by gathering your supplies, then pick a sunny spot and plant with confidence. Soon, you’ll be basking in the joy of those bright yellow blooms—one tiny rose at a time! 🌸