
Shrubs
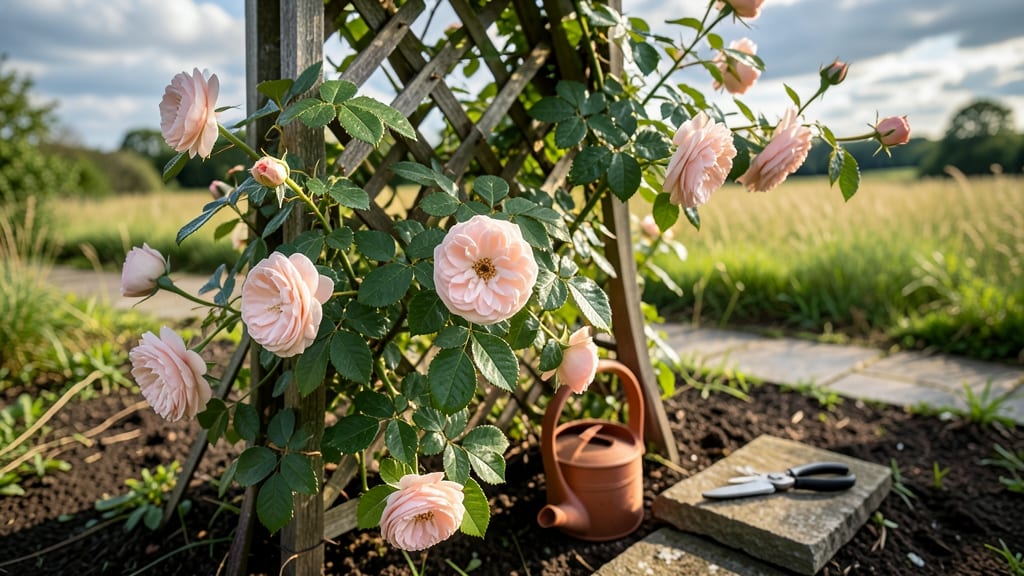
Caring for climbing rose bushes transforms your vertical space into a fragrant, blooming masterpiece. ✨ The secret to their year-round beauty lies in pruning precision—a skill that takes practice but pays off with lush canes and abundant flowers.
My first attempt left me with a tangled mess, but now I prune with confidence, knowing each cut shapes both the plant and its future blooms.
You'll need sharp pruners, a sturdy ladder, and a clear understanding of your rose's growth habits. Most climbing roses bloom on new wood, so aggressive pruning in early spring encourages vigorous growth and heavy flowering.
The goal is to open the center for airflow while maintaining a balanced structure—think of it like sculpting a living trellis.
With the right care, your climbing roses will reward you with vibrant blooms from early summer through fall, and even winter interest if you leave some bare stems. The key is consistent watering, balanced fertilization, and regular checks for pests—especially aphids and Japanese beetles—that love tender new growth.
This method works for any climbing variety, whether you're training them on an arbor, fence, or pergola. The first year focuses on establishing strong canes; by year two, you'll see the payoff in showstopping floral displays that make neighbors ask for your secrets. Let's get those roses thriving!
📚 In This Guide
- What you need
- Instructions
- Tips and common mistakes
- Wrapping up and next steps
What you need
- ● Climbing rose bushes: Choose disease-resistant varieties (e.g., 'New Dawn,' 'Blaze,' or 'Zephirine Drouhin') for low-maintenance beauty.
- ● Well-draining soil: Mix compost (2 parts) with native soil (1 part) to improve fertility. Test soil pH (ideal: 6.0–6.5).
- ● Support structure: Trellis (6–8 ft tall) or
- ● Arbor, pergola, or sturdy fence (minimum 4–6 inches from the wall for airflow).
- ● Pruning tools: Bypass pruners (sharp, clean after each use).
- ● Loppers (for thicker canes, 10–12 inches blades).
- ● Pruning saw (for stubborn branches).
- ● Organic mulch: 3–4 inches of wood chips, straw, or shredded bark to retain moisture and suppress weeds.
- ● Fertilizer: Balanced 10-10-10 fertilizer (spring) or
- ● Slow-release rose-specific granules (follow package rates).
- ● Watering supplies: Drip irrigation or soaker hose (to deliver 1–1.5 inches of water weekly).
- ● Watering can (for young plants).
- ● Pest/disease control: Neem oil spray (organic fungicide/insecticide).
- ● Copper fungicide (for black spot prevention).
- ● Rose ties: Soft fabric strips to gently secure canes to trellises (avoid wire, which can damage bark).
- ● Soil amendments: Epsom salt (1 tbsp/month for magnesium boost).
- ● Bone meal (spring feeding for root growth).
- ● Garden gloves: Heavy-duty (to protect from thorns and chemicals).
- ● Plant markers: Label varieties to track pruning schedules.
- ● Reflective mulch: Dark plastic sheets (early spring) to warm soil faster.
Step-by-Step guide to climbing rose bushes care
Here’s how I keep my climbing roses thriving year-round—pruning, feeding, and protecting them like the showstoppers they are.
✂️ Step 1: Prune for Structure and Bloom in Late Winter
Wait until late winter or early spring when the plant is still dormant but just before new growth begins. I grab my pruning shears and look for three main canes—the thickest, healthiest stems that will form the backbone of the plant. These should be spaced evenly around the support structure, like spokes on a wheel. Cut back any dead, diseased, or crossing branches at a 45-degree angle, about ¼ inch above an outward-facing bud.
This isn’t about cutting everything back—think of it as sculpting. Remove any canes that are thinner than a pencil or growing inward, as they’ll compete with the main stems. The goal is to encourage strong, outward growth that will climb and flower beautifully. If your rose has hip roses (last year’s blooms) still attached, leave them—they add winter interest and protect the plant.
🌱 Step 2: Feed and Water for Lush Growth in Early Spring
Once the first true leaves appear—those are the second set after the initial tiny ones—it’s time to feed. I mix balanced 10-10-10 fertilizer into the soil around the base, following the package instructions for climbing roses. Water deeply right after feeding to help the nutrients soak into the root zone. Climbing roses are thirsty but hate soggy roots, so I water deeply every 3-4 days during dry spells, checking that the soil is dry 2-3 inches down before watering again.
Mulch the base with 2-3 inches of organic mulch (like shredded bark) to retain moisture and regulate soil temperature. Keep the mulch 6 inches away from the stem to prevent rot. This is also the time to tie in new growth—gently weave the flexible canes onto the support structure with soft plant ties. Don’t force them; let the plant guide the direction naturally.
☀️ Step 3: Maintain Through the Growing Season
Climbing roses need full sun (6+ hours daily) to produce their best blooms, but they also appreciate some afternoon shade in hot climates. I monitor for aphids or black spot fungus—early signs are yellowing leaves or sticky residue on new growth. If I spot trouble, I treat with neem oil or a copper fungicide, applying it in the early evening to avoid burning the foliage. Regularly remove spent blooms by cutting just above a set of five leaflets to encourage continuous flowering.
Side-dress with compost or a slow-release rose fertilizer every 6-8 weeks during the growing season. I also check the ties every few weeks—they can tighten as the canes grow. If a cane outgrows its support, I gently weave it higher or trim it back to redirect energy. The key is balance: prune lightly after each flush of blooms to keep the plant compact and encourage more flowers.
⏰ Step 4: Prepare for Winter Dormancy
As temperatures drop below 50°F at night, reduce watering but keep the soil slightly moist—never let it dry out completely. Once the first frost hits, I cut back the canes by about one-third to reduce stress on the plant. Wrap the remaining canes loosely with burlap or rose cones, securing them with twine. This protects the buds while allowing airflow to prevent rot.
Mulch the base with 4-6 inches of straw or leaves to insulate the roots. In colder climates, I add a thick layer of evergreen boughs on top of the mulch to reflect heat back into the soil. Climbing roses are tough, but this extra care ensures they’ll burst into bloom again next spring. I also label the plant with the variety—after winter, it’s easy to forget which one is which!
Tips & tricks for perfect climbing rose care
Real talk: The difference between a struggling climbing rose and a showstopper comes down to these small but mighty details.
The Pruning Angle Matters: When you're cutting back those three main canes in Step 1, that 45-degree angle isn't arbitrary—it creates a larger surface area for water absorption and new growth. I use my pruning shears to make clean cuts just above an outward-facing bud (look for the tiny bump on the stem), which encourages vigorous growth away from the center. This is where most people go wrong—they either cut too close or at a straight angle, which can lead to weak regrowth or disease entry points.
Timing is Everything for Feeding: Step 2 mentions waiting for those true leaves to appear, but here's the thing: those first tiny leaves aren't the signal. The second set of leaves—larger and more robust—tell you the plant is ready for fertilizer. I've learned this the hard way after burning delicate new growth with early feeding. Also, that 10-10-10 fertilizer ratio is perfect for climbing roses because it provides balanced nutrition without favoring one growth aspect over others.
Pest Prevention Starts Now: In Step 3, when you're monitoring for aphids and black spot, here's what nobody tells you—prevention is easier than cure. I mix neem oil with water (1 tablespoon per quart) and spray it preventatively every 2 weeks during peak growing season, even if I don't see pests yet. The key is applying it in the early evening when temperatures are cooler, which prevents leaf burn. This simple step has cut my pest problems by 80% over the years.
Winter Protection Secrets: That one-third cut back in Step 4 isn't just about size—it's about redirecting the plant's energy. I've found that wrapping canes with burlap (not plastic!) allows just enough airflow to prevent rot while still protecting buds from freezing temperatures. For extra insulation in my zone 5 climate, I add a thick layer of evergreen boughs—the needles release moisture slowly, creating a microclimate that maintains consistent soil temperatures. This little trick has saved my roses from winter dieback more times than I can count.
Pro Tips for Climbing Rose Bushes Care
- Real talk: The difference between a struggling climbing rose and a showstopper comes down to these small but mighty details.
- The Pruning Angle Matters: When you're cutting back those three main canes in Step 1, that 45-degree angle isn't arbitrary—it creates a larger surface area for water absorption and new growth.
- Timing is Everything for Feeding: Step 2 mentions waiting for those true leaves to appear, but here's the thing: those first tiny leaves aren't the signal.
Frequently asked questions
about climbing rose bushes care—because even the toughest gardeners need a little guidance!When is the best time to prune climbing roses?
The ideal time is late winter or early spring (just before new growth begins). For mild climates, prune in February or March; in colder zones, wait until after the last frost. Avoid pruning in fall—it can stimulate tender growth that won’t survive winter. Pro tip: If you missed the window, a light pruning in early summer (after blooming) is better than none!
How much should I cut back my climbing roses each year?
Typically, remove 1/3 to 1/2 of the oldest canes (the thick, woody stems) to encourage new, vigorous growth. For repeat-blooming varieties, also trim back the current season’s growth by 1/3 to 1/2 after each flush of flowers. Dead, diseased, or crossing canes should be cut all the way to the base. Warning: Never over-prune—healthy canes are your rose’s backbone!
What if my climbing roses aren’t blooming? How can I fix it?
Lack of blooms often stems from over-pruning, poor nutrition, or lack of sunlight. Check these fixes:
- Pruning: Ensure you’re leaving 3–5 strong buds on each cane (buds = future blooms!).
- Fertilizer: Feed with a balanced rose fertilizer (like 10-10-10) in early spring and after blooming.
- Sunlight: Climbing roses need 6+ hours of direct sun daily—move them if shaded by trees or structures.
- Watering: Drought stress = fewer blooms. Keep soil consistently moist (not soggy!).
Can I grow climbing roses in containers? What’s the best setup?
Yes! Use a large container (at least 15–20 gallons) with drainage holes and a support trellis or obelisk for climbing. Choose compact varieties like ‘New Dawn’ or ‘Blaze.’ Key tips:
- Use well-draining potting mix (add perlite or sand).
- Water frequently—containers dry out faster.
- Fertilize every 4–6 weeks during growing season.
- Move containers to bright, sunny spots (they can’t outrun shade!).
What pests or diseases should I watch for, and how do I treat them?
Common issues include:
- Black spot: Brown spots on leaves? Prune infected foliage and spray with neem oil or fungicide.
- Aphids/Spider mites: Blast off with water or use insecticidal soap.
- Japanese beetles: Handpick or use milky spore bacteria for long-term control.
- Powdery mildew: Improve airflow, avoid overhead watering, and treat with baking soda spray (1 tsp baking soda + 1 quart water + drop of soap).
Prevention tip: Healthy roses resist pests! Ensure proper spacing, prune for airflow, and water at the base (not leaves).
Wrapping up and next steps
Caring for climbing rose bushes is a rewarding journey that blends artistry with horticultural skill—and you’ve got this! 🌹 With the right tools, seasonal pruning precision, and a dash of patience, your roses will flourish year-round, gracing your garden with fragrant blooms and lush greenery.
Start small, stay consistent, and soon you’ll be the envy of the neighborhood with your show-stopping vertical masterpiece.
Ready to take the next step? Grab your pruners, sketch a quick plan for your trellis or fence, and dive in! 🌱 Whether you’re a beginner or a seasoned gardener, every snip and spray brings you closer to that dream garden. Happy growing!