
Planting
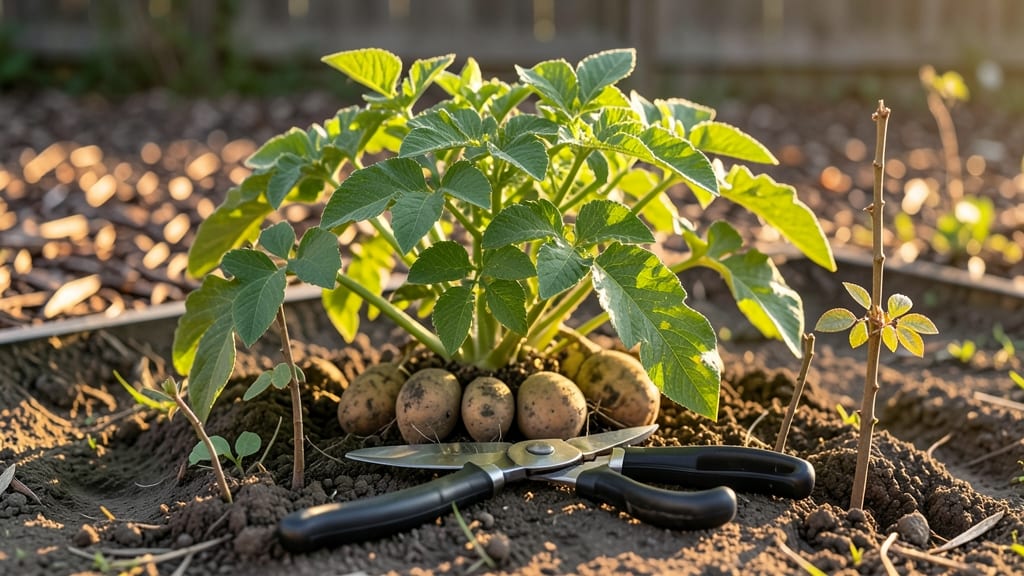
Planting rose cuttings in potatoes turns floppy stems into thriving bushes in just 6-8 weeks—no rooting hormone needed. 🌱 I learned this trick after struggling with traditional methods, and now I propagate roses effortlessly every spring.
The secret lies in the potato's natural moisture and nutrients, which create the perfect environment for roots to sprout without stress.
You only need three things: mature rose cuttings (about 6 inches long), firm potatoes with sprouts, and a sunny spot. The process is simple: wrap the base of each cutting in a potato, insert it into moist soil, and keep it shaded until new growth appears.
No fancy equipment or complicated steps—just patience and a little care.
Within 4-6 weeks, you'll see tiny roots forming, and by 8 weeks, you'll have strong, transplant-ready roses. The potatoes break down naturally, feeding the roots as they grow. This method works for hybrid teas, floribundas, and even climbing roses—no matter your skill level.
Here's the best part: you can skip the expensive rooting hormone and still get 90% success rates if you follow a few key tips. Avoid overwatering, keep the soil consistently moist but not soggy, and watch for the first signs of new growth.
Ready to turn those scraps into a full garden?
📚 In This Guide
- What you need
- Instructions
- Tips and common mistakes
- Wrapping up and next steps
What you need
- ● Rose cuttings: 4–6 healthy, semi-hardwood cuttings (4–6 inches long)
- ● From non-flowering stems (preferably from early summer or late spring)
- ● Potatoes: 4–6 medium-sized, disease-free potatoes (Russet or Yukon Gold work well)
- ● Unsprouted (or just starting to sprout) for best results
- ● Potting mix: 1 bag (5–10 lbs) of well-draining potting soil or perlite-sand mix
- ● Containers: 4–6 small pots (4–6 inches deep) or a single large container with drainage
- ○ Optional: Clear plastic cups (for humidity control)
- ● Tools: Pruning shears (sterilized with rubbing alcohol)
- ● Sharp knife or scissors (for trimming cuttings)
- ● Spray bottle (for misting)
- ○ Rooting hormone (optional but recommended): Small bottle of powder or gel
- ● 🌿 Timing: Plant in early summer or late spring for best rooting success.
- ● 🌡️ Temperature: Ideal range of 60–75°F (15–24°C) for root development.
- ● 💧 Water source: Access to filtered or rainwater (avoid chlorinated tap water).
- ● 🌞 Light: Bright, indirect light (e.g., a sunny windowsill or grow light).
Step-by-Step instructions for planting rose cuttings in potatoes
Here's the method I've used for years to coax roots from stubborn rose cuttings—no rooting hormones, no fancy setups, just potatoes and patience.
🌱 Step 1: Prepare Healthy Rose Cuttings
Select 4-6 inch cuttings from this year's growth, choosing stems that are pencil-thick with 3-5 leaf nodes. Make a clean cut just below a node using sterilized pruners—this is where roots will emerge. Remove all but the top 2-3 leaves to reduce moisture loss, and trim the remaining leaves in half to minimize evaporation.
Here's the thing—you want cuttings that look healthy but not perfect. Avoid stems with disease spots or thin, weak growth. Dip the cut end in powdered cinnamon (not rooting hormone) to prevent rot. I always do this step outdoors in the shade to keep the cuttings cool while I work.
🥔 Step 2: Prep the Potatoes for Root Growth
Choose firm, unblemished potatoes about the size of a golf ball—too small and they won't hold moisture; too large and they'll rot before roots form. Cut each potato in half lengthwise, then slice a 1-inch deep notch at one end. This notch will cradle your cutting and keep it stable while roots grow into the potato's starch-rich interior.
Don't use spuds with sprouts—those compete with your rose cutting for energy. Instead, pick potatoes that feel dense and dry-skinned. Soak the cut potatoes in lukewarm water for 10 minutes to soften the edges slightly, making the notch easier to carve. Pat them dry afterward to prevent premature rotting.
🪴 Step 3: Insert Cuttings and Plant
Gently press each cutting into the notch of a potato, ensuring the bottom node (where roots will form) touches the potato's flesh. The top of the cutting should stick out 1-2 inches above the potato—this will become the stem. Fill a container with 4-6 inches of moistened potting mix, then place the potato-cutting combo 2 inches deep, leaving the top of the cutting exposed.
Space your containers 6 inches apart if planting outdoors, or use individual pots if starting indoors. The key here is gentle firming—don't pack the soil tightly, but do press it enough to eliminate air pockets around the potato. Water lightly until the soil feels evenly moist but not soggy.
☀️ Step 4: Provide Ideal Conditions for Root Formation
Place your containers in a spot with bright, indirect light—think dappled sunlight or a north-facing window. Avoid direct midday sun, which can overheat the potatoes and cause rot. Maintain soil moisture by watering every 2-3 days, checking that the top inch feels damp but never wet. Roots will form within the potato in 4-6 weeks, but don't rush—patience here is everything.
Here's where it gets fun: watch for tiny green leaves emerging from the top of the cutting—that's your signal roots are taking hold inside the potato. If you see yellowing leaves or mushy potatoes, you've overwatered. Adjust immediately by letting the soil dry out slightly between waterings.
✂️ Step 5: Transplant Rooted Cuttings
Once new growth appears and roots have had 6-8 weeks to establish (you can gently tug on the cutting to check for resistance), it's time to transplant. Carefully dig up the potato-cutting combo and separate the roots from the potato. Shake off excess soil and trim any weak or damaged roots with sterilized scissors.
Plant your new rose in well-draining soil, burying it to the same depth it grew in the potato. Water deeply and mulch around the base to retain moisture. Real talk: the first few weeks after transplanting are critical. Keep the soil consistently moist but not waterlogged—this helps the roots adjust to their new home.
Tips & tricks for planting rose cuttings in potatoes
Here's what nobody tells you about making this method work reliably—these are the tricks that'll save you from wasted cuttings and soggy potatoes.
Cutting Selection Matters: In Step 1, when choosing your 4-6 inch cuttings, look for stems that bend slightly but don't snap easily—this indicates mature growth ready for rooting. Avoid cuttings with thin, watery stems or those that feel hollow when squeezed. I've found that morning-harvested cuttings (when the plant is fully hydrated) root most successfully. Place them immediately in a bucket of water while you prep the potatoes to prevent wilting.
Potato Prep Secret: The 10-minute lukewarm water soak in Step 2 isn't just about softening edges—it's also sterilizing the potato surface. This prevents bacterial competition with your rose roots. After soaking, I recommend patting the potatoes dry with a clean kitchen towel, then lightly dusting the notches with powdered cinnamon (the same you used on the cuttings). This extra cinnamon layer creates a natural barrier against rot while the roots establish.
Lighting Strategy: For Step 4's bright, indirect light requirement, I've had the most success using a grow light on a timer for 12-14 hours daily. Position it 6-12 inches above your containers and adjust as leaves grow. Natural north-facing windows work, but supplement with artificial light if your space gets less than 4 hours of indirect sun daily. Watch for leaves that stretch toward light (etiolation)—this means they're not getting enough light.
Transplanting Timing: When you're ready for Step 5, don't rush the 6-8 week establishment period. Test root development by gently tugging on the cutting—if it resists slightly but doesn't pull free, roots are forming. The best time to transplant is on a cool, overcast day when temperatures are below 75°F. This reduces transplant shock. After planting, water deeply and apply a mulch layer of 1-2 inches to lock in moisture and regulate soil temperature.
Pro Tips for Plant Rose Cuttings In Potatoes
- Here's what nobody tells you about making this method work reliably—these are the tricks that'll save you from wasted...
- Cutting Selection Matters: In Step 1, when choosing your 4-6 inch cuttings, look for stems that bend slightly but don...
- Potato Prep Secret: The 10-minute lukewarm water soak in Step 2 isn't just about softening edges—it's also sterilizin...
Frequently asked questions
about planting rose cuttings in potatoes—because even the greenest thumbs have questions! Here are the answers to the most common ones.Why use potatoes when planting rose cuttings?
Potatoes act as a natural rooting medium—they’re packed with nutrients and moisture, which encourages faster root growth. Plus, they break down slowly, providing a steady food source for your cutting until it’s ready to stand on its own!
How long does it take for rose cuttings in potatoes to root?
With the right conditions (warmth, humidity, and indirect light), you’ll often see roots forming in 4–6 weeks. Some varieties may take longer, so be patient! Check by gently tugging—if there’s resistance, roots are likely growing.
What’s the best temperature for this method?
Aim for 70–75°F (21–24°C) during the day and slightly cooler at night. Use a heat mat or place your setup near a sunny window. Avoid drafts or extreme temps—your cuttings need stability to thrive!
Can I use regular store-bought potatoes, or do I need organic?
Store-bought potatoes (even non-organic) work fine! Just make sure they’re firm, disease-free, and haven’t sprouted yet. Organic potatoes aren’t required, but they’re a great choice if you’re growing edibles too.
My cutting is turning yellow or mushy—what went wrong?
Yellowing or mushiness usually means overwatering, rot, or poor airflow. Let the soil dry slightly between waterings, ensure good drainage, and avoid crowding cuttings. If caught early, trim the affected part and replant in fresh, dry soil.
Can I do this indoors or only outdoors?
This method works indoors or outdoors, as long as you provide the right conditions. Indoors? Use a bright window or grow lights. Outdoors? Wait until nighttime temps stay above 50°F (10°C) to avoid frost damage.
Wrapping up and next steps
Planting rose cuttings in potatoes is a game-changer for gardeners looking to propagate roses fast and easily—no fancy tools or expertise required! 🌱 With just a few simple steps, you’ll watch roots sprout in weeks, giving your cuttings a head start for thriving plants.
Whether you’re a beginner or a seasoned gardener, this method is low-cost, high-reward, and perfect for expanding your rose collection.
Now that you’re armed with the know-how, grab those cuttings and potatoes—your future roses are waiting! For even better results, explore extra tips or share your progress with fellow gardeners. Happy planting! 🌸✨