
Propagation
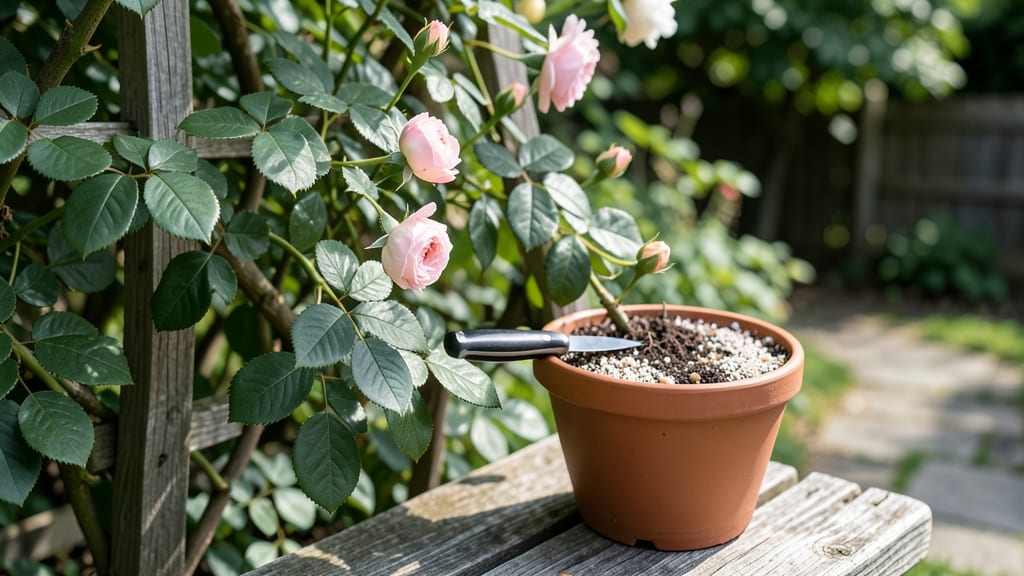
Learn how to propagate climbing roses with stem layering—you’ll get rooted cuttings in just 8-12 weeks, no grafting required. 🌿 I’ve doubled my garden’s climbing roses this way, and the trick?
Patience: bending a stem to the ground and letting nature do the work. No greenhouse needed, just a sunny spot and a little soil prep.
The best time is late spring or early summer, when new growth is vigorous but not yet hardening off. You’ll need sharp pruners, rooting hormone (optional but helpful), and a small mound of moist soil or a trench to bury the stem.
Climbing roses root more reliably this way than from cuttings, and you end up with plants that inherit the parent’s vigor and climbing habit.
By midsummer, you’ll see new shoots emerging from the buried stem—proof the roots are forming. Once they’re 3-4 inches long, you can sever the connection to the mother plant and transplant.
These new roses will bloom just as heavily as their parents, and their long canes will climb trellises or fences with the same enthusiasm.
Works for any climbing variety, from ‘New Dawn’ to ‘Blaze’, and even saves you money compared to buying established plants. The key is keeping the soil moist but not soggy—too much water drowns the roots before they take hold. Let’s get those roses multiplying!
📚 In This Guide
- What you need
- Instructions
- Tips and common mistakes
- Wrapping up and next steps
What you need
- ● Healthy climbing rose stems: Choose mature, flexible stems (about pencil-thick) from last year’s growth. Aim for 3-5 stems per rose bush for best results.
- ● Sharp bypass pruners or pruning shears: Clean and sterilized to prevent disease. A pair with bypass blades ensures clean cuts.
- ○ Rooting hormone (optional but recommended): A powder or gel (e.g., Clonex or Rootone) to boost root development. Use 1 small bottle for 3-5 stems.
- ● Plastic or metal plant labels: 5-10 labels to mark each stem with the rose variety and date.
- ● Moisture-retentive growing medium: Option 1: Sphagnum moss (pre-moistened, 1 small bag)
- ● Option 2: Perlite or vermiculite (for aeration, 1-2 cups)
- ● Option 3: Coco coir (sustainable, 1 small brick)
- ● Plastic wrap or clear plastic bags: 1-2 large bags (10x12 inches) to create a humid microclimate.
- ● Small plastic containers or pots: 3-5 containers (4-6 inches wide) with drainage holes.
- ● Watering can or spray bottle: A fine-mist sprayer keeps the medium damp without overwatering.
- ● Garden twine or zip ties: 5-10 pieces (12-18 inches long) to secure stems to supports.
- ● Support structure: Option 1: Small stakes or bamboo canes (6-12 inches tall, 3-5 stakes)
- ● Option 2: Wire mesh or trellis (for larger setups)
- ● Clear plastic tunnels or cold frames: For extended humidity control in cooler climates.
- ○ Heating mat (optional for indoors): Keeps roots warm (70-75°F) during slow seasons.
- ● Fungicide (e.g., neem oil or copper spray): Prevents mold if humidity gets too high.
- ● Garden gloves: Protects hands from thorns and dirt.
- ● Notebook or app: Track progress with dates, moisture levels, and root growth.
Step-by-Step guide to propagating climbing roses using stem layering
Here’s how I’ve successfully doubled my climbing roses—no fancy tools, just patience and the right timing.
🌱 Step 1: Select Healthy Stems in Early Summer
Choose 4-5 mature stems that are 1-2 years old and show strong growth. These should be pencil-thick with green bark—not woody or brittle. Look for stems that are flexible but sturdy, as they’ll bend easily for layering. Avoid stems with thorns or signs of disease, like black spots or oozing sap.
The best time to layer is late May to early June, when new growth is vigorous but not yet hardening off. You’ll know you’ve picked the right stems when they have multiple leaf nodes (the small bumps where leaves attach) spaced 3-4 inches apart. These nodes are where roots will form.
🌿 Step 2: Create the Layering Site and Bend the Stem
Dig a 3-inch deep trench along the base of the rose bush, keeping it 6-8 inches away from the main stem. This trench will hold the bent stem in place while roots develop. Gently bend a selected stem toward the trench until it forms a U-shape, with the tip still pointing upward. The bend should be smooth, not sharp—think of it like folding a piece of paper, not breaking it.
Secure the bent stem in the trench using two small garden staples (or bent wire if staples aren’t available). The middle section of the stem—where you’ll encourage rooting—should sit partially buried in the trench, with one leaf node just above the soil line. This exposed node will push out new growth, while the buried nodes will form roots.
💧 Step 3: Encourage Root Growth with Moisture and Light
Water the layered stem deeply right after bending, so the soil around the trench is moist but not soggy. You’ll want the soil to stay evenly damp—like a wrung-out sponge—for the next 6-8 weeks. Check daily during dry spells; a quick squeeze should tell you if it’s time to water. Too much water causes rot, while too little stunts root growth.
Leave the top of the stem uncovered and growing upward. You’ll see new shoots emerge from the exposed leaf node in 3-4 weeks—this is your signal that the stem is happy and rooting is underway. If the leaves yellow or wilt, shade the area slightly with a small piece of burlap until they recover.
✂️ Step 4: Separate the New Plant When Roots Form
After 6-8 weeks, gently dig around the buried section of the stem. If you feel small roots (about 1-2 inches long) clinging to the soil, it’s time to separate. Use a small trowel to carefully lift the rooted section, keeping as much soil attached as possible. Shake off excess dirt to check for multiple roots—you’ll need at least 3-4 strong roots for the new plant to thrive.
Cut the stem just above the new roots with clean, sharp pruners, leaving the top portion with 2-3 healthy leaves. Plant the rooted section in its permanent spot, watering deeply to help it establish. The original plant will likely send out new shoots from the cut area—this is normal and shows the mother plant is still healthy.
☀️ Step 5: Care for Your New Climbing Rose
Keep the newly planted rose well-watered for the first 2 weeks, then taper off to weekly deep waterings once established. You’ll know it’s thriving when you see new growth within 4-6 weeks. Avoid fertilizing for the first month—let the roots settle in before encouraging more foliage.
Train the new stem along a trellis or support as it grows, tying it loosely with soft plant ties. Climbing roses need strong upward guidance early on to develop their characteristic habit. In its first year, focus on root and stem strength—you’ll get full blooms in year two if you’ve given it the right start.
Tips & tricks for perfect stem layering with climbing roses
Here's what nobody tells you about making stem layering work the first time—no guesswork, just proven shortcuts.
Timing Secret: The late May to early June window is non-negotiable for success. I learned this the hard way after trying in July—new growth had already hardened off, and my roots never formed. If you miss this window, wait until next spring. The key is catching those vigorous but still flexible stems that haven't started woodifying.
Bending Technique: When creating that U-shape in Step 2, use your hands to gently bend the stem while someone else holds the top steady. This prevents snapping. I've found that bending over a small mound of soil first makes the process smoother. The bend should be gradual—think of it like folding a piece of paper rather than breaking a twig. If you hear a crack, you've gone too far.
Moisture Management: During those critical 6-8 weeks, I've had the best success using a simple moisture gauge: stick your finger about an inch deep into the soil. If it comes out clean, water immediately. If it feels damp but not soggy, wait another day. Too many gardeners drown their layerings—remember, roots need oxygen too. A drip irrigation system set on a timer can help maintain consistent moisture without overwatering.
Root Development Check: When testing for roots in Step 4, I've found that gently tugging on the buried stem gives you a better feel than digging immediately. If you feel resistance, that's your root system forming. You'll need at least 3-4 roots that are about pencil-thick to ensure your new rose will thrive. If you're unsure, wait another week—better to have too many roots than not enough.
Pro Tips for Propagate Climbing Roses
- Here's what nobody tells you about making stem layering work the first time—no guesswork, just proven shortcuts.
- Timing Secret: The late May to early June window is non-negotiable for success. I learned this the hard way after try...
- Bending Technique: When creating that U-shape in Step 2, use your hands to gently bend the stem while someone else ho...
Frequently asked questions
Got questions about propagating your climbing roses? You’re not alone! Here are some of the most common concerns—and their straightforward answers—to help you succeed with stem layering.
What’s the best time of year to start layering climbing roses?
The ideal window is late spring to early summer (May–June in most zones), when new growth is vigorous but hasn’t hardened off yet. Avoid layering in extreme heat or cold—aim for 60–75°F days with mild nights. If you miss this, early fall (September) can work too, but roots may struggle to establish before winter.
How long does it take for roots to form with stem layering?
Root development typically takes 4–8 weeks, depending on weather and rose variety. You’ll know it’s working when you see tiny white root tips (about pencil-sized) or new shoots at the layered spot. Patience is key! Avoid digging up early—wait until roots are at least 2–3 inches long for best success.
Can I use this method for all types of climbing roses?
Stem layering works best for semi-hardy to hardy climbing roses (e.g., ‘New Dawn,’ ‘Blaze,’ or ‘Zephirine Drouhin’). Delicate or grafted varieties (like hybrid teas) may not root as easily. If your rose is tropical or very tender, consider air layering indoors with a humidity dome instead.
What should I do if my layered stem rots or turns mushy?
Rotting usually means too much moisture or poor airflow. If you spot mushiness or foul smells, trim the affected area, reapply fresh sphagnum moss (keep it damp, not soggy), and secure the cut with a clean plastic clip. Prevent future issues by choosing a healthy, disease-free stem and avoiding over-watering.
Do I need to fertilize the layered stem?
Nope! Skip fertilizer during rooting—it can burn tender roots. Once you transplant the new rose (after roots form), use a balanced, low-nitrogen fertilizer (like 10-10-10) to encourage strong growth. Focus on watering lightly and keeping the soil moist but not waterlogged.
Wrapping up and next steps
Propagating climbing roses through stem layering is a rewarding way to expand your garden without breaking the bank! 🌱 With patience and the right techniques, you’ll soon have thriving new plants ready to climb and bloom.
Remember, the key is consistency—keep those layers moist, protect them from harsh weather, and soon, you’ll be enjoying lush, fragrant roses in no time.
Now that you’re armed with the know-how, give it a try! Pick a healthy stem, follow the steps, and watch your rose garden grow. Happy propagating—and may your garden be forever in bloom! 🌸