
Propagation
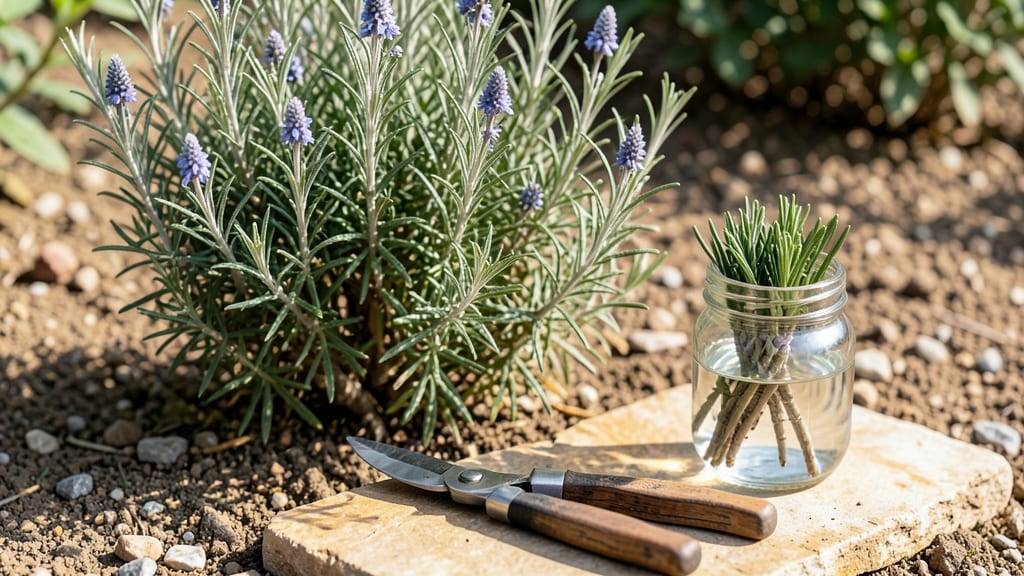
Taking rosemary cuttings is the fastest way to multiply your favorite plants—fast results in just 3-4 weeks with the right approach. 🌿 I’ve rooted dozens of cuttings, and the secret lies in choosing the right stems, using the perfect medium, and keeping patience (the hardest part).
Unlike fussy herbs, rosemary thrives when propagated, making it ideal for beginners.
You’ll need sharp scissors, clean containers, and either water or well-draining soil mix. Spring or early summer is the best time—rosemary grows aggressively then, giving you sturdy cuttings that root quickly.
Avoid woody stems; look for 4-6 inch sections with fresh green growth. The first few days are critical: keep humidity high and shade bright to prevent stress.
Once rooted, your new plants will smell like a Mediterranean vacation. 🌟 Prune them lightly to encourage bushiness, and within months, you’ll have enough to share with neighbors.
The best part? Rosemary’s hardy—once established, it’ll keep growing for years with minimal care. No more buying expensive plants when you can grow them for free!
Troubleshooting is simple: yellow leaves mean too much water, while slow growth just needs more light. Master this method, and you’ll never buy rosemary again. Ready to start? Grab your cuttings—your kitchen garden just got an upgrade.
📚 In This Guide
- What you need
- Instructions
- Tips and common mistakes
- Wrapping up and next steps
What you need
- ● Healthy rosemary plant: Choose a mature stem (at least 4–6 inches long) with no signs of disease or pests.
- ● Clean, sharp pruning shears or scissors: Sterilize with rubbing alcohol to prevent contamination.
- ○ Rooting hormone (optional but recommended): A powder or gel to speed up root growth (e.g., Rootone or Clonex).
- ● Well-draining potting mix: A blend of 50% perlite or sand and 50% peat or coco coir (avoid garden soil—it’s too dense!).
- ● Small pots or containers: 4–6 inches wide with drainage holes (yogurt cups or plastic cups work in a pinch!).
- ● Watering can or spray bottle: For gentle hydration without over-saturating the cuttings.
- ● Plastic bag or clear dome: To create a humid microenvironment (e.g., a ziplock bag with holes or a propagator lid).
- ● Heat mat: Keeps cuttings warm (70–75°F) to encourage faster rooting.
- ● Grow lights: If propagating indoors with low natural light.
- ● Hydrogen peroxide (3% solution): Dips cuttings to prevent bacterial/fungal issues.
- ● Label markers: To track cutting dates and varieties.
Step-by-Step instructions for taking a rosemary cutting
Here's my foolproof method for rooting rosemary cuttings—fast, healthy, and ready to grow!
🌿 Step 1: Select and Prepare the Perfect Stem
Choose a healthy, non-flowering stem from the base of your rosemary plant—these are the most vigorous. Look for stems that are about 4-6 inches long and pencil-thick, with at least 3-4 sets of leaves. Avoid woody, over-mature stems—they root poorly. Use sharp pruning shears to make a clean cut just below a leaf node (that little bump where leaves attach).
Here's the thing—rosemary cuttings root best when they've hardened off. If your plant is soft and lush from indoor growing, let it sit outside in full sun for a week before taking cuttings. This toughens the stems so they don't rot when you plant them. Strip off all but the top 2-3 sets of leaves—this reduces moisture loss while the roots form.
💧 Step 2: Root in Water or Soil (Your Choice!)
For water rooting, place the cuttings in a clean glass of room-temperature water, making sure only the stripped lower half is submerged. Change the water every 2-3 days to prevent bacterial growth. You'll see tiny roots forming in about 2-3 weeks—watch for the first signs of root hairs along the submerged stem. I like this method because it lets you track progress clearly.
For soil rooting (which works faster for rosemary), dip the cut end in rooting hormone powder to boost success. Fill a small pot with well-draining cactus/succulent mix and make a hole with your finger. Insert the cutting so the stripped portion is buried 1-2 inches deep. Gently firm the soil around it. Keep the mix lightly moist—never soggy. You'll know it's working when new growth appears at the top in about 3-4 weeks.
☀️ Step 3: Provide Ideal Conditions for Rooting
Place your cuttings in bright, indirect light—think east-facing window or under grow lights. Direct sun can scorch tender new growth while they're rooting. Maintain a warm environment of 70-75°F—a heat mat set to 75°F speeds up rooting dramatically. If using water, cover the container loosely with plastic wrap to retain humidity without trapping moisture.
Real talk: rosemary cuttings are finicky about moisture. Water-rooted cuttings need fresh water every 2-3 days—never let the water get murky. Soil-rooted cuttings should have barely damp soil—stick your finger in to check. If it feels dry at the surface, water lightly. Overwatering is the #1 killer of rosemary cuttings—it causes rot before roots can form.
✂️ Step 4: Transplant When Ready (Watch for These Signs!)
Your cutting is ready to transplant when you see new leaf growth at the top and either roots in water (about 2-3 inches long) or firm resistance when you gently tug the stem in soil. For water-rooted cuttings, plant in a pot with well-draining potting mix—bury the rooted portion 1 inch deep and firm soil around it. For soil-rooted cuttings, simply repot into a slightly larger container.
After transplanting, give your new plant a week to adjust before fertilizing. Place it in full sun gradually—start with morning sun only, then increase exposure over 3-5 days. You'll know it's thriving when it grows 1-2 inches in 2 weeks. That's your signal everything worked!
Tips & tricks for perfect rosemary propagation
These pro tips will help you turn your rosemary cuttings into thriving new plants faster than you'd expect!
Timing is Everything: The best time to take cuttings is in early spring or late summer when your rosemary is actively growing. Avoid taking cuttings during extreme heat or cold—rosemary struggles to root when stressed. I've found that morning hours work best because the stems are hydrated from overnight dew but haven't yet lost moisture to the midday sun. This gives your cuttings the best possible start.
Cutting Technique Matters: When making your cut just below a leaf node in Step 1, angle the cut slightly—this increases the surface area for root growth. I use a clean, sharp knife or pruning shears to make the cut, then immediately strip the lower leaves. This prevents bacterial entry points while reducing moisture loss. Don't forget to remove any flower buds if present—they'll sap energy from root development.
Rooting Environment Secrets: For water rooting, I've had great success using filtered or distilled water instead of tap water. The chlorine in tap water can inhibit root growth. Change the water every 2-3 days as specified, but also watch for cloudiness—this indicates bacterial growth. For soil rooting, I always pre-moisten the cactus/succulent mix before planting to eliminate air pockets that could prevent root contact with soil.
Transplanting Confidence: When you're ready to transplant in Step 4, gently squeeze the base of the stem to test root development before fully removing from water or soil. If you feel resistance, roots are forming! After transplanting, give your new plant a week to adjust before fertilizing. I use a balanced organic fertilizer at half-strength during the first month to avoid shocking the young roots.
Pro Tips for Take A Rosemary Cutting
- These pro tips will help you turn your rosemary cuttings into thriving new plants faster than you'd expect!
- Timing is Everything: The best time to take cuttings is in early spring or late summer when your rosemary is actively...
- Cutting Technique Matters: When making your cut just below a leaf node in Step 1, angle the cut slightly—this increas...
Frequently asked questions
Got questions about propagating rosemary from cuttings?
Here are the most common ones—and their answers—to help you succeed like a pro!
Can I take rosemary cuttings from a store-bought plant?
Yes, but with caution! Store-bought rosemary is often treated with growth inhibitors to keep it compact. Look for a plant with new, soft growth (not woody stems) and give it a few weeks of outdoor light before cutting. If it’s been in a dark store for a while, it may take longer to root.
How long does it take for rosemary cuttings to root?
Patience pays off! Most rosemary cuttings root in 2–4 weeks, but some may take up to 6–8 weeks. Keep the soil moist (not soggy) and place them in bright, indirect light. Avoid moving them until you see new growth—that’s your sign they’ve taken root!
What should I do if my rosemary cutting turns yellow or mushy?
Yellowing or mushy stems usually mean overwatering or rot. If you spot this, stop watering immediately and check for root rot (smelly, dark stems). Trim the affected parts, let the cutting dry for a day, and repot it in fresh, well-draining soil. Keep humidity up with a plastic bag until it recovers!
Can I root rosemary in water instead of soil?
Rosemary can root in water, but it’s trickier than soil. Use room-temperature water and change it every 3–4 days to prevent bacteria. Once roots form (after 3–6 weeks), transplant it to soil quickly—rosemary hates soggy roots long-term. Soil propagation (like the method above) is more reliable for this herb.
When is the best time of year to take rosemary cuttings?
Spring and early summer (March–June) are ideal because rosemary grows vigorously then. Avoid winter cuttings—plants are dormant, and success rates drop. If you’re in a warm climate, you can also propagate in fall, but spring is always the safest bet for happy, healthy roots!
Wrapping up and next steps
Taking a rosemary cutting is a rewarding way to grow your herb collection—and you’ve just unlocked the secrets! 🌱 With the right tools, a little patience, and these rooting tips, your new plant will thrive in no time.
Whether you’re a beginner or a seasoned gardener, this method makes propagation simple and fun.
Now that you’re ready to propagate, why stop here? Try experimenting with different rosemary varieties or even share your new cuttings with fellow plant lovers. Happy growing—and enjoy that fresh, fragrant rosemary in your kitchen soon! 🌿✨