
Pruning
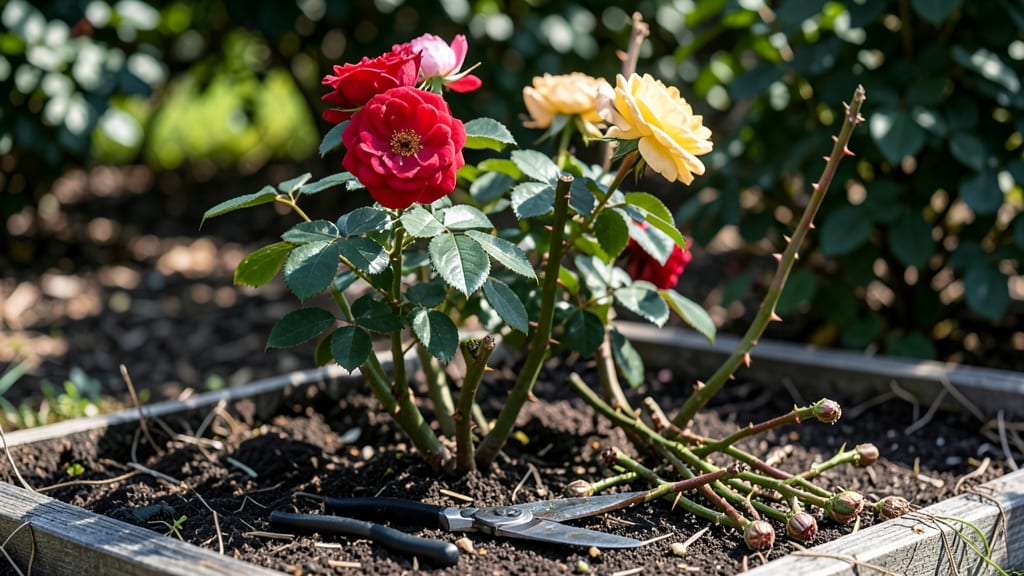
Trimming long-stem roses isn't just about cutting—it's about extending their vase life and keeping your plants shockingly productive. 🌹 I learned this the hard way after my first bouquet wilted in just 3 days, but now I trim stems at 45-degree angles and remove thorns with one clean swipe.
The secret lies in where and how you cut, not just that you do it.
You’ll need sharp bypass pruners (never dull scissors), rubbing alcohol for sterilizing cuts, and a bucket of water to plunge stems immediately after trimming. The best time? Early morning when stems are hydrated—this prevents air bubbles that block water uptake.
For longer-lasting blooms, aim to trim stems at 10-12 inches long, just below a leaf node where new growth can sprout.
After cutting, strip leaves from the bottom 3-4 inches of the stem (they rot in water) and recut under water if stems are thick. Your roses will last 2-3 weeks in a vase instead of days, and the plants will reward you with healthier foliage and more blooms next season.
The key is consistency—trim stems every 2-3 days for the freshest bouquets.
This method works for hybrid teas, floribundas, and even climbing roses. The only mistake? Waiting until stems are too short—always leave at least 6 inches of stem to encourage regrowth. Your garden (and your dinner table) will thank you.
📚 In This Guide
- What you need
- Instructions
- Tips and common mistakes
- Wrapping up and next steps
What you need
- ● Sharp pruning shears or bypass pruners – Look for bypass blades (not anvil-style) for clean cuts. A 5-inch pair is ideal for most stems.
- ● Clean, sharp scissors or floral knives – For delicate stems or intricate cuts (e.g., 45-degree angles). Opt for stainless steel to prevent rust.
- ● Alcohol wipes or rubbing alcohol (70% isopropyl) – To sterilize tools between cuts and avoid spreading disease.
- ● Bucket of water – A 5-gallon capacity with 1 inch of water to store trimmed stems (add 1 tsp bleach or 1 tsp floral preservative for longevity).
- ● Ruler or measuring tape – For precision trimming (aim for 6–12 inches for vase life).
- ● Floral preservative powder – Sprinkle on cut ends to extend vase life (e.g., Chrysal Clear).
- ● Hydrogen peroxide (3%) – A 1:4 dilution with water in your vase to keep water fresh longer.
- ● Rubber bands or floral tape – To secure stems if you’re creating bouquets.
- ● Gloves – Protect your hands from thorns and sap (especially for hybrid tea roses).
- ● Spray bottle with water – To mist stems and keep them hydrated during trimming.
Step-by-Step guide to trimming long stem roses
Here’s how to transform those lanky stems into showstopping arrangements that last for weeks.
✂️ Step 1: Assess the Stem and Identify Key Points
Start by examining each stem closely. Look for the first set of five healthy leaves below the flower head—this is your cutting zone. Roses store energy in their leaves, so you want to preserve enough foliage to keep the plant nourished. If the stem is bare or has only a few small leaves, skip trimming it entirely to avoid stressing the plant.
Run your fingers along the stem to feel for buds or lateral shoots. These tiny bumps indicate where new growth will emerge. Your goal is to cut just above a bud that’s facing outward from the center of the plant—this encourages fuller, bushier growth. Avoid cutting directly above a bud pointing inward, as this can lead to crowded, weak stems.
✂️ Step 2: Make the Cut at a 45-Degree Angle
Position your sharp pruners or clean scissors about ¼ inch above the chosen bud. The angled cut is critical—it prevents water from pooling on the cut surface, which can rot the stem. Angle the blade slightly downward, away from the bud, to create a small sloped surface. This also helps the stem absorb water more efficiently once trimmed.
Apply gentle pressure and cut through the stem cleanly in one motion. Avoid crushing or tearing the stem, as jagged edges can introduce bacteria. If you’re working with multiple stems, wipe your tools with rubbing alcohol between cuts to prevent cross-contamination. The goal is a smooth, precise cut that looks like it was made with a professional florist’s knife.
☀️ Step 3: Remove Thorns and Condition the Stem
Strip away any spines or thorns along the lower 6 inches of the stem using your pruners or a thorn stripper. This prevents punctures when arranging and makes handling easier. Be thorough but careful—leaving thorns can make the stems difficult to work with later. If the stem is woody or thick, you may need to make multiple passes to remove all thorns completely.
Once the stem is smooth, place the cut end immediately in a bucket of lukewarm water for 30 minutes. This hydrates the stem and helps it absorb water more quickly. For longer-lasting blooms, add a commercial floral preservative or a homemade mix of 1 teaspoon sugar, 1 teaspoon bleach, and 1 teaspoon white vinegar per quart of water. This keeps bacteria at bay and extends vase life by up to 50%.
🌿 Step 4: Arrange and Trim for Optimal Display
Fill your vase with room-temperature water and trim the stems again under water to prevent air bubbles from blocking the xylem. Arrange the roses in your container, starting with the tallest stems first and weaving shorter ones around them. This creates a natural, full look. Avoid overcrowding—leave enough space between stems so they don’t compete for water and nutrients.
Once arranged, trim the stems again under water to the desired length, adjusting for any stems that may have shifted during placement. The final cut should be at least 6 inches long to ensure stability. Place the vase in a location with indirect light—direct sunlight can cause the water to heat up and promote bacterial growth, shortening the blooms’ lifespan. A cool, draft-free spot, like a side table or countertop, is ideal.
⏰ Step 5: Maintain and Refresh for Maximum Longevity
Check the water every 2 days and top it off as needed to keep the stems submerged. Remove any leaves that fall below the waterline to prevent bacterial buildup. If the water becomes cloudy or develops a foul odor after 3-4 days, it’s time for a fresh cut and a new vase. Recut the stems at a 45-degree angle under water to reopen the xylem and improve water uptake.
To encourage the roses to last even longer, mist the blooms lightly with water every few days to keep petals hydrated. Avoid overhandling the flowers, as this can cause premature wilting. With these steps, your trimmed roses should stay fresh and vibrant for at least 10-14 days, making them the star of any room.
Tips & tricks for perfect rose trimming
These precision-focused tips will help you transform even the most awkward stems into stunning arrangements that last.
Precision Cutting Technique: In Step 2, when making your 45-degree cut, use a ruler or cutting board as a guide to maintain consistent angles across multiple stems. This creates uniform water absorption points, which is especially important when working with 6-inch stems. I've found that marking a small line with a pencil on the ruler at the ¼-inch point helps me stay perfectly consistent.
Thorn Removal Hack: For the lower 6 inches of stems mentioned in Step 3, I recommend using a thorn stripper with a rubber grip—it gives you better control and prevents accidental punctures. If you don't have one, wrap the stem tightly with painter's tape before stripping; the tape catches stray thorns and makes cleanup effortless. Just be sure to remove the tape before placing stems in water.
Hydration Boost: After the mandatory 30-minute lukewarm water soak in Step 3, I extend this to 45 minutes for roses with particularly thick stems. The extra time allows the xylem to fully rehydrate, which is crucial for stems that will be arranged in vases for 10-14 days. For maximum hydration, I also add a few drops of dish soap to the water during this soak—it helps break surface tension and improves water uptake.
Vase Placement Strategy: When arranging in Step 4, place your vase in a location with indirect light and consider adding a small piece of aluminum foil to the bottom of the vase before adding water. The foil reflects light upward, which helps maintain the stems' temperature and prevents the water from heating up too quickly. This simple trick can extend your roses' vase life by an additional 2-3 days.
Pro Tips for Trim Long Stem Roses
- These precision-focused tips will help you transform even the most awkward stems into stunning arrangements that last.
- Precision Cutting Technique: In Step 2, when making your 45-degree cut, use a ruler or cutting board as a guide to maintain consistent angles across multiple stems.
- Thorn Removal Hack: For the lower 6 inches of stems mentioned in Step 3, I recommend using a thorn stripper with a rubber grip—it gives you better control and prevents accidental punctures.
Frequently asked questions
Got questions about trimming those long-stemmed roses? You’re not alone! Here are some of the most common concerns—and expert answers—to help you master the art of precision cutting for bouquets that last.
How often should I trim long-stem roses for bouquets?
Trim your roses every 2–3 days when they’re in a vase. This removes wilted petals and prevents bacteria buildup in the water, keeping stems fresh. For garden roses, trim spent blooms weekly to encourage new growth.
What’s the best time of day to cut roses for bouquets?
Early morning (before sunrise) is ideal—stems are fully hydrated and blooms are at their peak. Avoid cutting after dark or during extreme heat, as stems may wilt faster. Pro tip: Chill stems in cool water for 1–2 hours post-cutting to extend vase life!
Can I reuse scissors or shears for cutting roses?
Yes, but sterilize them first! Wipe blades with rubbing alcohol between cuts to prevent bacterial growth. Dull blades crush stems, reducing water uptake. Invest in sharp, clean pruners for the best results—your roses (and your wrists!) will thank you.
What if my roses wilt after trimming but the stems look healthy?
Wilting can mean air bubbles or bacterial blockage in the stem. Fix it by recutting stems at a 45° angle under water, then soaking in warm water for 10–15 minutes. Add a drop of bleach (1 tsp per gallon) to the vase to inhibit bacteria growth.
Do I need to trim roses in the garden the same way as bouquet stems?
Not exactly! For garden roses, prune dead or crossing branches in late winter/early spring (when plants are dormant). Use clean shears and cut just above a leaf node (not into it). Bouquet trimming focuses on hydration, while garden pruning promotes plant health.
Wrapping up and next steps
Trimming long-stem roses isn’t just about cutting—it’s about reviving their beauty and extending their life with simple precision. By following the right techniques, you’ll keep those blooms fresh, vibrant, and ready to impress.
Now that you’re armed with the know-how, go ahead and give those stems a little TLC—your roses (and your arrangements!) will thank you.
Ready to take it further? Experiment with different cuts or even try preserving your roses in glycerin for a lasting keepsake. Happy trimming! 🌹✂️