
Propagation
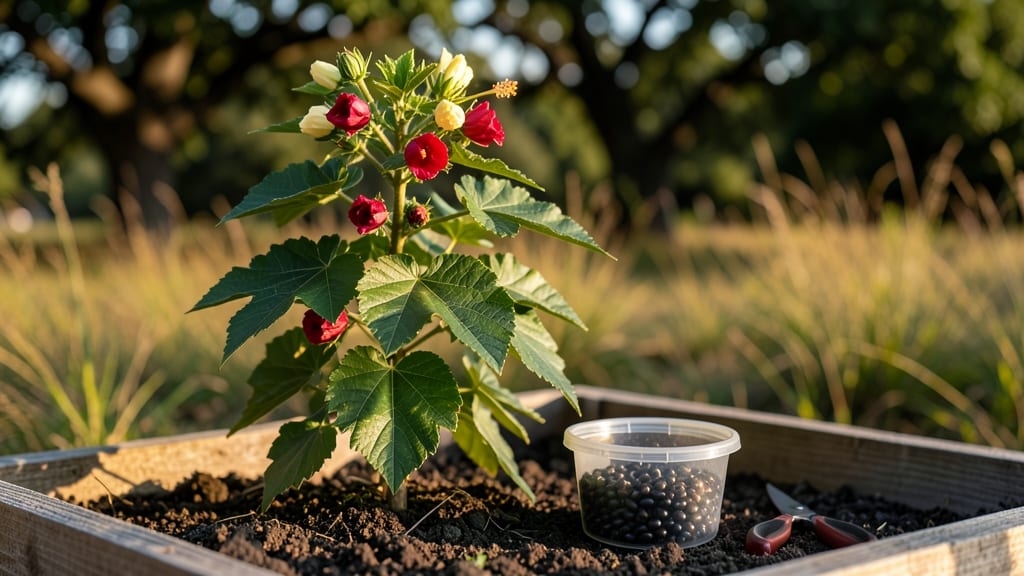
Planting roselle seeds unlocks homegrown tropical hibiscus—just like the ones you see in tropical markets. 🌿 I learned the hard way that roselle (Hibiscus sabdariffa) needs warmth, patience, and the right soil mix to thrive, but once you crack the code, the harvest is worth every effort.
These seeds aren’t picky, but they do demand consistent moisture and heat to break dormancy. The magic happens in well-draining soil with a 70°F+ environment—think indoor seed trays under grow lights or a heated mat if you’re in cooler zones.
Start seeds indoors 8-10 weeks before your last frost (or year-round in tropical climates), and keep them moist but not soggy. Germination can take 10-21 days, so don’t give up if nothing sprouts immediately.
Once seedlings pop, they’ll grow fast—2-3 inches per week—with deep green, lobed leaves that look like oversized maple leaves. Thin to the strongest sprout per pot, and harden them off before transplanting outside after all frost risk has passed. The real payoff?
Bright red calyces (the edible parts) that taste like tart cranberries and make incredible jams or teas. Roselle’s tropical roots mean it struggles in cold snaps, so protect young plants with row covers if nights dip below 50°F.
In warmer climates, direct-sow after frost, but always space plants 18-24 inches apart—they’ll grow 5-7 feet tall with bushy habits. Here’s how to avoid the most common pitfalls and get a bountiful harvest.
📚 In This Guide
- What you need
- Instructions
- Tips and common mistakes
- Wrapping up and next steps
What you need
- ● Roselle seeds: 10–20 seeds (organic, non-GMO preferred for best germination).
- ● Seed-starting trays or small pots: 2–4" deep, with drainage holes (biodegradable pots work too!).
- ● Seed-starting mix: Lightweight, well-draining potting soil (avoid garden soil—it’s too dense!).
- ● Plastic wrap or humidity dome: To retain moisture during germination (a clear bag or lid works!).
- ● Spray bottle: For gentle watering (avoid over-saturating seeds!).
- ● Grow lights or sunny windowsill: Roselle seeds need warmth (70–85°F) and bright light to sprout.
- ○ Fertilizer (optional but helpful): A balanced, water-soluble fertilizer (5-10-5 ratio) for young seedlings.
- ● Warm climate or indoor setup: Roselle thrives in USDA Zones 9–11 or as an annual in warmer regions. If you’re in a cooler zone, start seeds indoors 8–10 weeks before the last frost.
- ● Patience: Germination takes 7–21 days—stay consistent with moisture and warmth!
- ● Space for mature plants: Roselle grows 5–7 feet tall and wide—plan for full sun (6+ hours daily) in a garden bed or large container.
- ● 🌡️ Soak seeds overnight in warm water to soften the outer shell and speed up germination.
- ○ ✨ Use a heat mat (optional) to keep soil temps ideal—roselle loves warmth!
- ● 🎯 Label your trays to track planting dates (roselle grows fast!).
Step-by-Step instructions for planting roselle seeds
Here's the straightforward method I've used to grow healthy roselle plants from seed every season.
🌱 Step 1: Prepare Your Seed Starting Containers
Roselle seeds need warmth and moisture to germinate, so start with 4-inch diameter pots filled with a lightweight seed-starting mix. I like to mix equal parts of coco coir and perlite for excellent drainage—roselle roots hate soggy soil. Moisten the mix until it feels like a damp sponge, not dripping wet.
Fill each pot to within ½ inch of the rim and press down gently to remove air pockets. The surface should be firm enough to hold seeds in place but still soft enough for delicate roots to penetrate. I place the pots in a shallow tray to catch any excess water during the germination phase.
🌱 Step 2: Sow Seeds at the Correct Depth
Roselle seeds are large and flat, so plant just ¼ inch deep—any deeper and they'll struggle to reach the surface. I use my finger to make a small dimple in the soil, place one seed in each pot, and cover lightly with a thin layer of mix. Press gently to ensure good seed-to-soil contact without burying them.
Here's the thing—roselle seeds need warmth to germinate. Place the pots in a location that maintains 75-85°F soil temperature. A seedling heat mat works wonders if your home runs cooler. Keep the soil consistently moist but never soggy—this is where most beginners fail.
☀️ Step 3: Provide Warmth and Humidity for Germination
Cover the pots with clear plastic wrap or a humidity dome to create a greenhouse effect. This traps warmth and moisture, which roselle seeds crave. Germination typically takes 10-20 days, but don't be surprised if it takes longer in cooler conditions. I check daily for condensation on the plastic—this tells me the humidity level is perfect.
Once you see the first signs of sprouts, remove the plastic immediately. Leaving it on too long causes fungal issues that can kill seedlings overnight. Place the pots under a grow light or in a bright, indirect light spot. Roselle seedlings need 12-14 hours of light daily to prevent leggy growth.
🌿 Step 4: Thin and Transplant Seedlings
When seedlings reach 2-3 inches tall and have 2-3 true leaves, it's time to thin. If you planted multiple seeds per pot, carefully remove the weaker seedlings, leaving only the strongest one. This prevents overcrowding and gives the remaining plant room to grow.
After thinning, transplant each seedling into its own 6-inch pot filled with a well-draining potting mix. I like to add a handful of compost to each pot for extra nutrients. Water gently after transplanting to help settle the roots. Keep the soil moist but not waterlogged for the first week.
☀️ Step 5: Harden Off Before Outdoor Planting
Two weeks before your last frost date, begin hardening off your roselle seedlings. Start by placing them outside in a sheltered spot for 1-2 hours the first day. Gradually increase their time outdoors over 7-10 days, until they can tolerate a full day in the sun.
Roselle thrives in full sun and warm temperatures, so choose a location that gets at least 6-8 hours of sunlight daily. The plants are frost-sensitive, so wait until nighttime temperatures stay above 55°F before planting outdoors. I always plant in the late afternoon to reduce stress on the seedlings.
🪴 Step 6: Plant Outdoors in Well-Draining Soil
Dig a hole twice as wide as the seedling's root ball but only as deep as the pot. Gently remove the seedling from its pot and place it in the hole, ensuring the soil line on the stem is level with the ground. Fill the hole with soil and press lightly to remove air pockets.
Water deeply after planting to help the roots establish. Mulch around the base of the plant with 2-3 inches of organic mulch to retain moisture and suppress weeds. Roselle plants need consistent moisture, so water 1-2 times per week, depending on your climate. You'll know it's time to water when the top 1-2 inches of soil feel dry.
Tips & tricks for perfect roselle seed germination
Growing roselle from seed can be incredibly rewarding, but a few key tricks will help you avoid common pitfalls and ensure strong, healthy starts.
Soil Temperature is Non-Negotiable: The 75-85°F soil temperature range in Step 2 is critical—roselle seeds won't germinate properly if it's too cool. I've seen seeds take twice as long when soil temps dip below 70°F. If your home stays cooler, invest in a small seedling heat mat ($15-$20) placed under your 4-inch pots. Pro tip: Check soil temp with a thermometer before planting, especially in spring or fall when indoor temps fluctuate.
Humidity Management Makes All the Difference: After covering your pots with plastic in Step 3, monitor condensation daily. Too much moisture creates fungal risks, while too little slows germination. I've found that lifting the plastic for 5 minutes every other day prevents excess condensation while maintaining humidity. Also, avoid placing pots near drafts or air vents—they disrupt the stable environment roselle seeds need.
Light Requirements Need Precision: Those 12-14 hours of light in Step 3 are essential for preventing leggy seedlings. If using artificial grow lights, position them just 2-3 inches above the seedlings—they should be bright enough to cast minimal shadow. For natural light, rotate pots daily so all sides receive even exposure. Watch for seedlings stretching toward light; this is your cue to increase light intensity immediately.
Transplanting Timing is Everything: When thinning in Step 4, wait until seedlings have 2-3 true leaves and are at least 2 inches tall. This might seem like a small detail, but I've seen beginners transplant too early, which stresses delicate root systems. After transplanting to 6-inch pots, give roots 3-5 days to establish before introducing compost—adding it immediately can overwhelm the young plants with nutrients.
Pro Tips for Planting Roselle Seeds
- Growing roselle from seed can be incredibly rewarding, but a few key tricks will help you avoid common pitfalls and ensure strong, healthy starts.
- Soil Temperature is Non-Negotiable: The 75-85°F soil temperature range in Step 2 is critical—roselle seeds won't germinate properly if it's too cool.
- Humidity Management Makes All the Difference: After covering your pots with plastic in Step 3, monitor condensation daily.
Frequently asked questions
Got questions about growing roselle from seed?
You’re not alone! Here are answers to the most common queries to help you grow this tropical gem with confidence.
How long does it take for roselle seeds to germinate?
Roselle seeds typically sprout in 10–20 days if kept in warm (70–85°F), moist soil. For faster results, soak seeds overnight before planting or use a seedling heat mat. Patience is key—some seeds may take up to 30 days in cooler conditions. Keep the soil consistently damp (not soggy) to encourage germination.
When is the best time to plant roselle seeds indoors vs. outdoors?
Start seeds indoors 8–12 weeks before the last frost (spring) for a head start. Transplant seedlings outdoors only after all frost risk has passed and soil temps stay above 60°F—roselle hates cold! In tropical climates, direct-sow seeds outdoors in early summer for continuous harvests.
Why aren’t my roselle seeds sprouting? Troubleshooting tips.
If seeds aren’t germinating, check these fixes:
Cold soil? Move to a warmer spot (roselle loves heat!).
Too dry? Mist soil daily or use a humidity dome.
Old seeds? Roselle seeds lose viability after 1–2 years—try fresh ones!
Pests/fungus? Inspect for mold or insects; replant in sterile soil if needed.
Pro tip: A seed germination tester can help diagnose issues quickly.Can I grow roselle from store-bought hibiscus tea seeds?
Yes, but with a caution! Hibiscus tea (often Hibiscus sabdariffa) seeds may be viable, but germination rates vary. For best results, buy fresh, labeled roselle seeds from a nursery. If using tea seeds, soak them for 24 hours first to break dormancy. Note: Store-bought seeds might be treated or dried, reducing success.
Is roselle hard to grow in containers? What’s the ideal pot size?
Roselle thrives in containers! Use pots at least 12–18 inches deep with drainage holes to accommodate deep roots. A 5-gallon bucket or large fabric grow bag works well for 1–2 plants. Ensure the pot gets full sun (6+ hours/day) and fertilize every 4–6 weeks with a balanced liquid fertilizer. Dwarf varieties may need slightly smaller pots.
Wrapping up and next steps
Growing roselle from seed is a rewarding journey that brings vibrant tropical beauty and delicious harvests to your garden! 🌱 With the right soil, sunlight, and patience, you’ll soon enjoy this versatile plant’s striking flowers and tangy fruit.
Whether you’re a seasoned gardener or a beginner, each step brings you closer to a thriving roselle patch.
Now that you’re equipped with the know-how, roll up your sleeves and start planting! Keep track of your progress, and don’t hesitate to share your roselle-growing wins with fellow plant enthusiasts. Happy gardening—your future harvests are waiting! 🌿✨