
Pruning
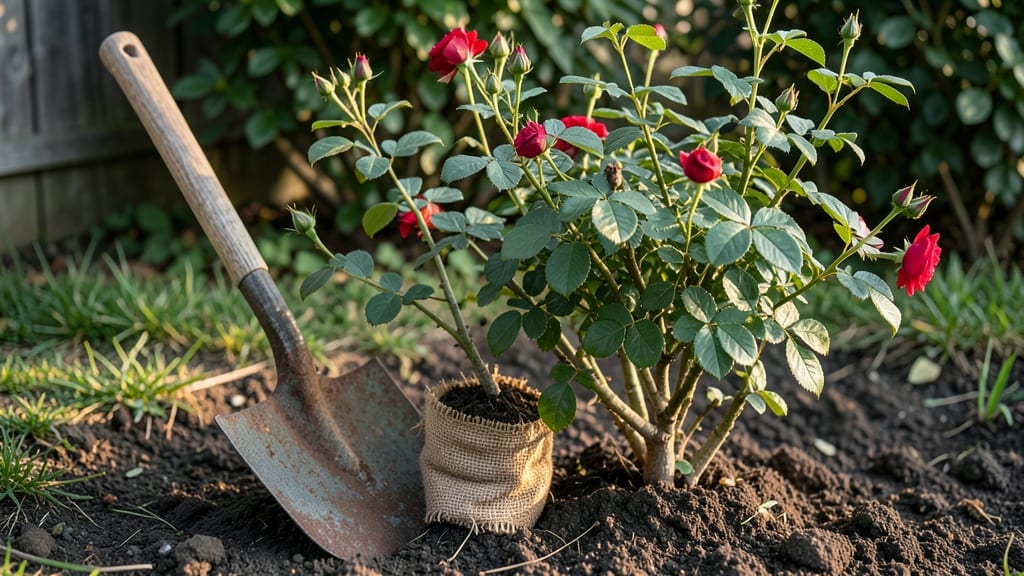
Relocating a rose bush can turn a struggling plant into a thriving centerpiece—if you time it right. 🌹 I’ve moved roses in both spring and fall, and the difference between a plant that bounces back and one that sulks for months comes down to preparation.
The key is working when the roots are active but not overburdened by heat or cold, and giving the bush time to establish before the next stressor hits.
Start by gathering your tools: a sharp shovel, pruners, burlap or a tarp for wrapping roots, and a wheelbarrow for hauling. You’ll also need fresh compost or well-aged manure to mix into the new hole—this gives the roots a nutrient boost right when they need it most.
Water the bush deeply a few days before moving day so the soil stays moist and roots slide out cleanly. The goal is to minimize root damage, so take your time digging a wide enough hole to capture as much of the root ball as possible.
Once you’ve lifted the bush, wrap the roots in damp burlap and keep them shaded until replanting. The new hole should mirror the old one in depth and width, with amended soil at the bottom.
After setting the bush in place, backfill with native soil mixed with compost, firming gently to eliminate air pockets. Within a month, you’ll see new shoots pushing through—proof the transplant is taking hold. Just keep watering deeply but infrequently to encourage deep root growth.
Here’s the secret weapon: prune back one-third of the bush immediately after transplanting. This reduces stress by limiting foliage and redirecting energy to root establishment. In the weeks that follow, watch for signs of distress like wilting or yellowing leaves, but don’t panic—most roses recover with consistent care.
The payoff? A bush that not only survives the move but thrives in its new spot, blooming even more beautifully than before.
📚 In This Guide
- What you need
- Instructions
- Tips and common mistakes
- Wrapping up and next steps
What you need
- ● Garden shovel or spade – A sharp, sturdy 5- to 6-inch wide shovel for clean cuts.
- ● Pruning shears or loppers – Bypass pruners (for small branches) or loppers (for thicker stems). Sterilize with rubbing alcohol!
- ● Garden hose or watering can – For thorough hydration before and after transplanting.
- ● Compost or well-aged manure – 5–10 gallons to enrich the new soil.
- ○ Mulch (optional but recommended) – 2–3 inches of organic mulch (e.g., shredded bark or straw) to retain moisture.
- ● Fertilizer (rose-specific or balanced 10-10-10) – 1–2 tablespoons mixed into the planting hole.
- ● Staking materials (if needed) – 3–4-foot bamboo stakes + soft plant ties for windy areas.
- ● Root stimulator – A biological or synthetic additive to boost root growth (e.g., Mycorrhizal fungi).
- ● Epsom salt (magnesium sulfate) – 1 tablespoon dissolved in water for post-transplant care.
- ● Garden gloves – To protect your hands from thorns and rough soil.
- ● Wheelbarrow or tarp – For hauling soil, compost, or the rose bush if it’s large.
Step-by-step instructions for relocating a rose bush
Here's how to move your rose bush with minimal stress and maximum success—your blooms will thank you.
🪴 Step 1: Choose the Right Time and New Location
Spring or early fall is ideal for transplanting roses—avoid extreme heat or cold. Pick a spot with 6+ hours of sunlight and well-draining soil. I always test the new location first by digging a small hole to check drainage; if water pools after 30 minutes, amend the soil with compost or sand before planting.
Roses need space to thrive, so ensure 3-4 feet between bushes for airflow. If your rose is grafted, mark the graft union with a flag so you plant it 2 inches deeper than before to protect it from sun exposure. The new hole should be twice as wide as the root ball but only as deep as the existing planting depth.
🌱 Step 2: Prepare the Rose and Dig Carefully
Water the rose deeply 24 hours before moving to encourage root growth and reduce transplant shock. On moving day, dig a 12-inch-wide circle around the bush, cutting roots gently with a sharp spade. I use a saw for thick roots—this prevents tearing and helps the plant recover faster.
Keep the root ball intact as much as possible. If you must prune roots, cut them cleanly and avoid damaging the main trunk. Wrap the root ball in burlap or a tarp if you're moving it far, and keep it moist by misting with water every few hours. The goal is to minimize root exposure to air and sun, which causes drying.
☀️ Step 3: Transplant with Proper Spacing and Support
Place the rose in the new hole so the top of the root ball sits 1-2 inches below soil level. Fill the hole halfway with native soil, then water deeply to settle it. I always add a handful of balanced rose fertilizer to the bottom of the hole—this gives the plant an immediate nutrient boost as roots establish.
Backfill the hole with soil, tamping gently to remove air pockets. Add a 2-inch layer of mulch around the base (but not touching the trunk) to retain moisture and regulate temperature. Install a support stake if your rose needs it, securing it loosely so it doesn’t restrict growth.
💧 Step 4: Water and Monitor for Recovery
Water the transplanted rose deeply every other day for the first 2 weeks, then taper to weekly waterings once new growth appears. You’ll know it’s recovering when you see new leaves unfurling within 3-4 weeks. Avoid fertilizing for 6-8 weeks—the plant needs to focus on root growth, not blooms.
Watch for wilting or yellowing leaves, which can signal stress. If this happens, water more frequently but avoid soggy soil. Prune any dead or damaged branches immediately, and avoid heavy pruning until the plant shows signs of vigorous new growth. Patience is key—your rose will reward you with stronger blooms next season.
Tips & tricks for perfect rose bush relocation
Moving a rose bush successfully comes down to these key details that make all the difference between struggling blooms and thriving plants.
Timing is Everything: The 24-hour watering before moving isn't just a suggestion—it's crucial. Think of it as giving your rose a hydration boost so its roots are plump and ready for the stress of transplanting. I've seen roses recover beautifully when prepped this way, but they wilt dramatically when skipped. Water again immediately after transplanting to help settle the roots in their new home.
Root Ball Protection: When digging that 12-inch circle, resist the urge to rush—gentle cuts with a sharp spade prevent root damage. For thick roots, a saw is your best friend. I've learned the hard way that torn roots mean slower recovery. If you're moving your rose more than a few feet, wrap the root ball in burlap and keep it moist with frequent misting. The goal is to keep roots covered and hydrated until they're safely in the ground.
Drainage Test: That 30-minute water test in the new hole is non-negotiable. I once planted a rose in soil that looked fine but pooled water after just 10 minutes—now I always test! If water lingers, mix in compost or sand to create better drainage. Poor drainage is the #1 reason roses struggle after transplanting, so don't skip this step.
Post-Transplant Care: The first 2 weeks are critical for recovery, so stick to that every-other-day watering schedule. I've noticed roses that get inconsistent watering during this period often show stress symptoms like yellowing leaves. Once new leaves appear after 3-4 weeks, you can ease up to weekly waterings. And remember—no fertilizer for 6-8 weeks! The plant needs to focus on root growth, not blooms.
Pro Tips for Relocating A Rose Bush
- Moving a rose bush successfully comes down to these key details that make all the difference between struggling blooms and thriving plants.
- Timing is Everything: The 24-hour watering before moving isn't just a suggestion—it's crucial.
- Root Ball Protection: When digging that 12-inch circle, resist the urge to rush—gentle cuts with a sharp spade prevent root damage.
Frequently asked questions
Got questions about moving your rose bush without the stress? Here are some of the most common concerns—and their solutions—to help you transplant like a pro!
When is the best time to relocate a rose bush?
The ideal time is early spring (before new growth starts) or late fall (after blooming season ends). Avoid extreme heat or frost—your rose will thank you with fewer transplant shocks! For climates with mild winters, dormant seasons (like late winter) also work.
How do I prevent my rose bush from dying after moving it?
Start by watering deeply 2–3 days before and after transplanting. Use a root stimulator or diluted fertilizer to encourage recovery. Mulch the base (but not the stem!) to retain moisture, and avoid pruning for at least 4–6 weeks to reduce stress.
How far can I move my rose bush without harming it?
Aim to keep the new location within 10–15 feet of its original spot to minimize root damage. If you’re moving it farther, dig a wider hole (2x the root ball) and prune 1/3 of the canes to balance the shock. Patience is key—larger moves may need extra care!
Can I relocate a rose bush in full bloom?
It’s not recommended—blooming roses are already stressed from producing flowers. Wait until after the last bloom cycle (or in early spring) to avoid stunted growth or dropped buds. If you must move it now, prune blooms heavily and prioritize recovery over aesthetics.
What’s the easiest way to divide a rose bush for relocation?
For climbing or shrub roses, dig around the base and gently separate canes with a clean knife, ensuring each section has roots and buds. For bare-root roses, soak the roots for 1–2 hours before planting. Replant divisions immediately in loose, well-draining soil. Pro tip: Label varieties to avoid mix-ups later!
Why are my rose bush’s leaves turning yellow after moving?
Yellow leaves often signal transplant shock (too much sun, over/under-watering, or root damage). Adjust care by:
- Providing partial shade for 1–2 weeks.
- Checking soil moisture (not soggy!).
- Fertilizing lightly with low-nitrogen food.
Wrapping up and next steps
Relocating a rose bush doesn’t have to be stressful—with the right tools, timing, and care, your plant can thrive in its new home! 🌸 Whether you’re addressing overcrowding, improving sunlight exposure, or simply refreshing your garden layout, patience and preparation are key.
Now that you’re armed with expert tips, take that first step: mark your new spot, gather your supplies, and give your rose bush the fresh start it deserves.
🌱 Your Next Step: Plan & Act Now!
Ready to make the move? Start by observing your rose bush’s current growth and choosing the best season for transplanting. Then, set a date and enjoy the rewarding process of nurturing your garden’s star! Happy gardening! 🌿