
Container Gardens
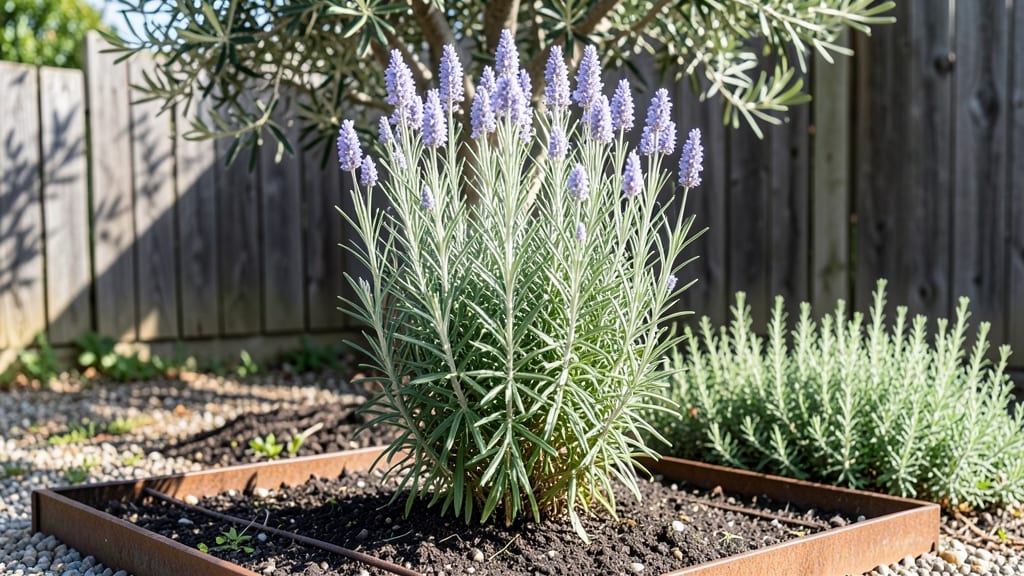
Growing rosemary in a planter turns a tough herb into a foolproof container star. 🌿 The key is matching its Mediterranean roots to your space—sunny spots, well-draining soil, and just enough water to keep it happy without drowning.
I’ve grown rosemary in pots for years, and once you get the basics right, it thrives with almost no fuss.
You’ll need a container at least 12 inches deep (rosemary has a long taproot), drainage holes, and a mix of potting soil with perlite or sand for airflow. Place it where it gets 6+ hours of sun daily—a south-facing window, balcony, or patio works perfectly.
Overwatering is the biggest mistake; let the top inch of soil dry out between waterings, and you’ll avoid root rot every time.
With proper care, your rosemary will grow woody stems and fragrant needles in just a few months, ready for cooking or garnishes. The best part? It stays compact in containers, making it ideal for small spaces.
Prune lightly after harvests to encourage bushier growth, and you’ll have a year-round herb that’s easier to manage than most houseplants.
Works for both indoor and outdoor planters, and even thrives in partial shade if you’re in a hot climate. Here’s how to keep it lush and productive—no green thumb required.
📚 In This Guide
- What you need
- Instructions
- Tips and common mistakes
- Wrapping up and next steps
What you need
- ● Rosemary plant: 1 healthy nursery-grown rosemary (preferably Rosmarinus officinalis for culinary use). Look for a 4–6 inch pot with woody stems and vibrant green needles.
- ● Planter: 1 container with drainage holes, minimum 12 inches deep and 12 inches wide (rosemary needs room to spread!). Terracotta, ceramic, or fabric grow bags work great.
- ● Well-draining potting mix: 2–3 cubic feet of a lightweight, fast-draining blend (e.g., 50% cactus/succulent mix + 50% perlite or pumice). Avoid heavy garden soil!
- ● Gravel or pebbles: 1–2 inches (for drainage layer at the bottom of the planter).
- ○ Fertilizer: 1 slow-release granular fertilizer (e.g., 10-10-10) or liquid seaweed fertilizer (optional but helpful for nutrient boosts).
- ● Mulch (e.g., pine bark or gravel) to retain moisture and deter weeds.
- ● Spray bottle for misting (rosemary loves humidity!).
- ● Pruning shears for shaping and harvesting.
- ● Saucer or tray to catch excess water (if indoors).
- ● Sunlight meter or app to track light exposure (if indoors).
How to grow rosemary in a planter for year-round fragrance
This hardy herb thrives in containers with just a few key adjustments—here's how to keep it lush and aromatic.
🪴 Step 1: Choose the Right Planter and Soil Mix
Rosemary needs excellent drainage, so select a container with drainage holes and at least 12 inches of depth—shallow pots lead to root rot. I use terracotta because it breathes, but any unglazed ceramic or plastic with holes works. Fill the bottom 2 inches with coarse gravel or broken pottery pieces to create a drainage layer.
Next, mix 2 parts potting soil with 1 part perlite or coarse sand for aeration. Rosemary hates soggy roots, so this blend prevents compaction. Fill the pot to 1 inch below the rim, leaving room for watering. Tap the sides gently to settle the soil without compacting it—you want fluffy, airy mix that won't suffocate roots.
🌱 Step 2: Plant Your Rosemary with Proper Spacing
For 4 plants, dig a hole in the center of the pot that's twice as wide as the root ball but only as deep. Gently remove the rosemary from its nursery pot and loosen any circling roots with your fingers—this encourages outward growth. Place the plant in the hole so the top of the root ball sits ½ inch below the soil line.
Fill around the roots with your soil mix, pressing lightly to remove air pockets. Don't pack it down too firmly—rosemary roots need room to breathe. Water immediately after planting until moisture runs freely from the drainage holes. This settles the soil and eliminates air gaps that could dry out roots.
☀️ Step 3: Position for Maximum Sunlight
Rosemary craves full sun—at least 6-8 hours daily. Place your planter in the brightest spot you have, ideally a south or west-facing window. If you're using grow lights, position them 6-12 inches above the plant and keep them on for 14-16 hours daily.
Here's the thing—rosemary grows leggy when light is insufficient. You'll notice stems stretching toward the light with sparse foliage. To prevent this, rotate the planter a quarter turn weekly so all sides get even exposure. In winter, supplement with a grow light if natural light drops below 4 hours daily.
💧 Step 4: Water Wisely to Prevent Root Rot
Let the top 2 inches of soil dry out completely between waterings—that's the key to happy rosemary. Stick your finger in the soil; if it feels dry to the touch, it's time to water. When you do water, soak thoroughly until water runs from the drainage holes, then empty the saucer immediately to prevent soggy roots.
Overwatering is rosemary's biggest enemy. You'll know you're doing it right when the soil feels damp but not wet, and the stems stay firm—not mushy. In winter, reduce watering to every 2-3 weeks since growth slows dramatically. Yellowing leaves usually mean overwatering, while crispy edges signal underwatering.
✂️ Step 5: Prune and Harvest for Bushy Growth
Pinch back the tips of new growth when stems reach 6 inches tall to encourage bushier, more compact plants. Use clean pruning shears to trim just above a set of leaves where you want new growth to sprout. Never cut into woody stems—focus on the tender new growth at the tips.
Harvest sprigs regularly by cutting just above a leaf node. You'll get the best flavor from stems that have matured but aren't woody. After heavy pruning, fertilize lightly with a balanced 10-10-10 fertilizer to support new growth. In late winter, give your rosemary a hard prune back to half its size—this rejuvenates older plants and prevents woody centers.
Tips & tricks for perfect rosemary in planters
Here's what nobody tells you about keeping your rosemary thriving year after year in containers.
Drainage is Non-Negotiable: I can't stress this enough—rosemary's roots will rot if they sit in wet soil. That 2-inch gravel layer in Step 1 isn't optional. If your pot doesn't have drainage holes, drill them yourself. For extra insurance, add a layer of charcoal pieces (from a grill) below the gravel—they'll absorb excess moisture and prevent bacterial buildup.
The Soil Mix Secret: When mixing your 2 parts potting soil to 1 part perlite, don't skip the perlite—it's what prevents compaction. I've seen people use just potting soil and end up with dense, waterlogged conditions that strangle the roots. If you can't find perlite, coarse horticultural sand works in a pinch, but it won't last as long between waterings.
Light Strategy for Small Spaces: That 6-8 hours of sunlight requirement is critical, but not everyone has a sunny balcony. If you're using grow lights, position them 6 inches above the plant for the first week to avoid leaf burn. Rotate your planter every 3-4 days (not just weekly) to ensure even growth—you'll notice one side getting leggy if you don't. In winter, supplement with lights if natural light drops below 4 hours daily.
Watering Hack: The 2-inch dry soil test works, but here's a pro move: use a moisture meter. They're cheap and take the guesswork out of watering. I aim for 30-40% moisture in the soil—any higher risks root rot. In winter, I water every 3-4 weeks instead of the summer schedule, and the plants stay perfectly happy.
Pro Tips for Rosemary In Planter
- Here's what nobody tells you about keeping your rosemary thriving year after year in containers.
- Drainage is Non-Negotiable: I can't stress this enough—rosemary's roots will rot if they sit in wet soil.
- The Soil Mix Secret: When mixing your 2 parts potting soil to 1 part perlite, don't skip the perlite—it's what prevents compaction.
Frequently asked questions
Got questions about growing rosemary in a planter? You’re not alone—this fragrant herb is easy but has a few quirks! Here are answers to the most common questions to help you cultivate a thriving rosemary plant with confidence.
How often should I water rosemary in a planter?
Rosemary hates soggy soil, so water only when the top 1-2 inches feel dry (about once a week in summer, less in winter). Planters dry out faster than ground soil, so check frequently. Overwatering is the #1 killer—stick your finger in the soil to test!
When is the best time to harvest rosemary from a planter?
Harvest spring through early fall when the plant is actively growing. Snip sprigs from the top or sides (never more than ⅓ of the plant at once) to encourage bushier growth. Avoid harvesting in winter—rosemary goes dormant and needs time to recover.
Can I grow rosemary in a planter indoors?
Yes, but it needs bright light (6+ hours/day)—a south-facing window or grow lights work best. If indoors, use a well-draining pot (terracotta is ideal) and reduce watering. Expect slower growth than outdoors, but it’ll still thrive with proper care!
What’s the easiest way to revive a leggy or dying rosemary plant?
If your rosemary looks stretched or sparse, prune it back by ⅓ to encourage new growth. Move it to a sunnier spot and reduce watering. For severely struggling plants, propagate cuttings in water or fresh soil—rosemary roots surprisingly fast!
Are there rosemary alternatives for planters?
If rosemary feels finicky, try these planter-friendly herbs with similar care needs:
- Thyme – Drought-tolerant and loves full sun.
- Oregano – Hardy and spreads easily (great for borders!).
- Lavender – Fragrant but needs excellent drainage.
- Mint – Fast-growing but invasive (keep in its own pot!).
Wrapping up and next steps
Growing rosemary in a planter is a fragrant, low-maintenance way to bring fresh herbs into your home—no green thumb required! 🌿 With just a sunny spot, well-draining soil, and occasional pruning, you’ll enjoy its piney aroma and versatile culinary uses all year.
Whether you’re a beginner or seasoned gardener, this hardy herb rewards effort with abundance and beauty.
Ready to harvest your first sprigs? Start by snipping a few leaves for cooking, then share your rosemary planter success with fellow gardeners. Happy growing!