
Planting
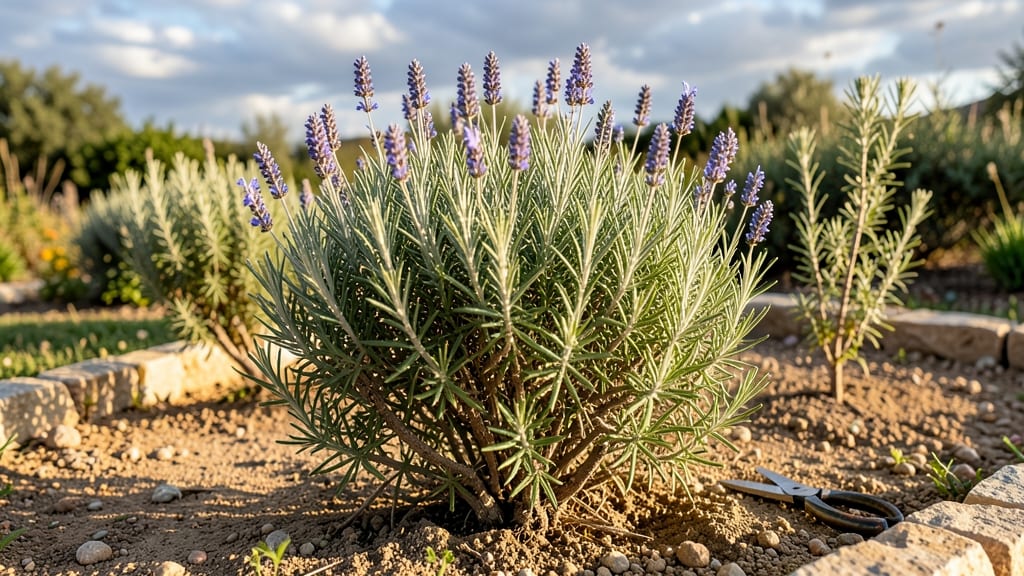
The rosemary plant life cycle unfolds like a fragrant journey from tiny seeds to towering shrubs. 🌱 I’ve watched mine go from a hesitant sprout to a bush bursting with pine-scented needles—each stage has its own needs, and knowing them makes all the difference.
The first two months are all about coaxing those delicate roots, while later stages demand patience for the bold flavors we love.
Germination kicks off in 2-4 weeks, but rosemary seeds need warmth and light to break through. Once sprouted, the plant enters its vegetative phase, where it focuses on leaf growth—this is where proper sunlight (6+ hours daily) and well-draining soil prevent leggy, weak stems.
By year two, flowering signals maturity, and with the right pruning, you’ll encourage more foliage and fewer flowers (since blooms drain energy).
With care, rosemary can live for decades, but its lifespan depends on your climate. In warmer zones, it thrives year-round; in colder areas, overwintering indoors or as a perennial with mulch keeps it alive.
The key? Pruning after flowering to maintain shape and harvest sprigs before the plant puts energy into seeds. That’s when your kitchen smells like a Mediterranean garden.
Whether you’re growing from seed or propagating cuttings, each stage builds on the last—germination → growth → flowering → dormancy (if applicable) → renewal. The real magic happens when you match care to the plant’s natural rhythm. Ready to nurture yours through every phase?
📚 In This Guide
- What you need
- Instructions
- Tips and common mistakes
- Wrapping up and next steps
What you need
- ● Rosemary Seeds: 1 packet (50–100 seeds) of Salvia rosmarinus seeds (preferably organic or non-GMO).
- ● Pro Tip: 💡 Choose seeds labeled for herb or culinary use for the best flavor.
- ● Growing Containers: 2–3 4-inch diameter pots (for seedlings) or a seed-starting tray with drainage holes.
- ● 1 6–8 inch pot or garden bed (well-draining soil required; see below).
- ● Growing Medium: Seed-starting mix: 1 bag (1–2 cubic feet) of lightweight, sterile mix (e.g., Pro-Mix or coco coir).
- ● Potting soil: 1 bag (1 cubic foot) of well-draining, sandy loam (amend with perlite or pumice if heavy).
- ● Tools: 1 spray bottle (for gentle watering).
- ● 1 small hand trowel (for transplanting).
- ○ 1 moisture meter (optional but helpful for tracking soil dampness).
- ● Light: Full sun (6–8+ hours/day)—use a grow light (LED or fluorescent) if indoors.
- ● Temperature: Ideal germination: 70–75°F (21–24°C).
- ● Mature plant thrives in 60–80°F (15–27°C) ranges.
- ● Humidity: Moderate (40–60%)—rosemary dislikes soggy roots!
- ● 1 humidity dome (to retain moisture during germination).
- ● 1 slow-release fertilizer (e.g., 10-10-10 or fish emulsion).
- ● 1 pruning shears (for shaping mature plants).
- ● 1 label maker (to track planting dates!).
How to grow rosemary through its complete life cycle
Here's how I guide rosemary from tiny seeds to mature, fragrant bushes—no shortcuts, just reliable growth.
🌱 Step 1: Start Seeds Indoors for Germination
Sow rosemary seeds 1/8 inch deep in a seed-starting mix (not garden soil) in small pots. Keep the soil at 70-75°F using a heat mat if needed—rosemary seeds germinate slowly, often taking 2-4 weeks. I cover the pots with plastic wrap to retain moisture but remove it daily for 10 minutes to prevent mold.
Water gently from the bottom by placing pots in 1/2 inch of water for 10 minutes—this keeps seeds evenly moist without disturbing them. Once seedlings emerge, move them to a sunny window or under grow lights for 14-16 hours daily. You'll see the first true leaves (not the initial seed leaves) appear after 4-6 weeks.
🌿 Step 2: Transplant Seedlings to Larger Pots
When seedlings have 3-4 sets of true leaves, transplant them to 4-6 inch pots with well-draining soil. Rosemary hates soggy roots, so I mix in 20% perlite or coarse sand to improve drainage. Handle seedlings by their leaves, never the stems, to avoid damage.
After transplanting, water deeply but wait until the top 1 inch of soil feels dry before watering again. Place pots in bright, indirect light for the first week to reduce transplant shock. You'll notice new growth appearing within 2-3 weeks if conditions are right.
☀️ Step 3: Harden Off and Plant Outdoors
Once seedlings are 6-8 inches tall, begin hardening them off by placing them outside in a sheltered spot for 1-2 hours daily. Gradually increase exposure over 10-14 days, ending with full sun. Choose a planting site with full sun (6+ hours daily) and well-draining soil—rosemary won’t tolerate wet feet.
Plant outdoors after the last frost when soil temperatures reach 50°F. Space plants 2-3 feet apart to allow for air circulation, which prevents fungal diseases. Water deeply after planting to settle the soil around the roots, then reduce watering—rosemary is drought-tolerant once established.
✂️ Step 4: Prune and Maintain for Year-Round Growth
Prune rosemary in early spring to shape the plant and encourage bushier growth. Cut back 1/3 of the plant’s height using clean, sharp shears. Avoid cutting into old wood, as rosemary struggles to regrow from mature stems. I harvest sprigs regularly to promote new growth—never take more than 1/3 of the plant at once.
Water only when the soil is completely dry, typically every 2-3 weeks in summer. Mulch lightly with 1 inch of gravel or straw to retain moisture and suppress weeds. In winter, reduce watering further—rosemary enters dormancy in colder climates but recovers quickly in spring.
🌿 Step 5: Harvest and Propagate for Long-Term Yield
Harvest rosemary in the morning after dew has dried for the strongest flavor. Cut stems just above a leaf node to encourage new growth. Use the harvested sprigs fresh or dry them by hanging bundles upside down in a warm, dark place for 1-2 weeks until crisp.
To propagate rosemary, take 4-6 inch cuttings from healthy stems in spring or early summer. Remove the lower leaves, dip the cut end in rooting hormone, and plant in moist perlite or sand. Keep the cuttings in bright, indirect light and maintain humidity with a plastic bag until roots form in 4-6 weeks.
Tips & tricks for perfect rosemary growth
Real talk: Growing rosemary from seed takes patience—but these tricks will help you avoid the most common pitfalls along the way.
Germination Secret: Rosemary seeds need that consistent 70-75°F soil temperature to germinate. I've found that placing pots on a seedling heat mat (or even on top of the fridge) makes all the difference when your home gets chilly. The 10-minute daily plastic wrap removal isn't just about preventing mold—it's also letting fresh air circulate to prevent that dreaded seed rot. Trust me on this: I've lost three batches before I learned this trick.
Lighting Strategy: Those 14-16 hours of daily light are non-negotiable for strong seedlings. If your sunny window isn't cutting it, invest in a simple LED grow light—even a basic one will work. I position mine about 6 inches above my seedlings and adjust as they grow. Watch for leaves stretching toward the light (called etiolation)—this means they're light-starved and need more intensity.
Transplanting Wisdom: When you're ready to move those 3-4 leaf seedlings to 4-6 inch pots, don't rush! The soil mix is where many people fail. I always triple-check that the 20% perlite/sand ratio is correct—this prevents soggy roots that'll kill your rosemary faster than anything. And here's what nobody tells you: Gently squeeze the base of the seedling before transplanting. If it feels too loose, it's not ready for the bigger pot yet.
Outdoor Transition: That 10-14 day hardening off period is your plant's boot camp for survival. Start with just 1-2 hours in that sheltered spot, then gradually increase exposure. I've seen rosemary seedlings go from thriving to crispy overnight when moved too quickly to full sun. Pro tip: Watch for the leaves—if they look wilted but perk up after a few hours, you're doing it right. If they stay wilted, go back to shorter exposure times.
Pro Tips for Rosemary Plant Life Cycle
- Real talk: Growing rosemary from seed takes patience—but these tricks will help you avoid the most common pitfalls along the way.
- Germination Secret: Rosemary seeds need that consistent 70-75°F soil temperature to germinate.
- Lighting Strategy: Those 14-16 hours of daily light are non-negotiable for strong seedlings.
Frequently asked questions
Got questions about growing rosemary from seed to harvest?
Here are some of the most common ones—plus quick, practical answers to help you nurture your fragrant garden star!
How long does it take for rosemary to grow from seed to harvest?
Patience is key! Rosemary seeds can take 4–6 weeks to germinate, followed by 6–12 months to mature enough for harvesting. For faster results, opt for nursery-grown plants—they’ll reward you with fragrant sprigs in just 3–6 months.
Can I grow rosemary indoors year-round?
Rosemary thrives indoors with 6+ hours of sunlight daily (a south-facing window or grow lights work). Use well-draining pots, keep soil slightly moist, and ensure good airflow. Just avoid overwatering—rosemary hates soggy roots!
Why isn’t my rosemary growing? Troubleshooting tips?
Check these common culprits:
- Too much water: Yellow leaves? Let soil dry between waterings.
- Not enough light: Leggy stems? Move to a brighter spot.
- Poor drainage: Root rot? Repot in a mix with perlite or sand.
- Overcrowding: Trim back or transplant if growth stalls.
Can I harvest rosemary from a young plant?
Yes! You can gently snip 10–20% of the plant’s growth once it reaches 6–8 inches tall. Avoid cutting into woody stems—focus on tender new growth. Regular trimming encourages bushier, more productive plants!
What’s the best alternative if rosemary struggles in my climate?
If your zone is too cold (Zone 7 or lower), try these rosemary-friendly swaps:
- Russian (hardy) rosemary: Tolerates light frosts.
- Creeping rosemary: Low-growing, cold-resistant variety.
- Oregano or thyme: Similar flavors, easier to grow in cooler climates.
Wrapping up and next steps
Understanding the rosemary plant life cycle isn’t just fascinating—it’s your key to nurturing a thriving, fragrant garden! From sprouting seeds to harvesting aromatic sprigs, each stage is a rewarding journey.
Whether you’re a beginner or a seasoned gardener, embracing this process connects you to nature’s rhythm and the joy of homegrown herbs. 🌿
Now that you’re armed with knowledge, take the next step: grab your rosemary seeds or cuttings and start your own plant! Share your progress with fellow green thumbs or experiment with recipes using your homegrown harvest. Happy growing!