
Container Gardens
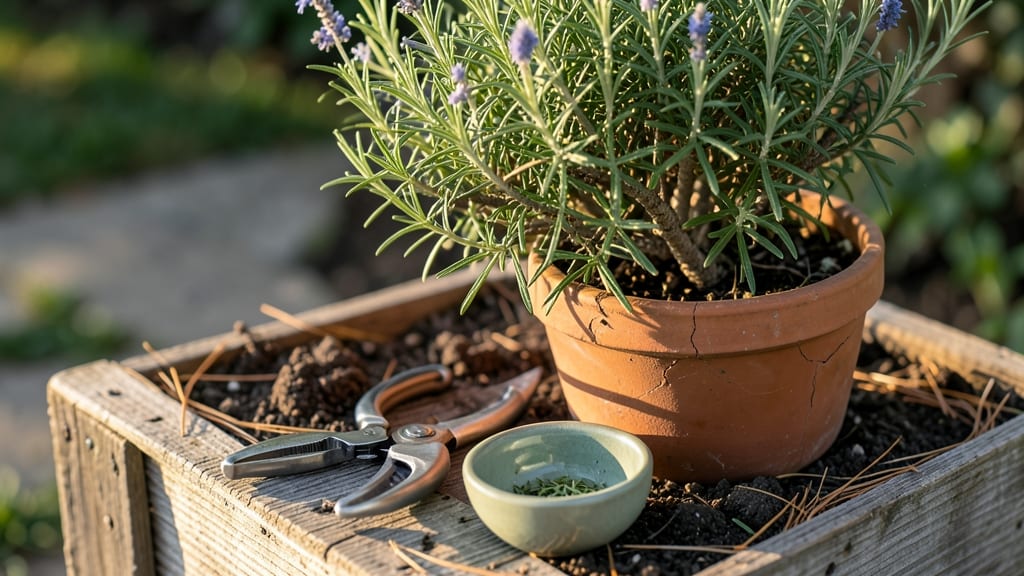
Turn those rosemary clippings into thriving new plants instead of tossing them. ✂️ I’ve rooted so many cuttings that my kitchen windowsill is now a mini rosemary forest—all from what would’ve been kitchen scraps. The best part? It’s foolproof, even for black thumbs like me.
You’ll need just three things: healthy rosemary stems (4-6 inches long), a clean jar or glass, and room-temperature water. Skip the fancy supplies—no soil, no grow lights, just patience. The magic happens in 2-4 weeks, when those stems transform into bushy new plants ready for pots or your garden.
Imagine snipping herbs for cooking all winter long, or gifting rosemary plants to friends—all from a single cutting. The scent alone makes it worth it, but the free plants? That’s the real win. Plus, you’ll never waste another sprig again.
Works year-round, but spring and summer give the fastest results. Here’s how to do it without killing a single cutting—promise.
📚 In This Guide
- What you need
- Instructions
- Tips and common mistakes
- Wrapping up and next steps
What you need
- ● Rosemary clippings: 3–5 healthy, 4–6 inch stems with at least 2–3 sets of leaves (avoid woody or flowered ends).
- ● Clean glass or jar: A clear container (8–12 oz) with a narrow neck, like a mason jar or glass vase.
- ● Fresh, filtered water: Room-temperature water (1–2 cups, enough to submerge the stem’s base by 1 inch).
- ● Pruning shears or clean scissors: Sharp tools to snip stems at a 45-degree angle for better water absorption.
- ○ Optional rooting hormone (gel or powder): Speeds up root growth (e.g., Rootone or Clonex).
- ● Small pebbles or marbles: Place 1–2 at the bottom of the jar to keep stems submerged without rotting.
- ● Spray bottle with water: For misting leaves and maintaining humidity.
- ● Grow lights or sunny windowsill: A spot with 6+ hours of indirect light per day (south-facing window or LED grow light).
- ● Hydrogen peroxide (3%) or cinnamon: A few drops in water or a sprinkle of cinnamon on the cut end to prevent bacterial growth.
- ● Small pot with well-draining soil: If you plan to transplant rooted clippings (use a mix like cactus/succulent soil).
Step-by-step guide to propagating rosemary clippings in water
Here's how to turn those kitchen scraps into thriving new plants—no fancy tools needed.
🌱 Step 1: Select Healthy Stems for Propagation
Choose 4-6 inch long stems from your rosemary plant, making cuts just below a leaf node where the stem meets the leaf. Avoid woody, yellowed, or diseased branches—they won't root well. I like to pick stems from the newest growth because they're most energetic and likely to sprout roots.
Strip the lower 1-2 inches of leaves from the stem, leaving just a few at the top. This bare section will sit underwater and encourage root formation. If your clipping has flower buds, pinch them off—they'll drain energy that should go toward root growth instead.
💧 Step 2: Prepare the Water and Create a Humid Environment
Fill a clean glass with room-temperature water, leaving at least 2 inches of stem submerged. Use filtered or distilled water if your tap water is heavily chlorinated—rosemary is sensitive to chlorine. Change the water every 3-4 days to prevent bacterial growth and keep it fresh for root development.
Place the glass in a bright, indirect light spot—near an east-facing window works perfectly. Avoid direct sun, which can overheat the water and stress the cutting. I cover the glass with a plastic bag loosely secured with a rubber band to create a mini greenhouse effect. This traps moisture and speeds up root growth.
⏰ Step 3: Wait and Watch for Root Development
Keep the water level constant by adding a little more as it evaporates. After about 2-3 weeks, tiny white bumps will appear along the submerged stem—these are the first root hairs. In another 2-4 weeks, you'll see ½-inch roots forming. I like to check weekly by gently tugging the stem—if it resists slightly, roots are taking hold.
If the water gets cloudy or develops a foul smell, dump it and rinse the container. Mold or bacteria can kill your cutting before roots form. Rosemary is tough, but even it won't thrive in dirty water. Be patient—some clippings root in 3 weeks, while others take 6 weeks, especially in cooler conditions.
🪴 Step 4: Transplant Rooted Clippings to Soil
Once roots reach 1-2 inches long, it's time to plant. Fill a 6-inch pot with well-draining potting mix—rosemary hates soggy roots. Make a hole twice as wide as the root ball and place your cutting at the same depth it was growing in water. Gently firm the soil around the base to eliminate air pockets.
Water lightly to settle the soil, then place the pot in bright, indirect light for a week to help it adjust. After that, move it to full sun (at least 6 hours daily). I like to mist the leaves occasionally during the first two weeks to reduce transplant shock. Keep the soil slightly dry between waterings—rosemary prefers drought conditions once established.
☀️ Step 5: Care for Your New Rosemary Plants
After two weeks, your new rosemary should look perky and start growing fresh leaves. Water when the top inch of soil feels dry—overwatering is the #1 killer of young rosemary. Feed with a balanced liquid fertilizer (like 10-10-10) once a month during the growing season to encourage bushy growth.
Pinch back the tips of new growth to encourage branching. If your plant gets leggy, trim it back by ⅓ to promote fuller growth. With proper care, your water-propagated rosemary will thrive for years—just like the plant you clipped from! Real talk: You'll have more rosemary than you know what to do with in no time.
Tips & tricks for perfect rosemary propagation
Here's what nobody tells you about turning kitchen scraps into thriving rosemary plants.
Selection Tip: The 4-6 inch length requirement isn't just arbitrary—it ensures enough energy reserves for root development. I've found that stems with at least 3-4 leaf nodes (where leaves meet the stem) root most reliably. If your clipping has fewer, don't worry—just give it a little extra time in the water. The newest growth is key because older, woody stems have less energy to dedicate to root formation.
The Humidity Hack: That plastic bag greenhouse effect works wonders, but here's the secret: leave it slightly loose—you want moisture trapped, not a sealed environment that could promote mold. I use a rubber band to create a loose tent, allowing just enough airflow to prevent bacterial growth while maintaining humidity. This balance is crucial during those first 2-3 weeks when roots are forming.
Root Development Watch: The 2-3 week window for root hairs to appear can feel like forever, but trust the process. I've noticed that cooler homes (below 65°F) often need the full 6 weeks, while warmer environments (70-75°F) can see roots in as little as 3 weeks. The gentle tug test is your best friend—if the stem resists even slightly, roots are forming. If it slides right out, give it another week.
Transplant Timing: Waiting until roots reach 1-2 inches might feel like waiting forever, but this size ensures your cutting has enough roots to establish itself in soil. I've made the mistake of transplanting too early, and those delicate roots break easily. Once you see that 1-2 inch length, your plant is ready to graduate from water to soil—just handle it gently to avoid root damage.
Pro Tips for What To Do With Rosemary Clippings
- Here's what nobody tells you about turning kitchen scraps into thriving rosemary plants.
- Selection Tip: The 4-6 inch length requirement isn't just arbitrary—it ensures enough energy reserves for root development.
- The Humidity Hack: That plastic bag greenhouse effect works wonders, but here's the secret: leave it slightly loose—you want moisture trapped, not a sealed environment that could promote mold.
Frequently asked questions
Got questions about rosemary clippings? You’re not alone!
Here are answers to the most common ones—so you can make the most of every sprig, whether you’re propagating, cooking, or composting.
Can I regrow rosemary from clippings in water?
Rosemary roots easily in water—just place 3–4-inch clippings in a jar with fresh water, changing it every 2–3 days. Keep the jar in bright, indirect light (like a sunny windowsill). Roots should appear in 2–4 weeks. Once rooted, transplant to soil for a thriving new plant.
How long does it take for rosemary clippings to root in soil?
If you skip water and plant directly in soil, roots take 4–6 weeks to form. Use a well-draining mix (like potting soil + perlite), keep it lightly moist, and place the cutting in a warm spot with bright, indirect light. Patience pays off—your rosemary will reward you with fresh growth!
What’s the best way to use rosemary clippings in cooking?
Fresh rosemary clippings are a game-changer! Best uses:
- Chop finely and sprinkle over roasted potatoes, meats (like chicken or lamb), or pizza dough.
- Add whole sprigs to soups, stews, or marinades (remove before eating).
- Infuse olive oil by steeping sprigs in warm oil for 1–2 hours—perfect for dipping bread!
Pro tip: Store clippings in a jar with a damp paper towel and plastic wrap in the fridge for up to a week.
Can I compost rosemary clippings?
Yes! Rosemary breaks down slowly in compost, so chop it into smaller pieces first. Avoid overloading your pile—mix it with nitrogen-rich greens (like grass clippings) for balance. If your pile is too dry, the woody stems may take longer to decompose. Bonus: The aroma will make your compost smell amazing!
Why won’t my rosemary clipping root?
If your cutting isn’t rooting, check these fixes:
- Temperature: Rosemary needs warmth (70°F+). Move it away from drafts or cold windows.
- Moisture: Overwatering rots cuttings; underwatering stalls growth. Keep soil/water consistently damp (not soggy).
- Light: Too little light = weak roots. Place near a sunny window or use a grow light.
- Cutting health: Use healthy, disease-free stems (avoid flowered or yellowing sprigs).
Try again with fresh clippings—sometimes it just takes a few attempts!
Wrapping up and next steps
Rosemary clippings are more versatile than you think—whether you’re regrowing a thriving plant, boosting your kitchen with homemade seasonings, or crafting natural remedies, every snip has potential! 🌱 With just a few simple steps, you can turn scraps into lush greenery, aromatic oils, or even delicious infusions. Don’t toss those clippings—give them new life!
Ready to put your new skills to work? Pick one idea from this guide and try it this weekend! Whether you’re a gardening newbie or a seasoned green thumb, there’s always room to grow—literally. Happy repurposing! 🌿