
Propagation
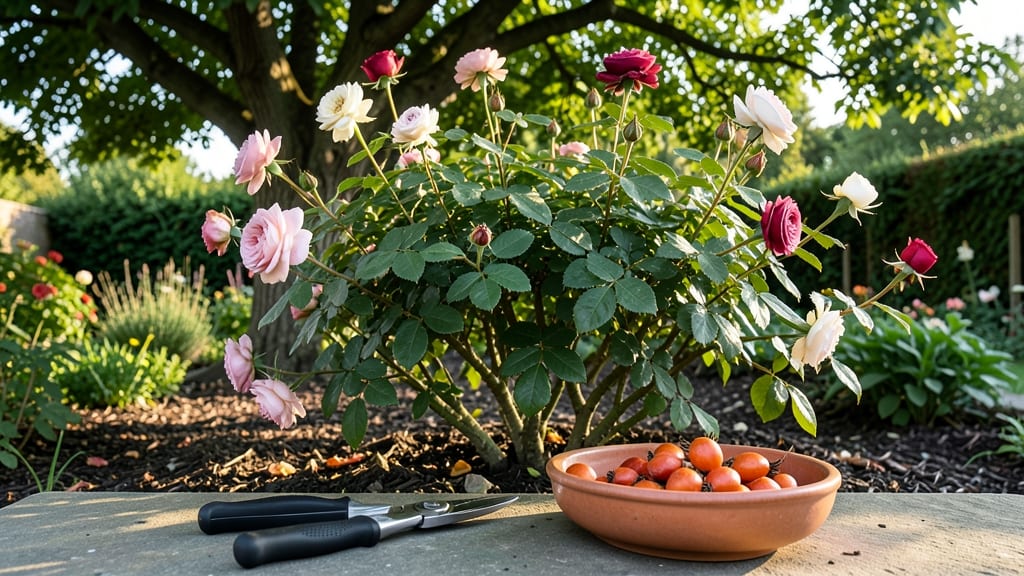
Learn how to get rose seeds from flower by starting with those little red hips you’ve been ignoring—then turn them into thriving plants with just patience and a few simple tools. 🌱 Most hybrid roses won’t produce true-to-type seeds, but wild species and heirlooms can yield surprising results if you follow the right steps.
You’ll need a pair of clean scissors, a paper bag for drying, and a cool, dark spot for stratification. The key is collecting mature hips (they’ll turn deep red or orange) and letting them dry completely before cracking them open.
Store the seeds in a sealed container in the fridge for 6-8 weeks—this mimics winter and breaks dormancy.
Germination takes time—3-6 months—but the reward is worth it. Tiny seedlings will emerge with delicate leaves, and with proper care, they’ll grow into hardy plants. Even if the first batch doesn’t thrive, you’ll learn what works for your climate and roses.
For non-seed-producing roses, try grafting or layering instead. But if you love the idea of growing roses from seed, this method is foolproof for species roses and a fun experiment for hybrids. Let’s get those seeds ready!
📚 In This Guide
- What you need
- Instructions
- Tips and common mistakes
- Wrapping up and next steps
What you need
- ● Mature rose hips: Collect fully ripe rose hips (the bulbous fruit that forms after blooms) from healthy, disease-free roses. Aim for 5–10 hips per batch for best results.
- ● Sharp scissors or pruners: Sterilized tools to harvest hips without damaging the plant.
- ● Paper towels or coffee filters: For drying seeds (use 2–3 sheets per batch).
- ● Small bowl or container: To hold seeds while cleaning (glass or ceramic works best).
- ● Water: Room-temperature, chlorine-free water (let tap water sit for 24 hours if unsure).
- ● Plastic bag or airtight container: For seed stratification (e.g., a quart-sized zip-top bag).
- ● Refrigerator: A cool (34–40°F) spot to mimic winter conditions (most fridges work!).
- ● Seed-starting mix: A sterilized, well-draining mix (e.g., 50% peat moss + 50% perlite or store-bought seedling soil).
- ● Small pots or trays: With drainage holes (e.g., 2–3 inch pots or a seed tray with cells).
- ● Spray bottle: For gentle watering to avoid disturbing seeds.
- ● Hydrogen peroxide (3%): 1 tsp per cup of water to sterilize seeds and prevent mold.
- ● Plant labels: To track seed varieties (especially if mixing types!).
- ● Grow lights or sunny windowsill: For seedlings (roses need 6+ hours of light/day).
- ● Humidity dome or plastic wrap: To retain moisture while seeds germinate.
- ● Journal/notebook: To log progress (e.g., stratification start date, germination timeline).
Step-by-step instructions for extracting rose seeds from flowers
Here's how I turn spent rose blooms into germination-ready seeds—no fancy tools needed.
🌿 Step 1: Collect and Prepare the Rose Hip
Wait until the rose bloom has fully wilted and the petals have fallen off naturally. This usually takes about 2-3 weeks after flowering. The seed pod, called a rose hip, will form at the base of the bloom and turn a deep red or orange color when ready.
Gently twist the rose hip from the stem—don't pull too hard or you might damage the plant. Place the hips in a paper bag and let them dry indoors for about 1-2 weeks. You'll know they're ready when the skin becomes slightly wrinkled and the seeds inside rattle when you shake the hip.
✂️ Step 2: Extract the Seeds
Once the hips are dry, cut them open lengthwise with a small knife or scissors. Inside, you'll find small, flat seeds surrounded by a pulpy interior. Carefully separate the seeds from the pulp—some may still be attached to the inner membrane. Place the seeds on a clean paper towel to air-dry for another 24 hours.
Here's the thing—rose seeds are notoriously slow to germinate. To improve your chances, I recommend storing them in a sealed container in the refrigerator for 3-4 months to break their dormancy. This mimics winter conditions and tricks them into thinking it's time to grow.
🌱 Step 3: Prepare Seeds for Planting
After the cold stratification period, remove the seeds from the refrigerator and let them sit at room temperature for 24 hours before planting. Fill small pots with a well-draining seed-starting mix—just enough to hold the seeds without compacting.
Plant the seeds about ¼ inch deep, spacing them about 1 inch apart. Lightly cover them with soil and mist the surface with water until evenly damp. Place the pots in a warm, sunny spot or under a grow light. Germination can take anywhere from 2-6 weeks, so be patient.
Keep the soil consistently moist but not soggy—overwatering at this stage can cause the seeds to rot. Once the seedlings emerge, thin them to the strongest one per pot. These young roses will take 2-3 years to bloom, but the wait is worth it for the unique, disease-resistant plants you'll grow.
Tips & tricks for perfect rose seed extraction
Here's what nobody tells you about turning rose blooms into thriving plants—these little details make all the difference.
Timing Secret: The 2-3 week wait for wilting might feel long, but patience here prevents premature seed extraction. If you cut hips too early, the seeds won't be fully developed. I've learned this the hard way—green hips yield seeds that won't germinate. Look for that deep red/orange color as your green light.
Seed Handling: When separating seeds from pulp in Step 2, work gently—those tiny seeds bruise easily. I use a damp paper towel to wipe away any remaining pulp after the 24-hour drying period. This extra step removes residual sugars that can attract mold during cold stratification. Think of it as giving your seeds a spa treatment before their big growth adventure.
Cold Stratification: Don't skip the 3-4 month refrigerator period! This mimics winter conditions that nature would provide. I store my seeds in a small plastic bag with a damp paper towel to maintain moisture. Place a label with the date—trust me, you'll forget when you tuck them away in the back of the fridge.
Planting Depth: That ¼-inch planting depth might seem shallow, but rose seeds need air circulation. Too deep and they'll suffocate before germinating. I use a toothpick to make tiny holes in the soil—it gives me precise control over that shallow planting. And remember, the 1-inch spacing gives roots room to establish without competing for nutrients.
Pro Tips for Get Rose Seeds From Flower
- Here's what nobody tells you about turning rose blooms into thriving plants—these little details make all the difference.
- Timing Secret: The 2-3 week wait for wilting might feel long, but patience here prevents premature seed extraction.
- Seed Handling: When separating seeds from pulp in Step 2, work gently—those tiny seeds bruise easily.
Frequently asked questions
Got questions about harvesting rose seeds? You’re not alone—germinating seeds from roses can feel tricky at first! Below, we’ve rounded up the most common questions (and answers) to help you avoid pitfalls and succeed with your rose propagation.
Can I get seeds from any rose flower?
Not all roses produce viable seeds. Hybrid teas, floribundas, and grandifloras often yield sterile seeds, while wild roses, climbers, and shrub roses (like Rosa rugosa) are your best bets. Look for hip-shaped seed pods after flowering—these are your green light!
How long do I need to wait before harvesting seeds?
Patience is key! Wait until the rose hips turn fully brown and slightly soft (usually 6–8 weeks after flowering). If you harvest too early, seeds won’t be mature; too late, and they may shrivel. Pro tip: Squeeze gently—if the hip gives way easily, it’s ready!
What if my seeds don’t sprout? Troubleshooting tips?
Seeds might fail to sprout due to dormancy, poor stratification, or old seeds. Try these fixes:
- Stratify longer: Extend cold treatment to 8–12 weeks for stubborn seeds.
- Check moisture: Overwatering can rot seeds; keep soil lightly damp (not soggy).
- Test viability: Soak seeds in water for 24 hours—if they sink, they’re likely viable!
Do rose seedlings grow into the same flower?
Probably not! Seed-grown roses are heirloom varieties—often wild-type or reverting to ancestral traits. If you want the exact parent plant, use grafting or buy certified seeds. For fun experiments, though, let nature surprise you!
What’s the best time of year to start?
For outdoor planting, aim for late winter or early spring (after the last frost). If starting indoors, you can begin 8–10 weeks before your last frost date. Seedlings need time to harden off—don’t rush! Bonus: Collect hips in fall for a head start.
Wrapping up and next steps
You’ve now unlocked the secret to growing your very own roses from seeds—what an exciting journey! 🌱 With just a little patience and care, you can nurture those tiny seeds into beautiful blooms that reflect your unique touch.
The best part? You’re not just saving money; you’re creating a legacy of roses that carry your personal story.
Ready to take the next step? Start by planting those germinated seeds in well-draining soil and watch them grow into thriving plants. Happy gardening!