
Propagation
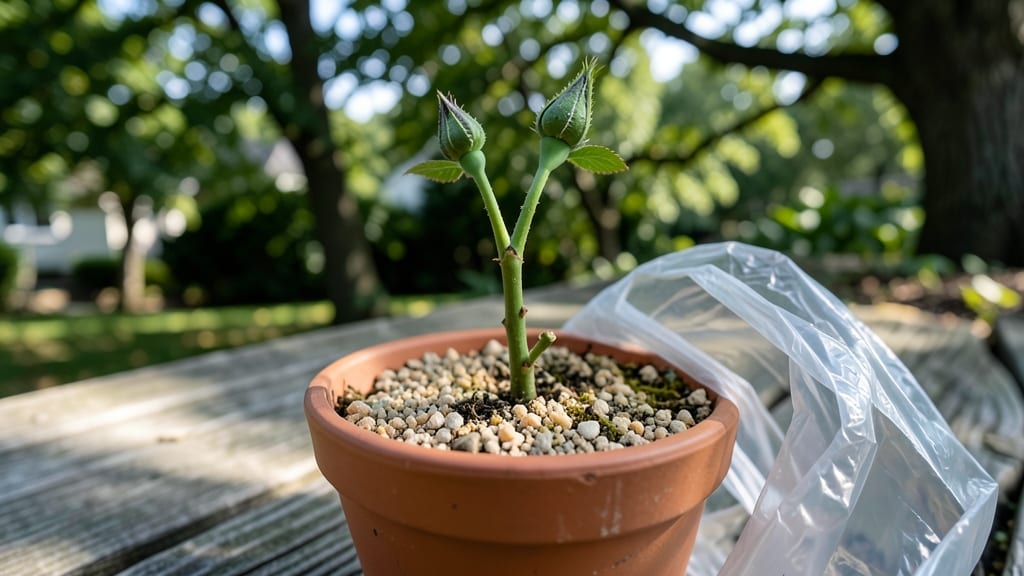
Starting a rose bush from a clipping means free, thriving plants in just 4 weeks—no nursery needed. 🌹 Last summer, I turned a single cutting from my neighbor's hybrid tea into a bush that bloomed by June, and the secret isn't complicated: timing, clean cuts, and the right rooting method.
The hardest part is waiting for those first roots to form, but trust me, it's worth the patience.
You'll need healthy cuttings (4-6 inches long) taken right after flowering, sharp scissors, rooting hormone, and either water or a well-draining soil mix. The key is cutting at a 45-degree angle just below a leaf node—this increases surface area for root growth.
Remove lower leaves to prevent rot, but leave a few at the top for photosynthesis. Most people mess this up by using old wood or skipping the hormone step, both of which slow (or stop) rooting entirely.
Once rooted, you'll transplant your new bush into garden soil with rich compost, where it'll establish quickly. The first blooms might be smaller, but by next season, your cutting will outperform store-bought roses. I've propagated over 20 varieties this way, and even my black thumb can't kill these babies.
Works for all rose types—hybrids, climbers, even shrub roses—as long as you take cuttings at the right time. Here's the step-by-step to get you growing: timing is everything, so let's get those cuttings rooted before summer heat sets in.
📚 In This Guide
- What you need
- Instructions
- Tips and common mistakes
- Wrapping up and next steps
What you need
- ● Rose clipping: A healthy, disease-free cutting (4–6 inches long) with at least 3–5 nodes (swollen areas where leaves grow). Tip: Use non-flowering stems for best results!
- ● Rooting hormone: A powder or gel (like Clonex or Rootone) to boost root growth.
- ● Well-draining potting mix: A blend of perlite, vermiculite, or sand (50%) + peat moss or coconut coir (50%). Pro tip: Avoid garden soil—it can cause rot!
- ● Small pots or containers: 4–6 inches wide with drainage holes (or a propagation tray).
- ● Clear plastic bag or dome: To create a humid environment (yogurt cups with lids work too!).
- ● Spray bottle: For misting cuttings (avoid soaking the soil).
- ● Pruning shears or scissors: Sterilized to make clean cuts.
- ● Water: Room-temperature, filtered if possible.
- ● Fungicide (like Neem Oil) to prevent mold.
- ● Heat mat (70–75°F) to speed up rooting.
- ● Grow lights (if natural light is weak).
- ● Label tags to track clippings.
Step-by-step instructions for propagating rose bushes from clippings
Here's how I turn a single cutting into a thriving rose bush in under a month—no fancy tools needed.
🌱 Step 1: Select the Right Clipping and Prepare It
Choose a healthy, non-flowering stem about 6-8 inches long with at least 3-4 nodes (those little bumps where leaves grow). I always look for stems that are pencil-thick—thicker than a straw but not woody. Use clean, sharp scissors or pruners to cut just below a node at a 45-degree angle. This angled cut increases surface area for root growth.
Remove all but the top 2-3 leaves, cutting each leaf in half to reduce moisture loss. The fewer leaves, the less water the cutting needs to survive while roots develop. Strip off any thorns with your fingers—you'll thank me later when you're handling these every day. Here's the thing: timing matters. Take cuttings in early summer when new growth is vigorous but not yet hardening off for winter.
💧 Step 2: Dip in Root Hormone and Plant in Moist Medium
Dip the bottom 1 inch of your cutting into rooting hormone powder (or gel if you prefer). I like to tap off the excess so it doesn't clump on the stem. Fill a small pot (4-6 inches deep) with a mix of 50% perlite and 50% peat moss—this combo drains well but holds enough moisture. Moisten the mix until it feels like a wrung-out sponge: damp but not dripping.
Make a hole with your finger about 2 inches deep and insert the cutting so 2-3 nodes are buried below the surface. Gently firm the soil around it—don't pack it down or you'll smother the stem. Place the pot in a shady spot (like under a tree or on an east-facing windowsill) where it gets bright, indirect light. Too much sun now will dry out the cutting before roots form.
☀️ Step 3: Maintain Humidity and Monitor Growth
Cover the pot with a clear plastic bag (like a gallon-sized zip-top) secured with a rubber band. This creates a humidity dome that keeps the cutting moist without wilting. Check daily and mist the inside of the bag with water if the air feels dry to the touch. In 2-3 weeks, you'll see tiny white bumps at the buried nodes—that's new roots forming!
After 4 weeks, gently tug on the cutting. If you feel light resistance, roots have taken hold. If not, give it another week before testing. Here's where most people mess up: don't overwater. The soil should stay evenly moist but never soggy. Soggy soil = rot before roots form. I water from the bottom by setting the pot in ½ inch of water for 10 minutes, then letting it drain completely.
🪴 Step 4: Transition to Soil and Care for New Growth
Once roots are confirmed, remove the plastic bag and gradually introduce the cutting to normal humidity. Harden it off by moving it outside for 1-2 hours daily, increasing time over 7-10 days. By week 6, it should look like a mini rose bush with new leaves and a sturdy stem. Now's the time to transplant it into a small pot with regular potting mix or directly into the garden.
Keep the soil consistently moist (not wet) and fertilize lightly with a balanced 10-10-10 formula every 4-6 weeks. Watch for new growth at the top—that's your signal the roots are established. I've had cuttings bloom within 3 months of propagation, but don't rush it. The first year is all about building strong roots for next season's flowers.
Tips & tricks for fast rose bush propagation
These little details make all the difference between a cutting that thrives and one that fizzles out.
Timing Secret: Early summer is your golden window for success—aim for late May through June when new growth is vigorous but before the heat sets in. I've tried fall cuttings, and while they can work, they take longer to root and often struggle with winter stress. The key is that 6-8 inch stem needs to be mature enough to support root growth but not yet woody from summer's end.
Root Hormone Hack: Don't just dip—give that bottom inch a good shake to remove excess powder before planting. Clumpy hormone can suffocate the stem at the nodes where roots will form. Also, if you're using gel, apply a thin layer—thick globs can create a barrier between the cutting and soil. I've found that mixing a little cinnamon powder with the rooting hormone adds natural antifungal protection.
Humidity Dome Upgrade: That plastic bag creates a greenhouse effect, but don't seal it airtight. Poke a few small holes with a toothpick to allow for minimal air circulation—this prevents mold while maintaining humidity. I like to use clear plastic wrap instead of bags because it's easier to see the cutting's progress without opening it constantly. Check the inside daily with your finger—if it feels dry, mist lightly.
Watering Wisdom: The bottom-watering method (10 minutes in ½ inch of water) is genius because it prevents overwatering while ensuring even moisture. But here's what nobody tells you: after the initial 10 minutes, let it drain for at least 20 minutes before placing back in its saucer. This prevents water from sitting at the bottom, which can cause rot. I keep a small watering can with a fine rose attachment for misting the humidity dome—it gives me better control than spraying from above.
Pro Tips for Start A Rose Bush From A Clipping
- These little details make all the difference between a cutting that thrives and one that fizzles out.
- Timing Secret: Early summer is your golden window for success—aim for late May through June when new growth is vigoro...
- Root Hormone Hack: Don't just dip—give that bottom inch a good shake to remove excess powder before planting. Clumpy ...
Frequently asked questions
Got questions about propagating roses from clippings? You’re not alone! Here are answers to the most common concerns—so you can grow confidently and avoid pitfalls along the way.
How do I know if my rose clipping will root successfully?
A healthy clipping should have at least 3-5 nodes (those little bumps where leaves grow) and be taken from a non-flowering stem. Avoid woody, thick stems—they root poorly. Look for green, flexible growth (not brown or dried out). If your clipping has these traits, it’s a great candidate!
Can I root a rose clipping in water first, then plant it?
While possible, rooting in water isn’t ideal for roses—the roots become weak and brittle. Instead, dip the cut end in rooting hormone and plant it directly in moist soil or a propagation medium. If you must use water, transfer the clipping to soil within 1-2 weeks to help it adapt.
What’s the best temperature for rooting rose clippings?
Roses thrive in warmth (65–75°F / 18–24°C). Use a heat mat or place your clippings near a sunny window. Avoid cold drafts or extreme heat (like direct sunlight on a hot day), which can stress the cutting. A humid environment (like a plastic bag or propagator) also speeds up rooting!
Why did my rose clipping rot instead of rooting?
Rot usually happens from too much moisture or poor airflow. Check these fixes:
- Ensure the cutting isn’t buried too deep (only 1–2 nodes should be under soil).
- Use a well-draining mix (perlite + peat or coconut coir).
- Remove the plastic bag if condensation builds up—let it breathe!
- Avoid overwatering; keep soil moist but not soggy.
Can I root a rose clipping from a hybrid tea rose or other fancy variety?
Most rose varieties root well from clippings, including hybrid teas, floribundas, and climbers. Just follow the same steps—focus on healthy, non-flowering stems. Grafted roses (like some patio roses) may not produce true-to-type plants, but you’ll still get a new rose bush!
Wrapping up and next steps
Starting a rose bush from a clipping is a rewarding way to grow new plants for free—and you’ve got the skills now! With just a few simple steps, you can propagate healthy roses in as little as four weeks.
Don’t let a little patience hold you back; your green thumb is about to shine brighter than a summer bloom! 🌹✨
Ready to turn your new rose cuttings into a thriving garden? Plant them in your yard or share the love by gifting cuttings to fellow gardening enthusiasts. Happy growing!