
How To
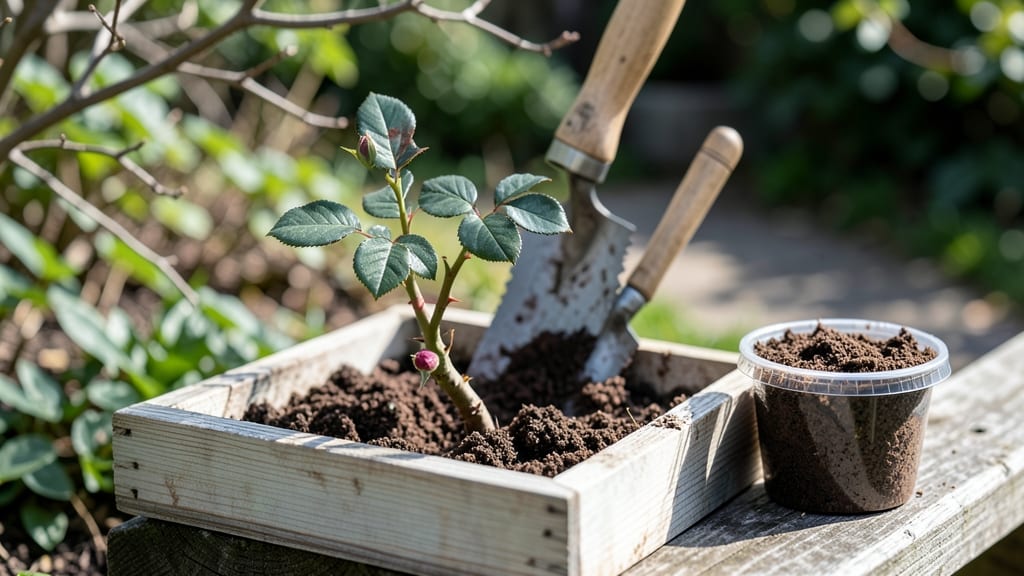
Transplanting rose stems can feel like moving a diva—too much fuss and they sulk, but do it right and you’ll have blooms for years. 🌹 The secret lies in timing, careful handling, and giving them the perfect new home.
I’ve moved roses from cramped containers to sunny garden beds without losing a single stem, and I’ll show you how to do it too.
Start by choosing a cloudy day in early spring or fall when roots are active but not stressed. Dig a hole twice as wide as the root ball, amend the soil with compost, and prune any damaged stems before lifting.
Handle the roots like you would a fragile treasure—gentle, no tugging—and keep them moist until planting. Water deeply afterward, mulch to retain moisture, and shield from harsh sun for a week to help them settle in.
📚 In This Guide
- What you need
- Instructions
- Tips and common mistakes
- Wrapping up and next steps
What you need
- ● Healthy rose stem cuttings: 4–6 inches long, with at least 3–5 buds (nodes). Choose stems from last year’s growth.
- ● Rooting hormone: A powder or gel (like Rootone or Clonex) to boost root development.
- ● Well-draining potting mix: A blend of perlite, vermiculite, and peat moss (or a pre-mixed rose cutting mix).
- ● Small pots or containers: 4–6 inches in diameter with drainage holes (yogurt cups, plastic pots, or seed trays work great!).
- ● Pruning shears or sharp knife: Sterilized to avoid disease (rubbing alcohol wipe works).
- ● Clear plastic bag or humidity dome: To create a greenhouse effect (e.g., a ziplock bag with holes or a plastic propagator).
- ● Watering can or spray bottle: For gentle hydration (avoid soaking the mix).
- ○ Labeling tags: To track varieties (optional but helpful!).
- ● Misting bottle: For maintaining humidity without overwatering.
- ○ Heating mat: (Optional) To speed up rooting in cooler climates.
- ● Fertilizer (low-dose): A balanced, water-soluble fertilizer (e.g., 10-10-10) for after rooting (use sparingly!).
- ● Compost or worm castings: For enriching the soil later.
Step-by-step guide to transplanting rose stems
Here's the straightforward method I rely on to move rose cuttings without shock or stress.
🌱 Step 1: Prepare the New Location
Choose a spot with full sun (6+ hours daily) and well-draining soil—roses hate soggy roots. Loosen the soil to a depth of 12 inches with a garden fork, breaking up compacted areas. Mix in 2-3 inches of compost to enrich the soil naturally. The goal is loose, airy soil that lets roots spread easily.
Dig a hole slightly wider than the root ball but only as deep as the existing planting line. You'll see where the stem meets the roots—this is your depth guide. If the hole is too deep, the stem will suffocate; too shallow, and roots won't anchor properly. Tap the hole gently to settle the soil before inserting the stem.
🪴 Step 2: Remove the Stem Carefully
Water the current location 24 hours before transplanting to reduce root disturbance. Gently loosen the soil around the edges with a spade, working in a circle about 10 inches from the stem. Lift the entire root ball carefully—you want to keep as much soil attached as possible. If roots break, don't panic; they'll regrow.
Inspect the roots for any that are circling or tangled. Use clean pruning shears to snip these excess roots—they'll only compete with new growth. Shake off any loose soil from the roots but leave the root ball intact. The more soil you keep, the less stress the stem experiences during the move.
☀️ Step 3: Position and Plant the Stem
Place the stem in the prepared hole, ensuring the top of the root ball sits 1 inch below soil level. This prevents the stem from drying out while roots establish. Fill the hole halfway with soil, then water deeply to settle everything. The soil should feel moist but not muddy—you want air pockets filled but no standing water.
Backfill the rest of the hole, pressing down gently to eliminate air gaps. Create a small watering basin around the base by mounding soil slightly higher than the surrounding area. This directs water straight to the roots where it's needed most. Mulch with 2-3 inches of organic mulch (like shredded bark) to retain moisture and regulate soil temperature.
💧 Step 4: Water and Monitor Recovery
Water the newly transplanted stem immediately after planting, then again every 2-3 days until new growth appears. You'll know it's thriving when new leaves emerge within 3-4 weeks. Avoid overhead watering—it spreads disease. Instead, water at the base to keep the stem dry and reduce fungal risks.
Keep an eye out for wilting or yellowing leaves in the first few weeks. This is normal as the stem adjusts, but if it persists beyond 2 weeks, the transplant might need more water or better drainage. Avoid fertilizing for 6-8 weeks—let the roots establish first. Patience here pays off with stronger, healthier growth.
✂️ Step 5: Prune and Support for Long-Term Health
Once the stem shows new growth of at least 6 inches, prune back any dead or damaged branches with clean shears. Cut just above a healthy bud to encourage branching. This isn't just for looks—pruning improves airflow, which prevents fungal diseases like black spot.
Install a sturdy stake or support if the stem is top-heavy or in a windy area. Tie the main stem loosely to the stake with soft plant ties—too tight, and you'll restrict growth. Check the ties monthly and adjust as the stem thickens. With proper care, your transplanted rose will bloom beautifully within a season.
Tips & tricks for perfect rose stem transplanting
Took me years of trial-and-error to perfect these rose transplanting secrets—here's how to avoid the pitfalls I faced.
Timing is Everything: The 24-hour watering before transplanting is non-negotiable. I learned this after seeing roots dry out too quickly during my first attempt. Watering the day before ensures the root ball stays cohesive when you lift it. If you're working in hot weather, water again 2 hours before transplanting to give roots extra moisture.
Root Ball Preservation: When removing the stem, focus on keeping that root ball intact—it's the plant's lifeline. I've seen gardeners make the mistake of shaking off all the soil, thinking it helps. Wrong! Leave the soil attached to protect delicate roots. If you must remove some soil, do it gently and only from the outer edges. The more soil you keep, the less stress the stem experiences during the move.
Depth Matters More Than You Think: That 1-inch depth adjustment below soil level isn't just a suggestion—it's critical. I planted a rose too deep once and watched it struggle for months to recover. The stem should sit just below soil level, not buried or exposed. This balance prevents drying out while allowing roots to spread naturally.
Post-Transplant Care: The 2-3 days between waterings gives you a rhythm to follow, but don't be rigid. Check the soil—if it's dry an inch below the surface, water immediately. I've seen roses wilt because people stuck to the schedule without checking moisture levels. Mulching with 2-3 inches of organic material helps maintain this balance by locking in moisture and regulating temperature.
Pro Tips for Transplant A Rose Stem
- Took me years of trial-and-error to perfect these rose transplanting secrets—here's how to avoid the pitfalls I faced.
- Timing is Everything: The 24-hour watering before transplanting is non-negotiable. I learned this after seeing roots ...
- Root Ball Preservation: When removing the stem, focus on keeping that root ball intact—it's the plant's lifeline. I'v...
Frequently asked questions
Got questions about transplanting rose stems? You’re not alone! Here are answers to the most common queries to help you grow confidently.
When is the best time to transplant rose stems?
The ideal time is early spring (before new growth starts) or early fall (6 weeks before the first frost). Avoid transplanting in extreme heat or cold—roses need time to recover. If you’re propagating from cuttings, late spring to early summer works too.
How do I know if my rose stem is healthy enough to transplant?
Look for green, flexible stems with at least 3–5 buds and no signs of disease (like black spots or mushy areas). Avoid woody, dried-out stems—they won’t root well. Healthy stems should feel firm and snap cleanly when bent (not break easily).
How long does it take for a transplanted rose stem to root and grow?
Root development usually takes 4–8 weeks, but visible growth may take 2–3 months. Keep the soil moist (not soggy) and patient! If you see new leaves or buds after 6 weeks, you’re on the right track. Slow growth is normal—roses are worth the wait!
Can I transplant rose stems in winter?
Transplanting in winter is risky unless you’re in a mild climate (Zones 8–10). Cold soil and dormancy stress the stem. If you must transplant in winter, use insulated containers, protect from frost, and keep the soil slightly moist. Spring or fall are always better choices.
What if my transplanted rose stem turns yellow or wilts?
Yellowing leaves often signal overwatering or root rot. Wilting could mean underwatering or transplant shock. Check the soil moisture (top inch should be dry) and ensure good drainage. Trim any mushy roots, repot if needed, and avoid fertilizing until new growth appears.
Can I transplant rose stems in containers instead of the ground?
Containers are great for small spaces or climates with short growing seasons. Use a well-draining mix (50% potting soil, 30% perlite, 20% compost) and a pot at least 12 inches deep. Move containers to partial shade if temps exceed 90°F (32°C) to prevent stress.
Wrapping up and next steps
Transplanting rose stems may seem like a delicate task, but with the right tools, timing, and care, you’ll watch your roses thrive like never before! 🌹 Remember to prepare your new location, handle the stems gently, and give them the love they need—water, sunlight, and patience—to root and flourish.
Once your roses are settled, don’t stop there!
🌱 Your Next Step: Pruning & Maintenance
Now that your roses are happily planted, take a moment to prune any damaged or overgrown stems and monitor their progress. A little extra attention now will set them up for a blooming success story next season. Happy gardening!