
Pruning
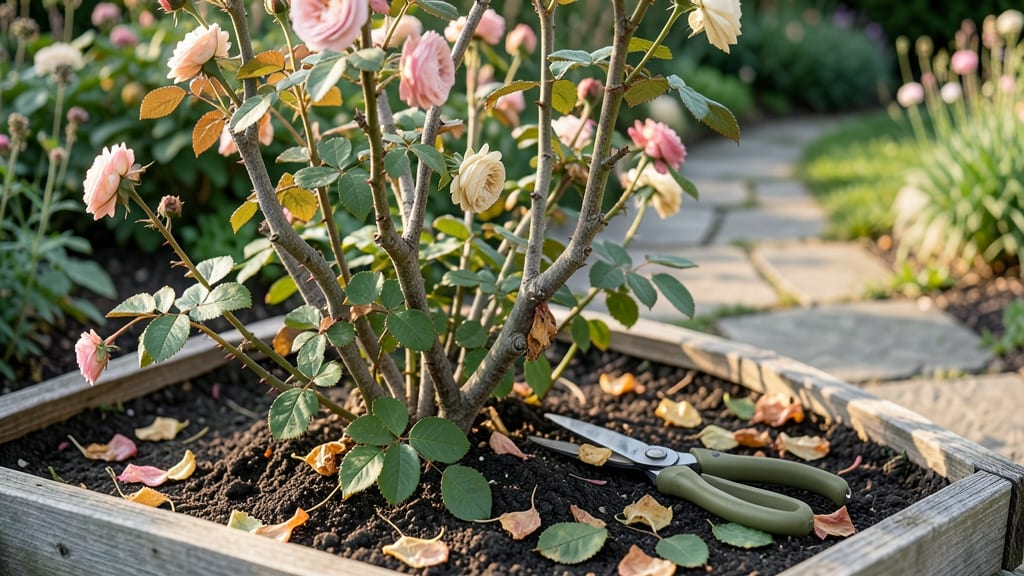
Autumn is the perfect time to prune bush roses—it’s not too late to shape them for next year’s showstopping blooms. 🌹 I’ve learned that cutting back now helps roses survive winter and bounce back stronger in spring.
The key is timing: aim for late October to early November, after the first frost but before hard freezes. You’ll need sharp pruners, a clean cutting surface, and a clear goal: remove dead, diseased, or crossing branches first. Then, thin out crowded stems to improve airflow.
This isn’t about drastic cuts—just strategic shaping. The result? A rose bush that’s healthier, more vigorous, and ready to burst with color come spring. Regional differences matter: in colder climates, prune lightly to avoid winter damage, while milder areas can handle slightly heavier cuts.
Avoid pruning too early—roses need time to harden off before winter. The payoff? Fewer pests, stronger canes, and more blooms next season. This method works for all bush roses, from Knock Outs to Floribundas. Grab your tools and let’s get pruning—your roses will thank you!
📚 In This Guide
- What you need
- Instructions
- Tips and common mistakes
- Wrapping up and next steps
What you need
- ● Pruning shears: Bypass pruners (sharp, clean, and 5-7 inch blades) for clean cuts. Quantity: 1 pair (or 2 if pruning large bushes).
- ● Loppers: Bypass or anvil type (for thicker stems, 18-24 inch handles). Quantity: 1 pair.
- ● Pruning saw: Hand saw with curved blade (for stubborn, thick branches). Quantity: 1.
- ● Gloves: Heavy-duty, cut-resistant (protect against thorns and debris). Quantity: 1 pair.
- ● Disinfectant: 70% isopropyl alcohol or bleach solution (1 part bleach to 9 parts water) to sterilize tools between cuts. Quantity: Small bottle or spray.
- ● Rubbing alcohol or vinegar: For quick tool clean-up post-pruning.
- ● Garden twine or tape: To mark branches for removal (if unsure).
- ● Sharpie or label markers: For labeling cuts (e.g., "Dead" or "Live").
- ● Compost bin or bag: For collecting pruned branches (or mulch them on-site).
- ● Safety glasses: To shield eyes from flying debris.
- ● Knee pads: For comfort during long pruning sessions.
- ● Weather check: Prune on a dry, cool day (avoid rain or extreme heat).
- ● Tool prep: Sharpen blades and disinfect tools before starting.
- ● Safety first: Wear long sleeves/pants to avoid thorn pricks.
- ● Plan ahead: Sketch a rough outline of your bush’s shape before cutting.
Step-by-Step instructions for pruning bush roses in autumn
Here's how to refresh your roses for stronger blooms next spring—no guesswork, just clear steps.
✂️ Step 1: Gather Tools and Assess the Bush
Start with clean, sharp pruning shears and a pair of gloves to protect your hands from thorns. I always disinfect my tools with rubbing alcohol to prevent spreading disease between cuts. Grab a small bucket to collect debris and a permanent marker to label any branches you plan to remove.
Examine your rose bush carefully. Look for dead, diseased, or crossing branches first—these take priority. You'll spot dead wood easily: it's brown, brittle, and doesn't bend. Diseased branches may have black spots or ooze. Mark these with your marker before making any cuts.
✂️ Step 2: Remove Dead and Problematic Growth
Begin by cutting out any dead or diseased branches completely, cutting back to the ground if needed. For crossing branches, remove the one growing inward to allow better airflow. I like to make my first cuts at a 45-degree angle, about ¼ inch above a healthy bud that faces outward on the branch.
Don't worry about being too aggressive here—you're clearing out what's holding your rose back. If a branch is thinner than a pencil, it's probably not worth saving. After removing the obvious problems, step back and assess the shape of the bush. You want an open center that lets light and air reach all parts.
✂️ Step 3: Thin Out Overcrowded Branches
Now focus on thinning the remaining branches to improve airflow and light penetration. Aim to remove about one-third of the oldest wood—these are the thicker, woodier stems that produce fewer blooms. Look for branches that rub against each other or grow inward; these should go.
Make your cuts just above an outward-facing bud, using your marker as a guide if needed. The goal is to create a vase-like shape with the strongest, healthiest branches evenly spaced. You'll notice the bush looks more open and less congested after this step.
✂️ Step 4: Shorten Remaining Branches for Next Year’s Growth
For the branches you're keeping, shorten them by about one-third to encourage new, vigorous growth next spring. Cut just above a bud that faces the direction you want the branch to grow. Avoid leaving stubs—always make clean cuts at the 45-degree angle you practiced earlier.
If a branch has multiple blooms, cut it back to just above the strongest, healthiest bud. This ensures your rose puts energy into producing quality blooms rather than weak, crowded stems. After pruning, your bush should have a balanced, open shape with plenty of room for new growth.
🪴 Step 5: Clean Up and Prepare for Winter
Rake up all the debris from your pruning and dispose of it in the trash—not the compost—since diseased branches can spread pathogens. Give your rose bush one final inspection to ensure no branches are left too long or too short. Water deeply to help the plant recover from the stress of pruning.
Apply a 2-3 inch layer of mulch around the base of the bush, keeping it a few inches away from the stem. This protects the roots from freezing temperatures and retains moisture. Your rose is now ready for winter with a strong foundation for next year’s blooms.
Tips & tricks for pruning bush roses in autumn
Here's what nobody tells you about giving your roses the best possible start for next year.
Tool Prep is Everything: I learned this the hard way after ruining three batches of pruning—sterilizing your tools between every cut prevents spreading disease. Use rubbing alcohol on a paper towel for quick disinfection, and always store your pruning shears in a dry place to keep them sharp. Dull blades crush stems instead of making clean cuts, which stresses the plant. I also keep a small bucket nearby to collect debris; this makes cleanup easier and prevents accidental composting of diseased material.
The 45-Degree Angle Secret: When making cuts in Step 2 and Step 4, that 45-degree angle isn't just for looks—it prevents water from pooling on the cut, which can lead to rot. Think of it like a roof: the cut sheds water away from the stem. Always cut just above a healthy bud facing outward; this ensures new growth emerges in the right direction. If you're unsure which bud is healthiest, look for plump, green buds without cracks or discoloration.
Visualizing the Vase Shape: After thinning branches in Step 3, step back and imagine your rose bush as an inverted vase. The strongest branches should radiate outward from the center, creating a balanced silhouette. The goal is to remove about one-third of the oldest wood—these are the thicker stems that produce fewer blooms. You'll know you're doing it right when the center of the bush opens up, allowing sunlight to reach all parts of the plant.
Mulching Matters: That 2-3 inch layer of mulch in Step 5 isn't just decoration—it's insulation for your rose's roots. Organic mulch like shredded bark or straw breaks down over time, adding nutrients to the soil. Keep it a few inches away from the stem to prevent rot, and avoid piling it too high against the base. In cold climates, you can even add an extra inch of mulch for winter protection.
Pro Tips for Pruning Bush Roses In Autumn
- Here's what nobody tells you about giving your roses the best possible start for next year.
- Tool Prep is Everything: I learned this the hard way after ruining three batches of pruning—sterilizing your tools between every cut prevents spreading disease.
- The 45-Degree Angle Secret: When making cuts in Step 2 and Step 4, that 45-degree angle isn't just for looks—it prevents water from pooling on the cut, which can lead to rot.
Frequently asked questions
Got questions about pruning your bush roses in autumn? You’re not alone—many gardeners want to get it right without risking their plants. Here are answers to the most common concerns, from timing to tools and troubleshooting.
When is the exact best time to prune bush roses in autumn?
The ideal window is after the first hard frost (when roses enter dormancy) but before winter’s deepest freeze. Late November to early December works for most climates. Avoid pruning too early—new growth can’t harden off before winter. Pro tip: If your area has unpredictable weather, wait until this seasonal chart aligns with your zone!
Can I prune bush roses in autumn if I missed spring?
Yes! Autumn pruning is better late than never—just adjust your approach. Focus on removing dead, diseased, or crossing branches first, then thin out 1/3 of the oldest canes to encourage new growth. Skip heavy shaping; save that for spring. Warning: Avoid pruning if your roses are still blooming or have fresh foliage—wait until they’re fully dormant.
What if I prune too late—will my roses die?
Pruning too late (e.g., January or February) won’t kill your roses, but it can stunt spring blooms by delaying dormancy. Late pruning also exposes canes to sunscald or winter dieback. If you must prune late, seal cuts with pruning sealant and mulch heavily. Quick fix: Cover canes with burlap for extra protection.
Should I sterilize my pruners after autumn pruning?
Absolutely!
Sterilizing tools prevents rose diseases (like black spot or powdery mildew) from spreading. Wipe blades with 70% isopropyl alcohol or a 10% bleach-water solution (1 part bleach to 9 parts water) between cuts. Bonus: Store pruners in a dry place or hang them to air-dry—rust is the enemy of sharp tools!
What if my bush roses look too bare after pruning?
Don’t panic! Bush roses need 1/3 to 1/2 of their canes removed to thrive, which can make them look sparse. Focus on structure over aesthetics: Keep 3–5 strong, outward-facing canes for airflow and sunlight. Growth hack: Fertilize with low-nitrogen rose food in early spring to encourage lush regrowth.
| Quick Reference | Do | Don’t |
|---|---|---|
| Timing | After first frost, before deep freeze | Prune when roses are blooming or tender |
| Tools | Sterilize blades; use sharp bypass pruners | Leave cuts jagged or use dull tools |
| Cuts | Angle cuts ¼” above outward-facing bud | Cut too close to bud or leave stubs |
Wrapping up and next steps
Pruning bush roses in autumn is your secret weapon for stronger stems, vibrant blooms, and healthier plants next season!
By removing dead wood, shaping growth, and encouraging airflow, you’re setting the stage for a show-stopping spring and summer. 🌸 With the right tools, timing, and technique, this task becomes a rewarding ritual—one that pays off in lush, thriving roses.
Now that you’re armed with the know-how, roll up your sleeves and get pruning! Grab your shears, step outside, and give your roses the care they deserve. Your future blooms will thank you. 🌿