
Propagation
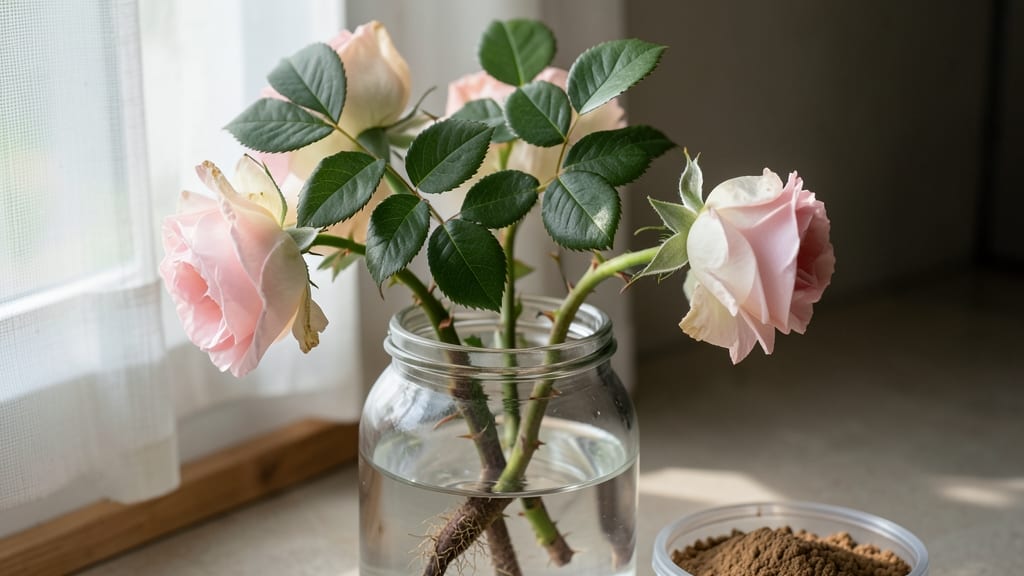
Learn how to propagate roses from a bouquet—that stunning arrangement can become new plants with just water, patience, and a few sharp snips. 🌹 I’ve turned dozens of wilting stems into thriving bushes, and the secret is simpler than you’d think.
Most people assume propagation needs fancy tools or a greenhouse, but this method works with what you already have at home.
The magic happens in a glass jar of water—no soil, no stress. You’ll need healthy stems (look for ones with at least three buds), clean pruners, and a little rooting hormone (optional but helpful).
Within 4-6 weeks, you’ll see roots forming, and by next spring, you could be transplanting little rose bushes that smell just like the ones you bought.
This isn’t just a way to save money—it’s a chance to grow roses that match your favorite bouquet’s exact color and fragrance. The first time I saw roots sprout from a stem I’d almost tossed, I was hooked. Now, every bouquet becomes a potential garden.
Works best in early summer when roses are actively growing, but even winter stems can root with the right care. The key is consistency: change the water every 3-4 days and keep stems out of direct sun. Let’s get those cuttings growing!
📚 In This Guide
- What you need
- Instructions
- Tips and common mistakes
- Wrapping up and next steps
What you need
- ● Fresh rose stems: Healthy, woody stems (about pencil-thick) from your bouquet—avoid wilted or overly soft ones.
- ● Sharp scissors or pruning shears: Clean, sterilized tools to make precise cuts (1 diagonal cut at the base, 1 straight cut above a leaf node).
- ● Clean water: Filtered or room-temperature tap water (let it sit out for 24 hours if chlorinated).
- ● Glass or jar: Large enough to submerge at least 3–4 inches of the stem (mason jars or clean drinking glasses work great!).
- ○ Optional rooting hormone: A gel or powder to boost root growth (e.g., Rootone or Clonex).
- ● Newspaper or paper towels: To line a tray or container for collecting condensation.
- ● Clear plastic bag: To create a mini greenhouse effect and retain humidity.
- ● Small pebbles or marbles: Place at the bottom of the jar to weigh down stems and prevent algae.
- ● Hydrogen peroxide (3%): A few drops in the water to keep it fresh and oxygenated.
- ● Grow lights or sunny windowsill: For indirect light (6+ hours/day) once roots sprout.
- ● Planting soil & pot: Well-draining potting mix (e.g., Miracle-Gro or cactus/succulent blend) for transplanting later.
Step-by-Step instructions for propagating roses from a bouquet
Here's the simple method I've used to root roses from store-bought bouquets—no greenhouse needed.
🌱 Step 1: Select and Prepare Healthy Stem Cuttings
Choose stems that are about 6-8 inches long with at least 3-5 buds (those little bumps where leaves grow). Cut just below a bud at a 45-degree angle using clean scissors or pruners—this gives more surface area for roots to form. Remove all but the top 2-3 leaves to reduce water loss.
Strip off any thorns carefully with your fingers (they'll grow back, but you'll thank me later). Here's the thing—skip any stems with blooms or buds that are already opening. You want fresh, firm growth that hasn't started flowering yet. I like to work with stems from the middle of the bouquet where they're still sturdy and green.
💧 Step 2: Change Water and Add Root Stimulator
Fill a clean glass or jar with room-temperature water until the stem is submerged up to the first set of leaves. Change the water every 2-3 days to prevent bacterial growth—stale water smells funky and slows rooting. I use a small glass for each cutting so I can monitor progress easily.
Add a rooting hormone or a pinch of cinnamon to the water for extra protection. I've found that cinnamon works just as well as commercial products and is safer if you have pets. Place the cuttings in indirect light—too much sun makes the water warm and encourages algae growth, which blocks oxygen for the roots.
☀️ Step 3: Monitor and Encourage Root Growth
After about 2-3 weeks, you'll see tiny white or brown nubs forming at the base of the stem—those are your roots! Keep the water level consistent, adding more as needed without submerging the leaves. You'll know it's working when the stem stays upright in the water instead of floating.
Once roots reach about 1-2 inches long, it's time to plant. I wait until I see good root development before transplanting because fragile roots break easily. Choose a pot with drainage holes and fill with a mix of 50% potting soil and 50% perlite to keep things airy. Water lightly after planting and keep the soil evenly moist.
🌿 Step 4: Transition to Soil and Care for New Plants
Place your newly potted rose in a spot with bright, indirect light for the first week to help it adjust. After that, gradually introduce it to more sunlight—too much too soon causes stress. You'll see new growth within 4-6 weeks if everything's going well.
Here's where it gets fun—watch for the first true leaves to emerge from the buds. These will be smaller and different from the original leaves. Once your rose has established a good root system and new growth, you can fertilize lightly with a balanced rose fertilizer. Don't overdo it—new plants are sensitive to too many nutrients.
Tips & tricks for perfect rose propagation
Real talk: Turning bouquet stems into thriving roses takes patience—but these tricks cut down on guesswork and boost success rates.
Cutting Precision: That 45-degree angle in Step 1 isn't just for looks—it creates more surface area for roots to form. Use a sharp pair of pruners and make the cut just below a bud where the stem is slightly thicker. I've found that stems with 3-5 buds have the best balance of energy reserves for both rooting and future growth.
Water Quality Matters: In Step 2, room-temperature water is key—cold water shocks the stem while warm water encourages bacterial growth. I use filtered water or rainwater if possible, as tap water's chlorine can hinder root development. Change the water every 2-3 days religiously, even if it doesn't look dirty. That's when bacterial growth starts becoming visible.
Lighting Strategy: Indirect light in Step 2 is non-negotiable. I place my cuttings near an east-facing window where they get morning sun but are shielded from harsh afternoon rays. Too much direct light causes the water to warm up, which leads to algae growth that blocks oxygen from reaching the developing roots. A sheer curtain helps diffuse light perfectly.
Root Development Watch: In Step 3, those tiny white nubs appear around week 2-3, but don't rush to transplant just because you see them. Wait until roots reach 1-2 inches—they'll be thick enough to handle the transition to soil. I've seen cuttings with 1/2-inch roots fail during transplanting because they weren't established enough.
Pro Tips for Propagate Roses From A Bouquet
- Real talk: Turning bouquet stems into thriving roses takes patience—but these tricks cut down on guesswork and boost success rates.
- Cutting Precision: That 45-degree angle in Step 1 isn't just for looks—it creates more surface area for roots to form.
- Water Quality Matters: In Step 2, room-temperature water is key—cold water shocks the stem while warm water encourages bacterial growth.
Frequently asked questions
Got questions about turning your bouquet into a thriving rose garden? We’ve got answers! Here are some of the most common concerns—and solutions—to help you propagate like a pro.
Can I propagate roses from any bouquet?
Not all roses will root successfully. Look for hybrid tea, floribunda, or grandiflora roses—they’re the easiest to propagate. Avoid spray-painted or heavily treated roses, as preservatives can inhibit growth. Freshness matters too: use stems within 24–48 hours of cutting for the best results!
How long does it take for rose cuttings to root?
Patience is key! Most cuttings show roots in 3–6 weeks, but some may take up to 3 months. Keep them in bright, indirect light and change the water every 2–3 days. Once you see tiny white roots (or a slight resistance when tugging the stem), it’s time to transplant to soil!
Why are my rose cuttings rotting?
Overwatering or bacterial buildup are the usual culprits. Ensure only 1–2 inches of the stem are submerged in water, and use a fresh container for each cutting to prevent contamination. If you spot black, mushy stems, trim the affected area and switch to a new water source immediately.
Can I skip the water step and plant cuttings directly in soil?
Yes! This method (called "soil propagation") works well for hardy roses like climbing or shrub varieties. Dip the cut end in rooting hormone, plant in moist potting mix, and cover with a plastic bag to retain humidity. Keep soil consistently damp (not soggy) and place in bright, indirect light. Roots may take 4–8 weeks to form.
What’s the best temperature for rooting rose cuttings?
Aim for a cozy 65–75°F (18–24°C) range—this mimics spring-like conditions. Avoid drafts or direct heat (like radiators), as extremes can stress the cuttings. A sunny windowsill or a seedling heat mat (set to low) can help maintain ideal temps without overdoing it.
Wrapping up and next steps
Propagating roses from a bouquet is a rewarding way to turn a fleeting gift into a lasting garden treasure! With just a few simple steps—patience, water, and a little green thumb magic—you can grow new plants from cuttings.
Whether you’re a beginner or a seasoned gardener, this method proves that even the most delicate blooms can root and thrive.
Now that you’re armed with the know-how, take the next step: grab those stems, set up your propagation station, and watch your bouquet bloom into a bush! Happy growing—your future roses are waiting! 🌹✨