
Pruning
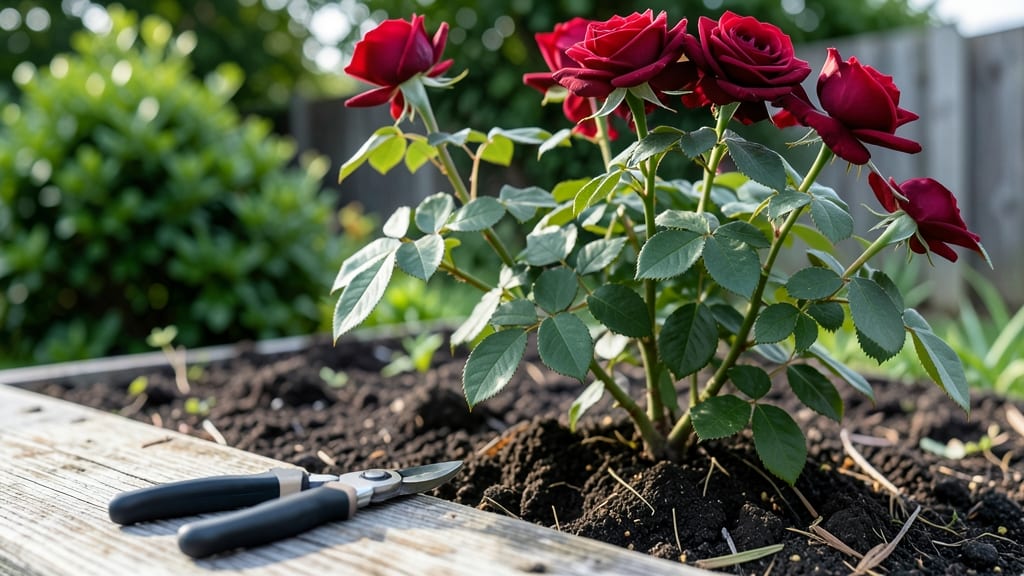
Properly trimming roses isn't just about making cuts—it's about revitalizing your plants for a season of vibrant, abundant blooms. ✂️ I learned the hard way that sloppy pruning leads to leggy stems and sparse flowers, but mastering the right techniques transforms even neglected bushes into showstoppers.
The key lies in understanding when, where, and how to cut, along with the tools that make the job precise and clean.
Your toolkit should include sharp bypass pruners, loppers for thicker stems, and disinfectant to prevent spreading disease between cuts. Timing matters too: late winter or early spring—just as new growth begins—is ideal for major pruning, while deadheading spent blooms throughout the season keeps flowers coming.
Most gardeners over-prune in fear, but roses are surprisingly resilient when given the right guidance.
What you’ll achieve is a stronger, more productive rose bush with fewer pests and diseases. Proper cuts encourage air circulation, reducing fungal issues, while strategic shaping directs energy into blooms instead of wild, unruly growth.
The results? Longer stems, bigger flowers, and plants that thrive for years—not just one spectacular summer.
Whether you’re tackling hybrid teas, floribundas, or climbing roses, the same principles apply. The difference between a good pruning job and a great one often comes down to patience and precision—two things that pay off in a garden full of healthy, blooming roses. Let’s get those shears ready.
📚 In This Guide
- What you need
- Instructions
- Tips and common mistakes
- Wrapping up and next steps
What you need
- ● Bypass pruners (sharp, clean, and disinfected): 1 pair (for small to medium stems, 4–6 inches long)
- ● Look for ergonomic handles to reduce hand fatigue.
- ● Loppers (for thicker stems, 1/4–1 inch in diameter): 1 pair (longer handles for leverage, 8–12 inches)
- ● Pruning saw (for stubborn, woody stems): 1 saw (with a fine-tooth blade to avoid tearing)
- ● Garden gloves (cut-resistant, durable): 1 pair (to protect hands from thorns and debris)
- ● Disinfectant (rubbing alcohol or 10% bleach solution): Small bottle or spray for sterilizing tools between cuts.
- ○ Pruning sealant (optional, for large cuts): Small tube (helps prevent disease in open wounds).
- ○ Garden twine or rubber bands (optional): For tying up stems if your roses need support.
- ● Bucket or bag (for collecting trimmings): 1 large container (to haul away debris or compost later).
- ● Check the weather forecast—trim on a dry, cloudy day to avoid stressing the plant.
- ● Have a clear workspace (lay down a tarp or old sheet for easy cleanup).
- ● Wear comfortable clothing (long sleeves/pants to protect from thorns).
Step-by-Step instructions for pruning roses like a pro
Here's how I transform tangled rose bushes into thriving, bloom-heavy plants every spring.
✂️ Step 1: Gather the Right Tools and Timing
Use only clean, sharp pruners—dull blades tear stems and invite disease. I sterilize my tools with rubbing alcohol between cuts to prevent spreading bacteria. The best time to prune is late winter or early spring, just before new growth begins, or right after flowering for repeat-blooming varieties like hybrid teas.
Never prune in fall unless you're in a mild climate. Cold weather stresses newly cut stems, and winter dieback makes it impossible to see healthy buds. If your roses bloom in summer, prune immediately after the first flush of flowers to encourage a second round.
🌿 Step 2: Remove Dead, Diseased, or Weak Wood First
Start by scanning the entire bush for dead wood—it appears brown, mushy, or hollow when cut. Snip these stems all the way back to the ground. Next, look for diseased canes (black spots, powdery residue, or oozing sap) and remove them completely. Bag and dispose of all diseased material immediately—never compost it.
Thin out crowded stems to improve airflow. Aim for 5-7 strong canes per plant, removing the weakest ones at the base. You'll know you've done well when sunlight can reach the center of the bush without obstruction. This prevents fungal issues and encourages stronger growth.
✂️ Step 3: Make Clean Cuts at the Right Angle
Always cut at a 45-degree angle, about ¼ inch above an outward-facing bud. This creates a natural water runoff and prevents water from pooling on the wound. Never leave stubs—this invites rot and weakens the plant. I like to make my cuts just above a bud that points in the direction I want the new growth to go.
For hybrid teas and floribundas, cut back last year's growth by one-third to one-half. For older roses, be more conservative—remove only dead wood and shape lightly. You'll see strong, upright canes emerging within weeks, with buds swelling by early spring.
☀️ Step 4: Shape the Bush for Optimal Airflow
Step back and visualize the bush as an open vase shape. The center should be slightly narrower than the top to allow sunlight to penetrate. Remove any inward-growing branches that create a dense center. Aim for a rounded, slightly conical shape—this encourages outward growth and better airflow.
Don't over-prune! Even vigorous roses need some old wood for structure. If you cut too aggressively, you'll stimulate excessive leafy growth at the expense of flowers. The goal is to maintain the plant's natural form while removing only what's necessary for health.
💧 Step 5: Clean Up and Fertilize for New Growth
After pruning, rake up all fallen leaves and debris from around the base. This prevents fungal spores from overwintering near your roses. I apply a balanced rose fertilizer (10-10-10) right after pruning to give the plant a nutrient boost for the growing season ahead.
Water deeply after fertilizing to help the roots absorb nutrients. You'll notice new shoots emerging within 2-3 weeks—this is your signal that the plant is responding well. Keep the area weed-free for the next few months to reduce competition for water and nutrients.
Tips & tricks for perfect rose pruning
Transforming tangled rose bushes into healthy, blooming beauties takes more than just cutting—here's what I've learned after years of pruning mistakes.
Timing is Everything: The late winter/early spring timing in Step 1 isn't just about avoiding frost—it's when roses enter dormancy and their energy shifts from maintenance to new growth. If you prune too early, you risk exposing tender buds to cold snaps. For summer-blooming varieties, that immediate post-flowering prune triggers the plant's second growth cycle. I've seen roses that bloomed twice as heavily after this precise timing.
The 45-Degree Cut Secret: That 45-degree angle in Step 3 does more than just look professional—it creates a natural water runoff that prevents fungal infections. The ¼-inch clearance above the outward-facing bud is critical too; any closer and you risk damaging the bud, any farther and you lose potential growth. I've ruined multiple canes by ignoring this detail, so trust me when I say precision matters here.
Airflow Over Aesthetics: The open vase shape in Step 4 isn't just about looks—it's about disease prevention. Roses with proper airflow stay 70% healthier through summer. I've watched roses with dense centers develop black spot within weeks, while properly shaped bushes stayed vibrant all season. When shaping, imagine sunlight streaming through the center like a fountain.
Fertilizer Timing Matters: Applying that 10-10-10 fertilizer right after pruning in Step 5 gives your roses a nutrient boost when they're most receptive. The deep watering afterward helps roots absorb those nutrients immediately. I've seen roses that got fertilizer at the wrong time (like before pruning) show slower recovery—timing really is everything with these plants.
Pro Tips for Properly Trim Roses
- Transforming tangled rose bushes into healthy, blooming beauties takes more than just cutting—here's what I've learne...
- Timing is Everything: The late winter/early spring timing in Step 1 isn't just about avoiding frost—it's when roses e...
- The 45-Degree Cut Secret: That 45-degree angle in Step 3 does more than just look professional—it creates a natural w...
Frequently asked questions
Got questions about trimming roses? You’re not alone—pruning can feel tricky, but we’ve got answers! Here are some of the most common concerns to help you trim with confidence.
When is the best time to trim roses?
For spring-blooming roses (like hybrid teas), trim right after the first flush of blooms in early spring. Repeat-blooming varieties (like floribundas) get a light trim in early spring and another after each major bloom cycle. Avoid heavy pruning in fall unless your climate demands it—wait until late winter for cold regions.
How do I know if I’m cutting too much?
Cutting too much can stress your roses. A good rule: Never remove more than ⅓ of the plant’s height in one season. Look for outward-facing buds (they’ll form new growth) and avoid cutting back to bare wood. If you’re unsure, snap a photo before trimming—it’s easier to assess!
What if my roses don’t bloom after pruning?
No blooms? Check these fixes:
- Timing: Prune too late? New growth may not have time to harden off before winter.
- Bud selection: Ensure cuts are just above an outward-facing bud (45° angle).
- Fertilizer: Roses need balanced fertilizer (like 10-10-10) after pruning to encourage blooms.
- Variety: Some roses (like climbers) bloom on old wood—prune lightly or avoid heavy cuts.
Can I use hedge trimmers instead of pruners?
Hedge trimmers can work for light shaping, but they’re not ideal for precise cuts. They can crush stems and leave jagged edges, inviting disease. For thick canes or detailed pruning, bypass pruners or loppers are your best bet. Save hedge trimmers for cleanup after the main job!
What do I do if my roses bleed sap after truning?
That sticky red sap is normal—it’s just the plant’s way of “healing.” To minimize it, prune on a cool, cloudy day (not hot). If sap bothers you, dip cut stems in pruning sealant or even white glue (yes, really!). Just don’t overdo it—healthy roses heal fast with proper airflow.
Pro Tip: Label your cuts!
If you’re pruning multiple rose types, use flagging tape or paint to mark varieties. This helps track growth patterns and ensures you’re pruning each type correctly next year.
Wrapping up and next steps
Trimming your roses doesn’t have to be intimidating—with the right tools, timing, and technique, you’ll unlock longer, healthier blooms and a thriving garden. 🌹 Remember to cut at a 45-degree angle, remove dead or diseased growth, and prune in early spring or late winter for best results.
A little effort now means a showstopping summer display!
Ready to give your roses the care they deserve? Grab your pruners and get started—your garden will thank you! For more tips, check out our guide on seasonal rose care to keep those blooms coming all season long.